December 2nd, 2013

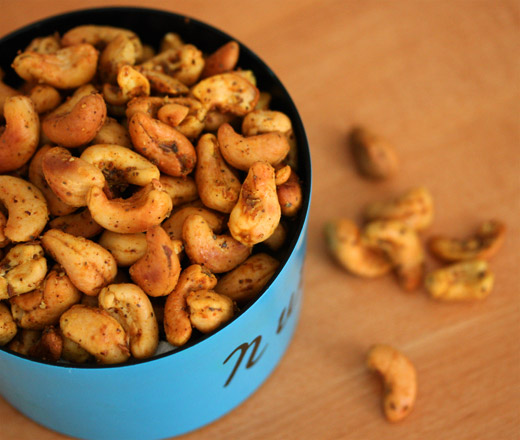
Cashews with Indian Spices

Did everyone have a nice Thanksgiving?

Lots of turkey? Made a dent in the leftovers yet?

That’s good.

At my Thanksgiving, I had these nuts.

Of course the usual suspects were eaten at the feast as well. But these cashews were a favorite part of hors d’oeuvres hour. (Which of course happened at 3:30 PM, because we ate LINNER or DUNCH at 5 PM. We are celebratory Americans!) And well, this just may be my new favorite nut recipe.

The reason that I’m sharing this recipe with all of you straight off of the first big holiday of the season, and not some clever recipe for what to do with leftovers, is does anyone really need another leftover recipe? With Thanksgiving happening so late this year, the holiday season is surging! You may be already searching for nibbles to serve at your next holiday meal. (Or these nuts would make a nice hostess gift.) Buttery pecans, candied walnuts, or mixed nuts, redolent with warm spices are all common occurrences during the holiday season, but these cashews are different. They are spicy not spiced– buttery, slightly piquant– and will leave you wanting more.

Originally, the recipe from David Tanis’s new book, calls for coriander seeds. I was out, but did have some black mustard seed, so I substituted, and the nuts worked out like a charm. I’ve actually made them a few times. First with blanched almonds, which was very good, but I actually preferred the cashews. (Apparently Tanis does too, because that’s what he calls for.) Although the recipe calls for some melted butter, that’s what adheres the spices to the nuts, the cashews have an additional, delicious buttery flavor to them all on their own. The cashews is also a slender enough nut to crisp beautifully in the oven.

So here you are, my new favorite nut recipe!

Cashews with Indian Spices
adapted from One Good Dish

1/2 teaspoon black mustard seed
1/2 teaspoon cumin seed
1/2 pound raw cashews
2 tablespoons melted unsalted butter
1/4 teaspoon cayenne pepper
1/4 teaspoon turmeric
sea salt

Preheat the oven to 400 degrees.

In a small, dry skillet over medium heat, toast the mustard seed and the cumin until fragrant and the mustard seeds begin to pop, about 1 minute. Coarsely grind the spices in a mortar and pestle.

Spread the cashews in a single layer in a baking pan. Roast for 7-10 minutes, or until light golden brown.

Drizzle the nuts with the melted butter, sprinkle with the toasted spices, cayenne, and turmeric. Generously season with salt, and serve warm or at room temperature. Nuts will keep in an airtight container for a few days. If you prefer them warm, they can be reheated in a low oven for a few moments before serving.

Pin It
November 11th, 2013

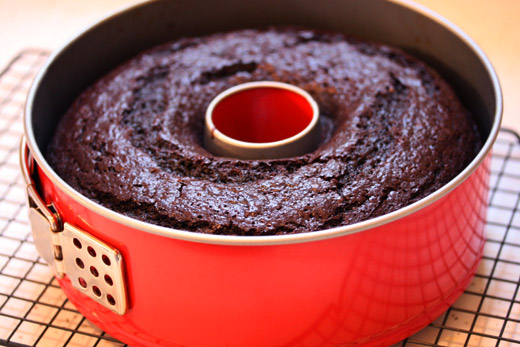
Chocolate Guinness Cake

I don’t care for beer. Really, I never have. This is not so much a problem now, but imagine being in college, and refusing that red Dixie cup full of suds at a backyard party. It just never seemed right to say, “I would really prefer a glass of wine.” So I took the cup and held on to it. And sipped. And it got warm. Which was part of the problem to begin with.

When I drink a beer now, it has to be REALLY cold, all of the time. If someone would invent a refrigerated glass– one that actually worked– maybe some of my issues with the beverage would be taken care of. My other issue with beer, is that it is too darn filling. If I drink a pint, I feel the need to run around the block, or do calisthenics.

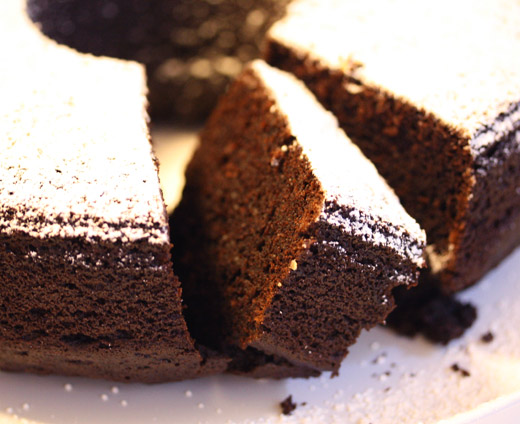
So, now that we have my issues with drinking beer out of the way, let’s talk about cooking or baking with the stuff. I have no problem doing that. Take for instance this Chocolate Guinness Cake– it was remarkable!

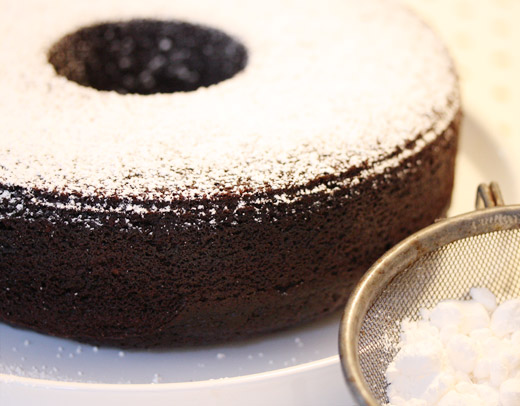
The recipe comes from Nigella Lawson. Dark, moist, simple to put together, but complex in taste, this cake is a winner. Ever the glutton, Ms. Lawson also recommends topping this cake with a frothy crown of icing. One is meant to frost just the top of the cake, making it resemble the foam on a pint of Guinness. This seemed a bit too cute for me, and frankly, the cake needs nothing more than a dusting of powdered sugar.

Although the recipe calls for a 9-inch springform pan, I opted to bake it in a shallow tube pan of sorts, which worked beautifully. This is a cake to be shared. As moist and rich as it is the day that you bake it, it falls a little flat in subsequent days. So grab a can of Guinness, and more than a few friends, and give this cake a try.

Chocolate Guinness Cake
from Nigella Lawson

1 cup Guinness
10 tablespoons unsalted butter
3/4 cup unsweetened cocoa powder
2 cups sugar
3/4 cup sour cream
2 eggs
1 tablespoon vanilla extract
2 cups flour
2 1/2 teaspoons baking soda
1/2 teaspoon kosher salt

Preheat the oven to 350 degrees. Butter or spray with cooking spray a 9-inch springform, or a tube pan. Set aside.

In a large saucepan, over medium heat, heat Guinness and butter together, until the butter is melted. Remove from the heat, add the cocoa and the sugar, whisking until fully incorporated.

In a medium sized bowl, combine the sour cream, eggs, and vanilla. Add this mixture to the Guinness mixture, whisking to blend. Add the flour, baking soda, and salt, whisking until smooth.

Pour into the prepared pan. Bake until firm and risen, about 45 minutes to 1 hour.

Place the pan on a cooling rack, and cool until just warm before removing the sides of the pan. Cool to room temperature before dusting with powdered sugar.

Pin It
October 21st, 2013

Pie in Connecticut

For all of those readers in the Connecticut area, I will be taking part in a fundraiser for Gateway Community College in New Haven. This ticketed event (don’t worry, there are still some left!) will be a lecture/demo all about everyone’s favorite fall dessert– PIE!

The event supports Gateway’s Culinary Arts program. Last year, I started working at Gateway, teaching a small-batch baking course. It’s a wonderful place to be, with so many students eager to learn; so I was thrilled to be a part of this fundraiser.

The event starts at 6 PM. I will be making a few pies from my book, and will be answering any questions about the pie-making process that audience members may have. All ticket-holders will go home with a signed copy of my book, and a pie baked for them especially by Gateway students. Oh! and of course there will be pie to samples throughout the course of the evening.

Come on down Wednesday evening to do one of my favorite things– talk pie!

Read more about the fundraiser here, and you can buys your tickets on-line here.

Pin It
October 1st, 2013

Cheese Blintzes

Let me tell you a little story. It’s about being dim (my being dim, of course).

I went to the cheese shop that I always go to. They have a really wonderful house-made ricotta there; it’s light, with just the right amount of salt, and tastes like cream. I was going to bake a ricotta pound cake, and needed 14 ounces of the stuff. I asked the cheese monger behind the counter for said amount, and he replied, “Oh, you’ll need quite a lot,” and handed me a three pound container. (Come to think of it, this story may be about two dim people.) I took the enormous vat, noting it was quite heavy, but not thinking too much about it until I got home. There I struck myself on the forehead; I had a massive brain fart. 14 ounces is just about a pound– that’s what I should have asked for! Now what was I going to do with all of this excess ricotta?

So at my house, September was the month of ricotta. We had a pound cake. I swirled it into some sauteed greens. Ricotta has been spread on baguette slices, then drizzled with honey. But the best recipe by far, has been cheese blintzes.

There are a lot of cheese blintz recipes out there. Some use cottage cheese, others farmers cheese; many contain cream cheese. But the recipe that I decided on– for obvious reasons– just uses ricotta cheese. My ricotta was fairly dry (I think that I would advise draining if your ricotta has an abundance of moisture), so I added an egg for binding, a bit of sugar, and the zest of a lemon. I had read somewhere that esteemed food writer, Mimi Sheraton (her German Cookbook was one of the first cookbooks that I ever received), always added a bit of wheat germ to her filling as well– so I did the same.

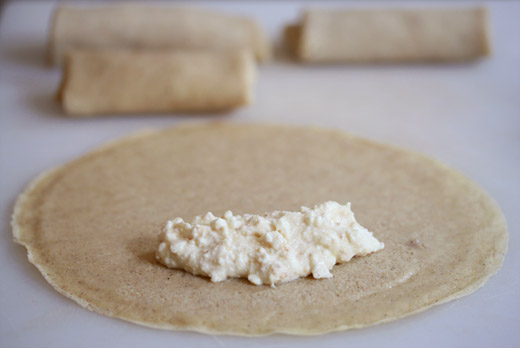
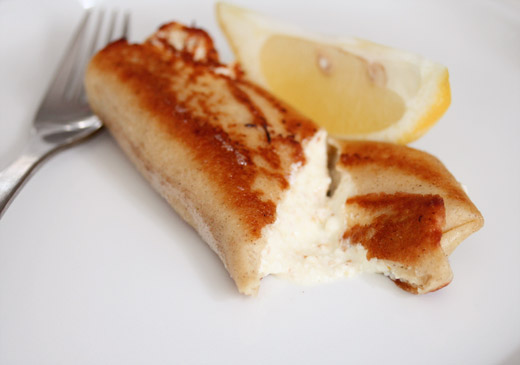
The crepes couldn’t be simpler. While cooked through, they are browned only on one side. The pale, golden brown color remains on the exterior of the blintz once its rolled. Although nontraditional, I substituted a bit of buckwheat flour in the batter. The nuttiness paired well with the wheat germ in the filling.

I know that making the crepes, filling them with the cheese, and then frying the blintz, may seem like a lot of work; but I split it into a couple of days. One day I made the crepes, separated each one with waxed paper, then stored them overnight in the fridge. The next morning I made the filling, and recruited my husband to aid in the rolling. Believe it or not, it went by quickly.

I fried some of the blintzes in a mixture of butter and a bit of oil, and then I froze the remainder. That way they will be ready to fry as needed. I guess I’ll have my own dimness to thank the next time that I’m eating a blintz!

Cheese Blintzes
Makes 12-14 blintzes

Crepes

1 cup water
3/4 cup milk (I used whole)
3 eggs
5 tablespoons (2 1/2 ounces) unsalted butter, melted
1 1/4 cup (6 1/4 ounces) all-purpose flour
1/4 cup (1 1/4 ounces) buckwheat flour
1 tablespoon sugar
1/4 teaspoon kosher salt

In a medium size bowl, whisk all of the ingredients together until smooth. Set aside for 1 hour, to relax gluten in the flours.

Heat a 9-inch, nonstick skillet over medium heat. Lightly grease the pan. Pour about 1/4 cup of batter into the middle of the pan. Swirl and tilt the pan, making sure the bottom of the pan is evenly coated with batter. Cook until the crepe is opaque, and set. Flip the crepe out of the pan, uncooked side down, place a sheet of wax paper over each crepe to cool. Crepes can be made one day prior, an kept, well-wrapped in the refrigerator.

Cheese Filling

1 pound ricotta cheese (drained if necessary)
1 egg
2 tablespoons wheat germ
1/4 cup (1 3/4 ounces) sugar
1 teaspoon vanilla extract
zest of 1 lemon
1/4 teaspoon kosher salt

Whisk ingredients together until well-combined

Assembling the blintzes:

Use about 3 tablespoons of filling per crepe. Place filling oneinch from the edge of the crepe. Spread the filling out some, fold over the crepe, and tuck the edges in towards the center. Loosely continue rolling, like a burrito, folding the free edge under the blintz. Continue with the remaining crepes.

Cooking:

In a medium size frying pan, heat oil, and butter, until foam subsides. You should have a thin coating of fat in the skillet. Place the blintzes, seam side down, in the skillet. Fry to a golden brown, then carefully flip and continue cooking on the other side.

Remove from skillet, and serve with wedges of lemon.

Pin It
September 17th, 2013

Black Bottom Cupcakes

My dad never liked his cupcakes to be frosted. This was enough to make my little, childhood head explode. How could he not like mounds of sweet, buttery topping? But my mom respected his preference. Whenever she would make cupcakes, she always left a few unfrosted for him. There they would sit– lonely, topless, dry– but sure enough, my dad would eat them. He might have even enjoyed them.

I wonder how he would have felt about these beauties.

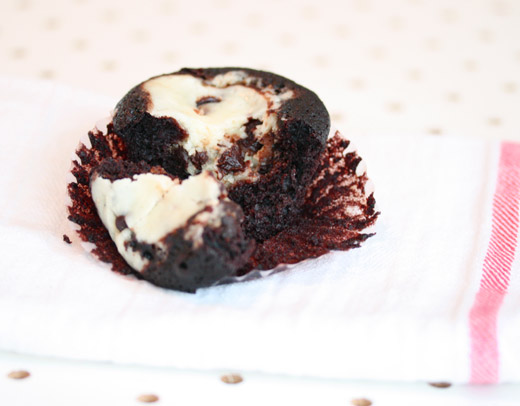
The black bottom cupcake, or as I like to call them– the unfrosted, but pretty darn delicious cupcakes– graced my dessert plate recently.

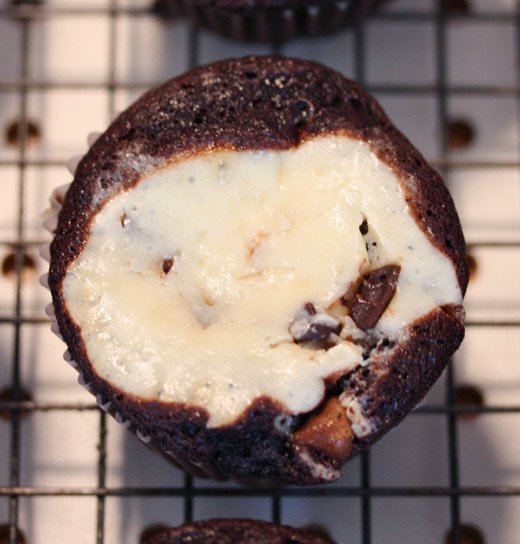
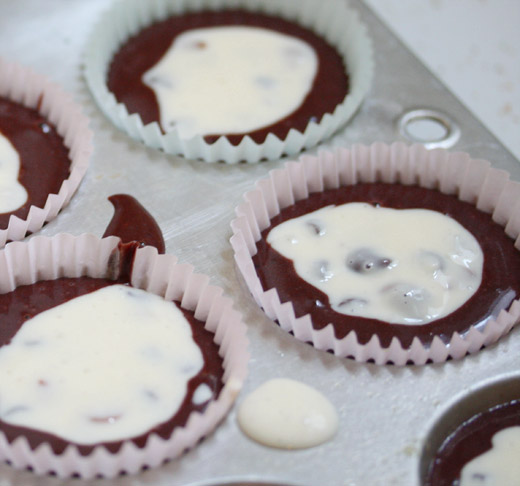
For those who aren’t familiar, the black bottom cupcake is an experiment in successful dualities. There is the moist, rich, chocolate cake– that gives these cakes their name, but then there is the smooth, gently sweet, cream cheese layer that is dolloped on the top. (I won’t say neatly, because from the picture above, you can tell that I am not always the neatest of bakers.) It’s like eating a cheesecake an a chocolate cake together in one bite. The two batters combine in the oven into one creamy and rich dessert.

There are a few baking morsels in the cream cheese batter too. As with many of my baking endeavors, this recipe came out of necessity. I had some cream cheese that needed to be used– but not enough for a cheesecake. And as I was perusing my baking shelf, I noticed lots of morsels– mini chocolate chips, bittersweet chunks, peanut butter chips– again, not enough to use on their own, but they would be combined into an “everything” baked good perfectly.

The morsels melted into the cake. The cream cheese filling puffed, and then sunk into the deep chocolate cakes. These cupcakes were just the right amount of decadent. Who knows, all those years ago, my dad might have been on to something.

Black Bottom Cupcakes
adapted from Taste of Home

makes about 18 cupcakes

Cream Cheese Custard:

1 package (8 ounces) light or regular cream cheese, softened
1/3 cup (2 1/3 ounces) sugar
1 egg
1/8 teaspoon kosher salt
1 cup (6 ounces) assorted baking morsels

Cupcakes:

1 cup (7 ounces) sugar
1 cup water
1/3 cup vegetable oil
1 egg
1 teaspoon vanilla extract
1 1/2 cups (7 1/2 ounces) flour
1/3 cup (1 ounces) unsweetened, baking cocoa
1 teaspoon baking soda
1/2 teaspoon kosher salt

Preheat the oven to 350 degrees. Line a standard muffin pan with paper liners, or grease and flour each cup. Set aside.

Make the cream cheese custard. In a small bowl, beat cream cheese, sugar, egg, and salt together until smooth. Set aside.

Make the cupcakes. In a large bowl, beat the sugar, water, oil, egg, vinegar, and salt together until smooth. In another bowl, whisk the flour, cocoa, baking soda, and salt together, until lump-free and well-blended. Gradually beat the dry ingredients into the wet ingredients until blended.

Fold the morsels into the cream cheese custard. Fill the muffin cups 2/3 of the way full with the chocolate cake batter. Drop one heaping tablespoon of cream cheese mixture into the center of the cupcake batter.

Bake for approximately 25 minutes. Cool in the pan for 10 minutes, then remove the cupcakes to a cooling rack to continue cooling.

Pin It
September 5th, 2013

Sloppy Joes

Well hello.

It’s been a very long time.

What was I doing?

Well, I was in California visiting family and friends for much of the month of July. And then there was this little matter to be taken care of. But as of September 1, it’s off my desk. (At least until edits come back; then bread and I will once again become very close.)

However, during my hiatus I did cook… and eat.

Call it regression, call it nostalgia, but I made sloppy joes this summer. And the recipe was good enough that I had to share. I hadn’t eaten a sloppy joe in years. Probably 20 or so. My grandma used to make them for lunch occasionally. (Yes, they were from a can– or at least the sauce was.) Needless to say, they were not a stellar representation. Sometimes we would get them at camp– the perfect entree for feeding hundreds of sweaty kids– slop in a bowl! So let’s just say, my memories of sloppy joe filling were not the greatest. But I had a feeling that there could be more to this sandwich than ground beef and sweet, red sauce.

I looked around the web a bit, and found that many recipes were just browned ground beef, and a bottle of barbeque sauce. That wasn’t what I remembered, or what I wanted. Some recipes were simply ketchup with a lot of brown sugar– too sweet. So I toyed with my own recipe.

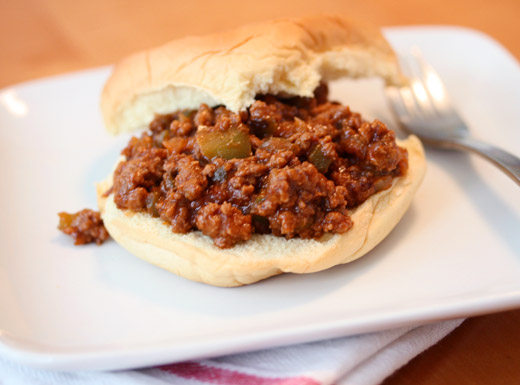
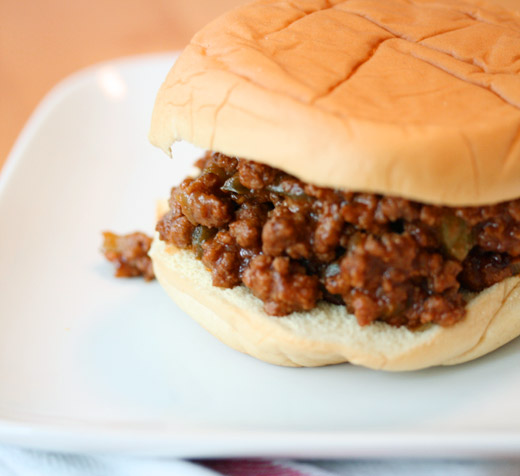
This filling is slightly sweet, a tad acidic, with just a hint of spice. And yes, it’s sloppy– but not excessively so. Served with an old-fashioned, spongy potato roll, these sloppy joes should have been the sandwich of my youth. Instead, they can be the sandwich of my 30s.

Sloppy Joes

Makes 4-6 sandwiches

1 tablespoon vegetable oil
1 yellow onion, diced
1 green pepper, diced
1 clove garlic, minced
1 pound lean ground beef
1/2 cup ketchup
2 tablespoons tomato paste
1 tablespoon Siracha, or other chili paste
1 tablespoon Worcestershire sauce
2 tablespoons Dijon mustard
2 tablespoons apple cider vinegar
1 tablespoon packed brown sugar
salt and pepper, to taste

potato rolls, for serving

In a large frying pan, over medium heat, heat the oil. Add the onion and green pepper, season with salt and pepper, and saute, until the onion is transparent, and the pepper softens. About 5 minutes. Add the garlic, and the ground beef, turn up the heat to medium-high, and cook, breaking up the beef into small pieces with a wooden spoon. Continue to saute until the beef is no longer pink. If you would like, the pan may be drained at this point, of any cooking liquid, but I didn’t have much liquid or grease.

Add the ketchup, tomato paste, Siracha, Worcestershire sauce, mustard, vinegar, and brown sugar. Stir well, add 1/4 cup of water, season with salt and pepper, and stir again. Bring the mixture to a simmer, reduce the heat to medium-low, and stirring frequently, cook for 20 minutes.

Taste for seasoning, and add additional salt and pepper, if needed. If you would like the mixture to be dryer, turn the heat up, and continue to cook for a few minutes more.

The rolls may be toasted for additional crispiness. Serve the sloppy joe filling while still warm.

Pin It
July 11th, 2013

Peach Galette

How is everyone’s summer going thus far?

I’m in California visiting family, but forgot to post this TV clip from Connecticut Style that I did before we left. I made a Peach Galette, aka, the lazyman’s pie. Galettes are a wonderful alternative when baking an entire, double-crusted pie is too much of an undertaking in the summer heat.

You can find the recipe here.

Pin It

This summer I have had malted milk on the brain!

For me, this meant malted milk balls, and malted milk powder, getting swirled together with vanilla ice cream to make a malty and delicious mess. The mess was then made into an ice cream cake. The beauty of this dessert, is you get to sit back, and accept all of the compliments for “baking” such a decadent treat.

The cake is more of an assemblage of ingredients, than an actual baking recipe. Although you will have to turn on your oven to bake the graham crust (my apologies to all those going through a heat wave!), it is only for a brief moment.

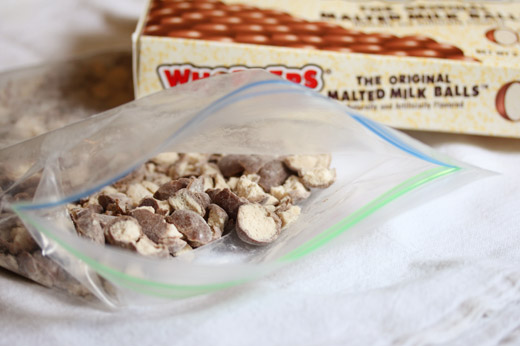
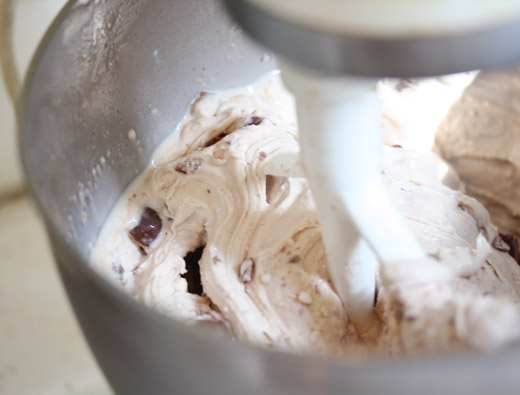
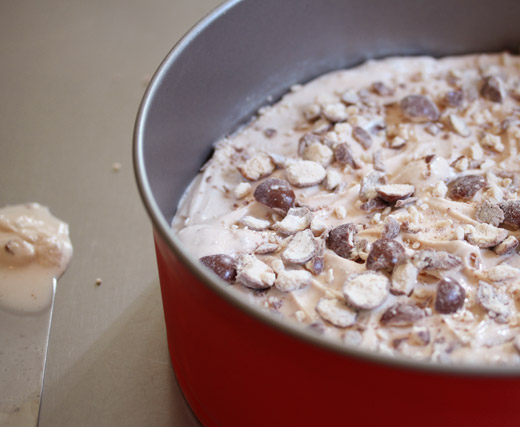
Crust made– you set to work on the ice cream filling. In this case I used a quart of and a half of vanilla bean ice cream. (Breyer’s containers come in exactly this measurement.) I mixed the ice cream in my stand mixer. This made the ice cream more malleable, and I didn’t have to wait for it to melt before it was easily spreadable. In the mixer I added 1/3 cup of malted milk powder, and crushed Whoppers, saving a portion to sprinkle on top of the cake. The malted milk powder adds a depth and unique sweetness.

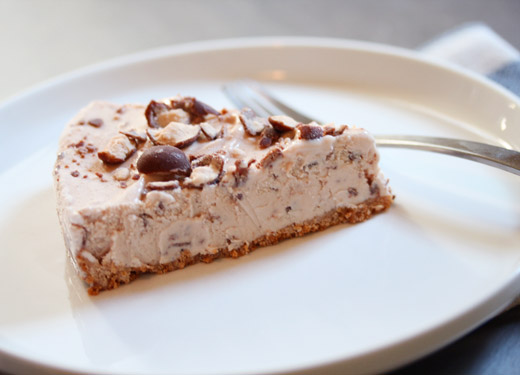
Spread into a springform pan, this dessert was fabulous– perfectly old school. I have never met a person who doesn’t love an ice cream cake. Everyone oohed and aahed then got to eating it quickly. As much as you love an ice cream cake, you hate a pool of ice cream cake pudding.

If you’re stumped about what to serve on the Fourth of July– make an ice cream cake.  You won’t be sorry that you did, and I bet our forefathers would love it too!

Malted Milk Ice Cream Cake

For the crust:

1 1/4 cups (5 ounces) graham cracker crumbs (approximately 1 sleeve of graham crackers)
2 tablespoons sugar
1/4 teaspoon kosher salt
5 tablespoons unsalted butter, melted

Preheat the oven to 350 degrees.

In a medium-size bowl, mix the graham cracker crumbs, sugar, and salt, together. Pour the butter in, and mix until the crumbs are well-moistened.

Empty the crumb mixture into a 9 inch springform pan. Using your hands, flatten crumbs evenly into the tin, working the crumbs up to create a quarter in border.

Bake for 8-10 minutes, or until crust is golden brown. Remove from oven, keep outside rim attached, and cool completely.

For the ice cream cake:

5 ounces Whoppers candies, crushed
1 1/2 quarts vanilla bean ice cream
1/3 cup malted milk powder

Reserve about 1/4 of crushed Whoppers for the top of the cake.

In the bowl of a stand mixer, blend ice cream, the rest of the Whoppers, and malted milk powder, until soft, and thoroughly blended.

With an off-set spatula, smooth the ice cream onto the cooled graham crust. Sprinkle the remainder of the Whoppers over the top of the cake. Freeze for at least 6 hours, or up to 1 day before serving.
When ready to serve, run a hot towel, around the outside of the pan, and release the sides. Cut into slices. A warm knife may also be used to get clean slices.

Pin It
June 26th, 2013

Everything Cookies

Something happened to the way that I cook when I moved to the East coast. I waste very little. It’s not that I was a spendthrift before– but I was guilty of throwing away sorry looking-vegetables in the bottom of the crisper, or leftovers that weren’t appealing to me anymore– they just got discarded. I know, I know, I’m not proud of my wasteful past.

Now however, it’s a different story. Maybe it’s that I find food costs to be higher on the East rather than the West coast, maybe it’s just that I’ve matured, maybe it’s that the more work I do on a professional level, has me not discarding a thing. Kale leaves are used in salad, while the stems are sauteed and served as a side dish. Tired looking fruit is simmered into compote and eaten with yogurt. And snack food– well that gets used too!

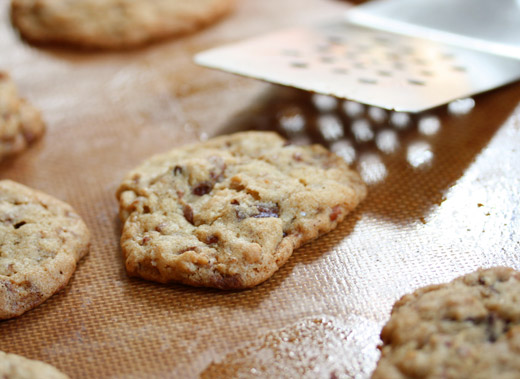
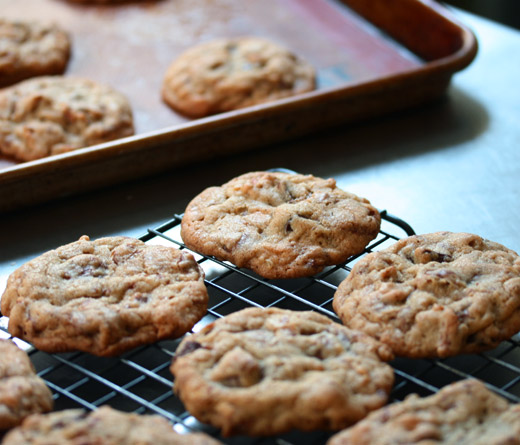
These Everything Cookies were inspired by a half-eaten bag of pretzels sticks. I am not the hugest pretzel fan, but had bought the bag to crush as breading for chicken cutlets. (Which is DELICIOUS, and should be made by those uninitiated!) So what do I make with the extra pretzels? Crush them too, and slip them into cookie batter.

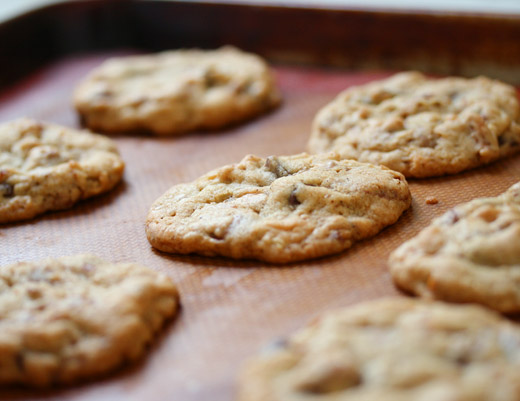
Now these cookies weren’t simply pretzel cookies. They had crushed Whoppers– or malted milk balls– in them. Then there were dark chocolate chunks. (I had a few ounces in my baking pantry.) Finally, there was a little bit of ground espresso. These were not a coffee flavored cookies, but it rounded the ingredients out, and gave the cookies depth.

The cookies had that salty-sweet flavor from the pretzels, a chewiness from the melted and subsequent congealing of the malt balls, all while resembling a favorite chocolate chunk cookie. With all of those ingredients, these cookies seemed pretty everything to me. I may just have to buy pretzels for the purpose of making these cookies again!

Everything Cookies

Makes 24 cookies

1/2 cup (4 ounces) unsalted butter, at room temperature
1/2 cup (3 ounces) light brown sugar, packed
1/3 cup (2 1/3 ounces) sugar
1 egg
1 teaspoon vanilla extract
1 1/4 cups (6 1/4 ounces) all-purpose flour
1/2 teaspoon baking soda
1/2 teaspoon kosher salt
1/2 cup (2 ounces) crushed pretzel sticks
2 packages (3 1/2 ounces) Whoppers, crushed
1/2 cup (3 ounces) dark chocolate chunks
1/2 teaspoon ground espresso

Preheat the oven to 350 degrees.

In the bowl of a stand mixer, fitted with the paddle attachment, cream the butter and both of the sugars, until light and fluffy, about 3 minutes. Beat in the egg and the vanilla until well-incorporated.

In another bowl, whisk the flour, baking soda, and salt together. Add the flour mixture, and beat on low speed until just combined. Using a spatula, fold in the pretzels, Whoppers, chocolate chunks, and espresso until well-combined.

Scoop the dough by heaping tablespoons onto a parchment-lined, or Silpat-lined baking sheet. The dough will fill two pans. Bake for 13-15 minutes, switching pans halfway through the baking process. Remove from the oven, allow to rest on the pan for 5 minutes, and then remove to a cooling rack.

Pin It
June 13th, 2013

Little Apricot Cakes

Hands down, apricots are my favorite stone fruit. Back in California, they were the first fruit to hit the market in late spring. I would buy them by the pound, keeping a bowl on the kitchen counter where I would eat them out of hand whenever I felt like snack. They were local, sweet, and delicious.

When we moved to the East Coast the local apricot became difficult to come to by. Those soft, little fruits did not seem to like the harsh winters and the often rainy springs of the East. While I do try to eat locally most of the time, it seems that certain tastes are here to stay– and I crave a fresh apricot in the late spring. So I buy them when I see them– no matter where they come from.

But the difficulty with imported apricots, is they are really not as flavorful as as an apricot fresh from the tree. This diminutive fruit is delicate! It does not develop the same nuanced taste plucked off of its tree, and transported hundreds of miles. It’s a shame. The good thing? Apricots bake remarkably well. The flavor get sweeter, and more intense. Any puckery taste is mellowed into a honeyed sweetness, and I am back to in love.

Now I might not keep a bowl of apricots on my kitchen counter, but I do bake with them each spring. I have a recipe for an apricot pie with candied ginger in my pie book, that is delicious (if I do say so myself!). Apricot clafoutis remains one of my favorite desserts. And when I saw the recipe for Little Apricot Cakes in the June issue of Bon Appetit, I knew it was something I had to try.

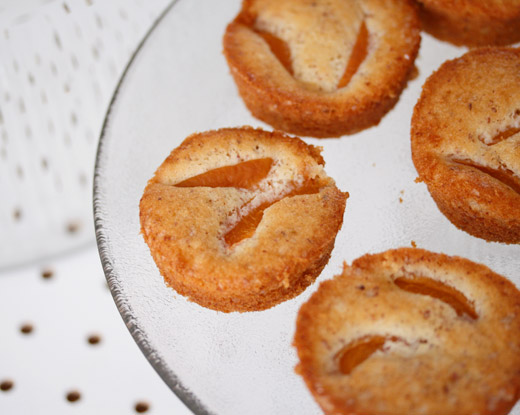
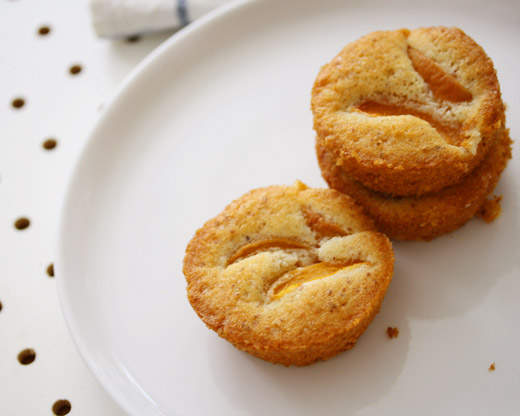
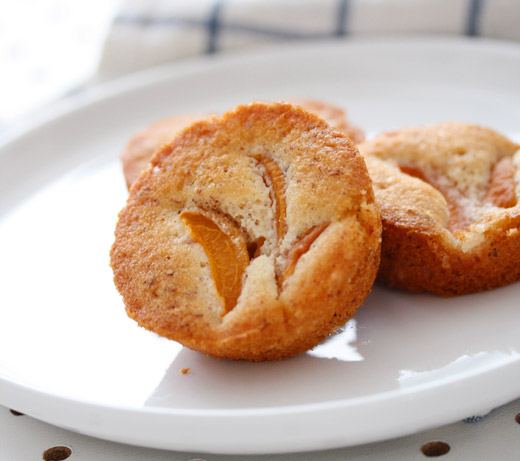
I adapted the recipe ever so slightly by substituting almond meal for part of the flour. This gave the cakes a rustic quality that I really liked. These cakes were the perfect tea cake– not to sweet, not frosted, self-contained– the perfect late afternoon snack. Come to think of it, I had them the following morning as a coffee cake of sorts, with a dollop of yogurt. They were a wonderful way to start the day as well.

Little Apricot Cakes
adapted slightly from Bon Appetit Magazine June ’13

3/4 cup all-purpose flour
1/4 cup almond meal
1 1/2 teaspoon baking powder
1/4 teaspoon kosher salt
6 tablespoon unsalted butter, at room temperature
1/3 cup sugar
1 egg
1 teaspoon lemon zest
1 teaspoon vanilla
1/3 cup whole milk
2 apricots, halved, pitted, cut into 1/4″ wedges
2 tablespoons sanding or turbinado sugar

Preheat oven to 350 degrees. Coat a standard, 12 cup muffin tin with nonstick spray. Set aside.

In a medium-size bowl, whisk flour, almond meal, baking powder and salt together.

Using an electric mixer, in a medium-size bowl, cream the butter and sugar together until light and fluffy. Add egg, lemon zest, and vanilla, and beat until combined.

With mixer on low speed add the dry ingredients in 3 additions, and the milk in 2 additions, beginning and ending with the dry ingredients. Divide the batter evenly into the 12 muffin cups. The cups will only be 1/3 full. Top with the apricot slices, and sprinkle with sugar.

Bake for 20-25 minutes, or until golden, and a tester comes out clean. Remove from the oven and cool for 5 minutes, before removing cakes from the pan. Continue to cool completely on a rack.

Pin It
© 2024 wordpress test site
all rights reserved