Flaky, buttery, short, and golden brown– pie dough can be the thing that turns a pie from simply a good dessert to truly a great masterpiece. But dough seem to be the most intimidating process for many home bakers. Whenever I teach a class, or give a demo, there are always a multitude of questions about the ingredients, the process, and hints for making that pile of flour into a delicious dough. Undoubtedly, there are more than a few home bakers that will raise their hands, and timidly state, “I have made a pie before, but I just buy the pre-rolled, frozen crusts. Dough scares me.” I understand, but that’s such a shame. If you’ve gone through the trouble of making a filling, don’t you want to make the dough as well?
So I knew that I wanted to pay special care to the chapter on pie dough when I wrote my book. Dough does not have to be scary; the rolling pin is your friend. With a bit of practice, just a bit, you will be rolling out pie dough like a pro. I swear. While I can’t leap out of the computer screen, and climb into each and every one of your kitchens, I’ve decided to give pictorial example of each step, along with some helpful hints. (That’s the next best thing, right?) The recipe I tell my beginning students to start with is my recipe for Standard Pie Dough. I’ve used it elsewhere on this site, but the recipe is at the bottom of this post as well.
Let’s begin, shall we?
The first thing to do is aerate your dry ingredients (flour, sugar, and salt), with either a whisk, or you could sift them all together. You want your dough flaky and light, and one way to ensure this is to mix them well, and to incorporate air.
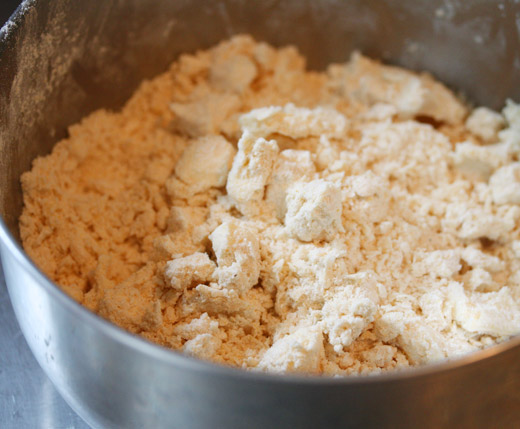
Next you incorporate fats, in this case shortening and butter. I know that some cooks would never use anything as pedestrian as vegetable shortening. Well, in this case, I do– butter for flavor, and shortening to ensure flakiness in the finished product. For beginning bakers, I find cold shortening more pliable, more lenient, and a bit easier to work with than all butter. The fat is cut into 1/2 inch chunks, and tossed in the dry ingredients. Then you want to work the fat into the flour mixture, always with your hands. Some cooks swear by a mixer, or food processor; I swear by your hands. In the finished crust, melted fat is what creates the flakes. You want some disparity in the size of fat pockets in the dough. That is most easily achieved by blending the fats with your hands. A machine works too quickly; it is too mechanized. You want an end result where the mixture that looks nubby, like gravel.
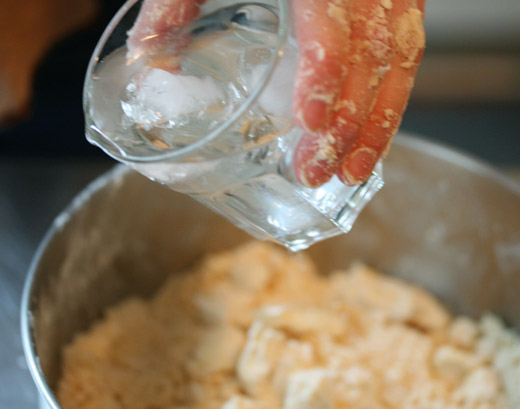
Next you add the ice water. If I haven’t said this enough, everything must be cold. This step is one of the most frustrating for beginners, because rarely will the amount of water added be the same. The ratio changes due to external temperature, humidity, the size of the fat chunks that were added, etc. It’s usually between 6-10 tablespoons though, and not less than than 3. Water should be added a little at time. You don’t have to be gentle. In fact, you want to be working as quickly possible, handling the dough very little at this point. You don’t want to knead the dough, as much as pat it into a mass. Still with me?
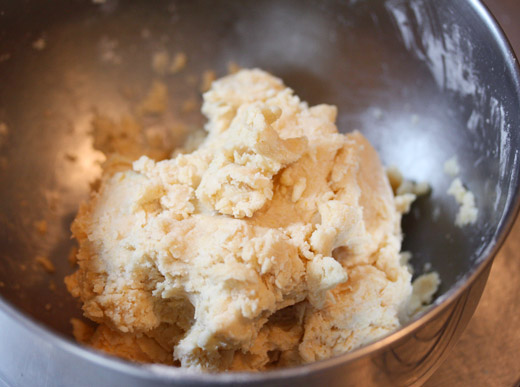
How do you know when you’ve added enough water? See how the dough is cleaning the sides of the bowl. See how it now is more of a mass, than just a bowl of ingredients. Those are good signs. The dough should not be as sticky. Maybe you heard a little squish sound as you were bringing the dough together. Those are all good signs. I have found that it’s better to add a bit too much water than too little when making dough. Having a dough that’s too dry will be difficult to roll out, it will tear and be sticky. When a dough is wet, you will only need to make sure your rolling surface is well-floured.
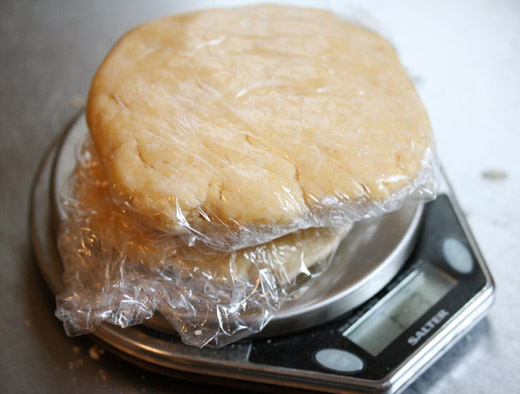
Last step is to separate into rounds, press the dough together, and wrap in plastic. Then you need to let rest in the fridge. This is an important step. You’ve played with the dough for awhile; it’s important to let the gluten in the flour relax before rolling it out. This will also contribute to a short and flaky dough. The dough needs to rest for a minimum of 1 hour, but will last in the fridge for 2 days. It can also be frozen for up to one month. Just defrost it in the fridge before use.
Got it? Get baking!
Standard Pie Dough
from United States of Pie
2 cups all purpose flour
2 tablespoons sugar
1 teaspoon Kosher salt
6 tablespoons unsalted butter, chilled and cut into ½ inch cubes
6 tablespoons vegetable shortening, chilled and cut into ½ inch cubes
6-10 tablespoons ice water
Makes enough for one 9-inch double-crusted pie, or two 9-inch pie shells.
In a large bowl whisk together the flour, sugar, and salt until well blended and free of lumps. Add the butter and the shortening to the flour mixture and toss gently to coat. With your fingertips, blend until the mixture resembles a coarse meal. Work the fats into the flour, rubbing the larger pieces of butter and shortening between your fingers until the mixture resembles gravel.
Sprinkle on the water, one tablespoon at a time, starting with 3 tablespoons, then gradually adding more water if needed. Blend with your fingertips, as little as possible, pulling the meal together and creating a dough. The dough will become less sticky, and more of a mass when enough water has been added. Finally, knead minimally in the bowl to make sure the dough has just enough moisture.
Separate the dough in half. (One mound of dough should weigh approximately 10½ ounces.) Place each half on a sheet of plastic wrap and seal. Gently form into a disk, roughly ¾ inch tall. Place the wrapped dough in the refrigerator for at least one hour or up to two days before rolling out. Dough can be frozen for up to 1 month, and defrosted in the refrigerator before using.


Really useful post, thank you! I am one of those people who never make pie dough but I will try some time, using these instructions!