Where did spring go? In New England we seemed to jump right into summer.
I’ve been doing all of my baking for the bread book in the mornings, before the heat and the humidity really set in. And after a morning covered in dough, with flour crusted along my hair line from pushing errant locks out of my face, the only thing that I really like “cooking” for dinner is salad. (Although I should be honest, salads are pretty much all I want to eat from June through August, book or no book!)
Last week, I made a jar of Caesar dressing, which I loved. I hadn’t had a Caesar salad in quite awhile. Since the days when it seemed that every restaurant had a soggy salad topped with grilled chicken on the menu, but now, everything old is new again.
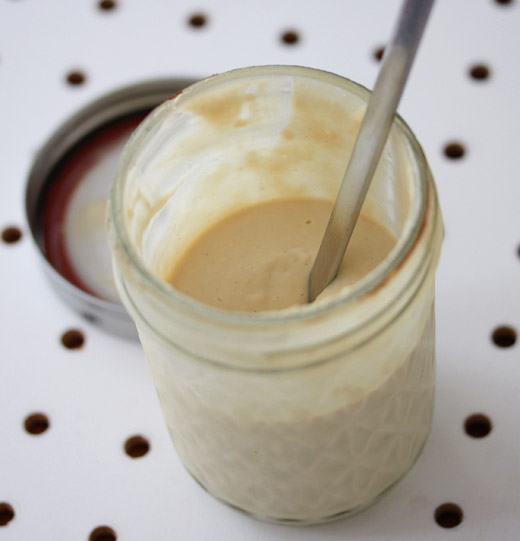
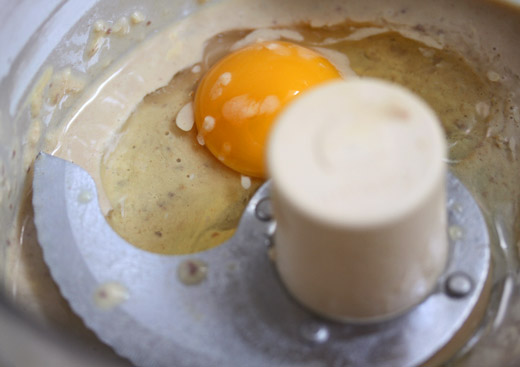 This Caesar was made in the food processor, so it comes together quickly. The dressing was garlicky, briny, thick, and smooth. And because of its pungent flavor, you could be judicious with the application. One recipe actually made quite a few salads.
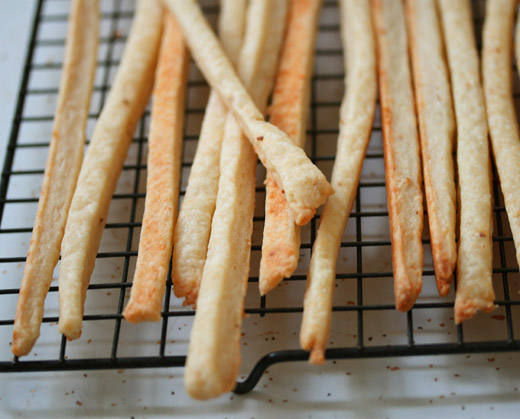
I made it with the traditional romaine one night, with gem lettuces the next, and my favorite, torn bits of hardy, curly kale. (I think that kale salad will be to the 2010s what Chinese chicken salad was to the 80s, and traditional Caesar was to the 90s. Don’t you?) Each salad was tossed with rustic croutons, for extra crunch and interest, and because I love a crouton.
Maybe this summer will be the season of Caesar for me. Only time, and heat will tell. Here’s the recipe, so you can make a jar too.
Caesar Dressing
adapted from A Girl and Her Pig
7 anchovies
2 peeled cloves of garlic
3 tablespoons Dijon mustard
1/4 cup white wine vinegar
1/2 lemon, squeezed
1 large egg
1/2 cup olive oil
1/2 cup vegetable or canola oil
1 ounce Parmesan cheese, finely grated
Salt and pepper, to taste
Pulse the anchovies and the garlic in a food processor to form a rough paste. Add the mustard, vinegar, lemon, and egg, and process until smooth and creamy.
With the processor on, gradually drizzle in the oils, creating an emulsion. Mix in the Parmesan cheese, taste for seasoning, put in a jar or bowl for storage in the refrigerator. The dressing will thicken as it refrigerates. It will keep for about 1 week.
As I was putting together the pictures for this post, I was amazed to see just how many times rhubarb has made an appearance on this site. You might even think that is the only fruit/vegetable I cook with.
There was this galette. And let’s not forget this one from years ago. (Apparently I loved Photoshop back in 2005.)
Then there’s cobbler, and pie, and of course, cake. And most recently, this cake. That’s a lot of rhubarb for one little site!
So what more can I say about this vegetable cum fruit?
Let’s see…
It’s good. In season, I cook with it often. And to get a little bossy– I think you should too. So here is yet another recipe that uses the humble produce.
On Sunday mornings I usually cook or bake something substantial and/or brunchy. Then my husband and I languish over the paper, poke around Interweb, or watch the Sunday morning news programs. I know– very exciting! Don’t you want to come over on Sunday mornings now? Well these muffins were on menu last week.
Earlier in the week I had made some apple-rhubarb sauce to have with yogurt, or simply on its own. I cut up stalks of rhubarb, and simmered them with one, peeled and cored Fuji apple that had I cut into chunks. I sweetened the fruit with a bit of honey to taste, and let the batch cook until the fruit and vegetable had fallen apart, and melded together.
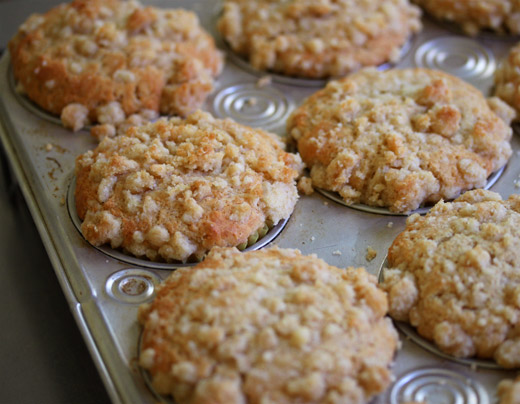
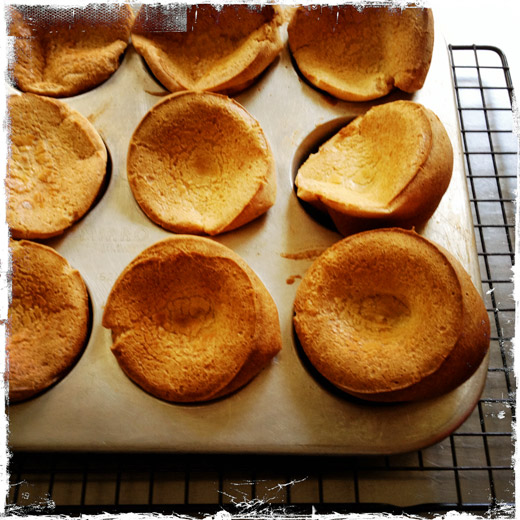
I had a bit of sauce left over on Sunday morning, so I spooned it in the center of these muffins before baking. The muffins are a great go-to recipe. They are easily adaptable. Fill the muffins with jam, or plain applesauce. They make great blueberry muffins. Or you could even enjoy them plain.
But if you’re like me, and are making an entire food blog about rhubarb alone, make the apple-rhubarb sauce, and enjoy the sweet-tart combination.
Apple-Rhubarb Muffins
Makes 12 muffins
For the batter:
1 1/2 cups (7 1/2 ounces) all-purpose flour
1/2 cup (2 1/2 ounces) whole wheat flour
2 1/2 teaspoons baking powder
1/2 teaspoon kosher salt
1/4 teaspoon nutmeg
1 egg
6 tablespoons (3 ounces) unsalted butter, melted
1 1/3 cup whole milk
approximately 6-8 tablespoons apple-rhubarb sauce
For the crumb topping:
3 tablespoons sugar
3 tablespoons brown sugar
1/4 teaspoon kosher salt
1/2 cup (2 1/2 ounces) all-purpose flour
4 tablespoons unsalted butter, melted
Preheat the oven to 375 degrees. Line a 12 cup, standard muffin tin with paper liners. Set aside.
Make the topping:
Whisk the dry ingredients together. Pour the melted butter over the dry ingredients and stir well. The mixture will clump. Continue to mix, breaking up any larger clumps, then set aside.
Make the batter:
In a large mixing bowl, whisk the flour, baking powder, salt, and nutmeg together to combine. In a medium-size mixing bowl whisk the egg, milk, butter, and vanilla together until well-integrated. Make a well in the dry ingredients, and all at once, add the wet ingredients. Stir just until combined.
Spoon the batter into the muffin cups, about 1/3 of the way up. Spoon in the apple-rhubarb sauce, about 1/2 tablespoon per cup, onto the batter. Next, spoon some more batter on top, covering the sauce. The muffin cups should be filled about 3/4 of the way up.
Sprinkle the crumb topping on to each muffin cup, then bake for 20-25 minutes. Muffins should be golden brown, and spring back when touched. Remove from the oven and allow to cool for about 10 minutes before serving.
Back in California, what seems like eons ago, I used to do some catering. It’s not something that I do an awful lot of in my new life as a cookbook writer, but I would. And well, this past weekend, I did. There was a couple in my neighborhood getting married. They shunned the usual, multi-tiered wedding cake. They had decided that at their wedding they wanted a dessert that they loved. They wanted pie.
I could get behind that.
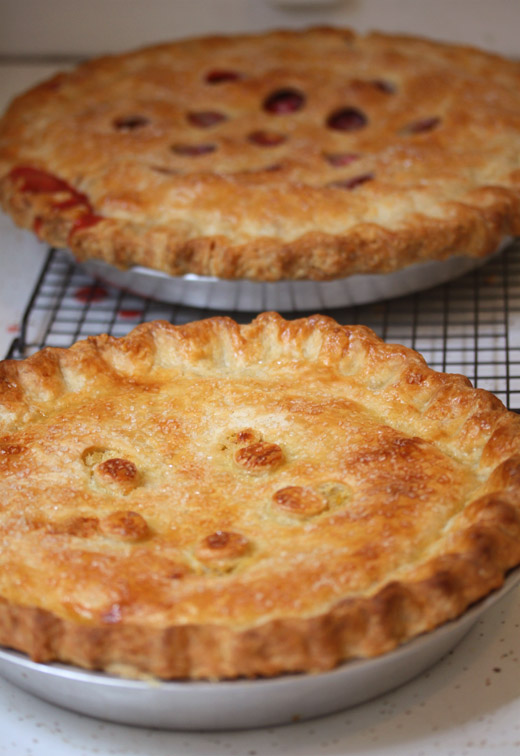
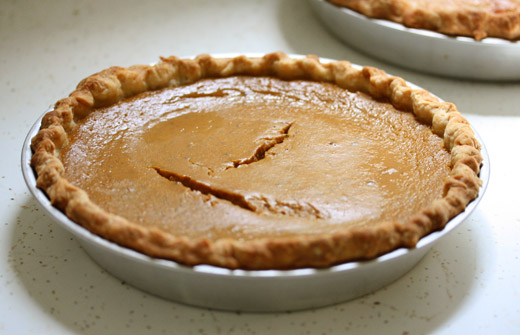
The couple provided a three-tiered cake/pie stand of varying sizes, and I provided the pies for each tier. These two were very easy-going, requesting only one flavor be included– pumpkin– the bride’s favorite, and the rest was up to me.
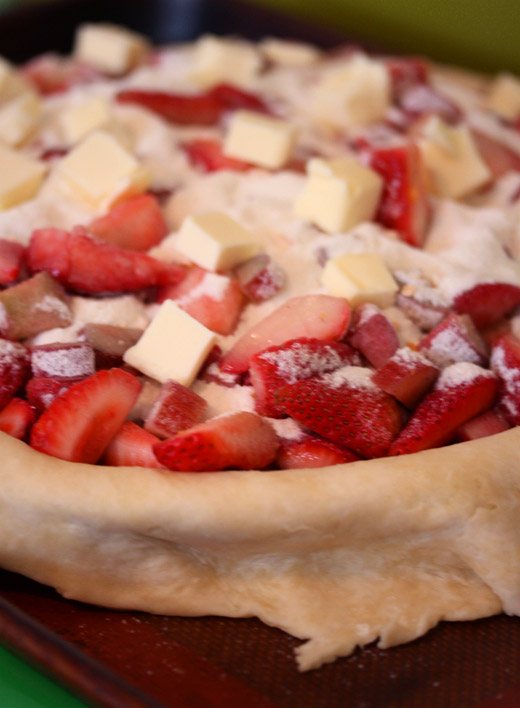
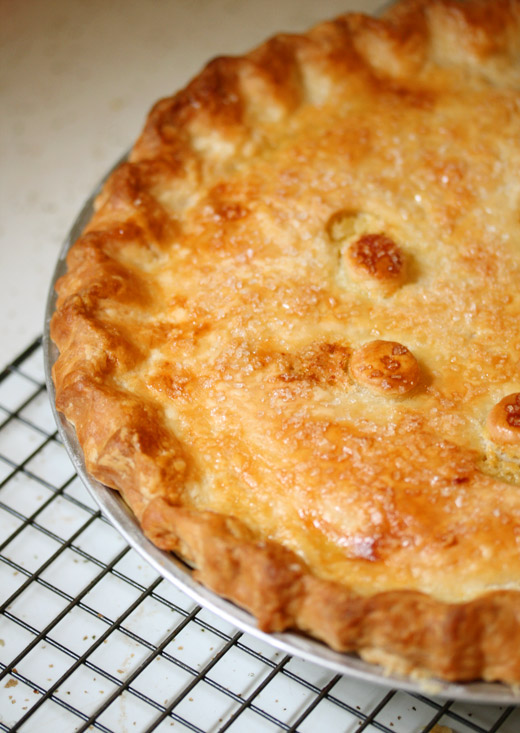
After much deliberation, I decide that the bottom tier would be the classic springtime treat of strawberry -rhubarb. This pie was enormous! Measuring 12 inches at the base of the pie plate, the pie barely wedged in the stand.
The center tier was Shaker Lemon. An unearthed classic from my pie book, this pie is made by macerating entire lemons– skin, pith, and all– sliced paper thin, then left to mingle with sugar overnight. This filling is blended with a simple custard, and baked to a sunny, pungent confection. It’s one of my favorites; hopefully the wedding party enjoyed it too.
The baking was going off without a hitch. As I pulled the pumpkin, my final pie from the oven, it was beautiful, puffed and smooth. When I set the pie on the cooling rack, I breathed a sigh of relief, and left the kitchen. But the sigh of relief came too soon. When I passed the pie ten minutes later, it had developed a huge crack. I couldn’t have a fissure swallow up the bride and groom cake topper!
Remembering that whipped cream hides a multitude of sins, I quickly whipped some billows, and stabilized it with a bit of gelatin, for longevity. Later, I mounded a dollop on the center, and plopped the diminutive bride and groom on top. Actually, I think it looked more festive with the inclusion of whipped cream.
My kitchen smelled fabulous the rest weekend, like butter, and fruit, and spices. And I hope the couple enjoyed their pies.
I’ve been baking a lot lately. A lot of bread. As summer quickly approaches I am furiously trying to finish up all of my recipe testing for the cookbook. I know that come July, when the heat and humidity set in, the last thing I will want to be doing is standing in my kitchen amongst cup of flour.
Ages ago, when I started this blog, I was not a baker. I have always loved baked goods, but baking was not my domain. It was too finicky, too time consuming. I never would have dreamt that I would become a baking instructor, and now am working on my second baking cookbook. But I have come to love the exactitude and the purposeful nature of baking. And I love the final product!
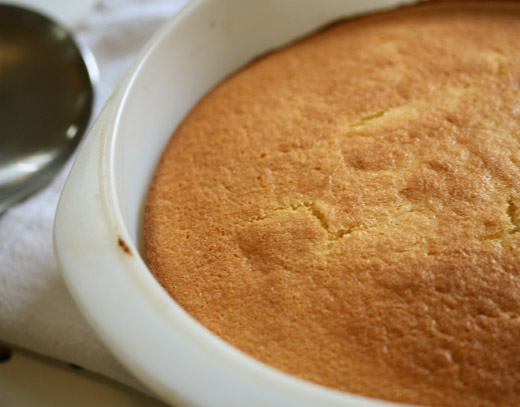 However, there are instances when I don’t have the time to contribute to making a baked good. Yet, I’m looking for something quick, warming, and deliciously homemade, to satisfy my sweet tooth. And this Lemon Pudding Cake fits the bill. It is not too sweet. It is neither frosted or glazed. It does not scream– I am dessert! It is humble. And aren’t there times when that is all you want?
This is an old recipe. In fact, I have a recipe for a Lemon Pie-Cake that is quite similar to this, in my first cookbook. So, it’s an oldie, but a goodie.
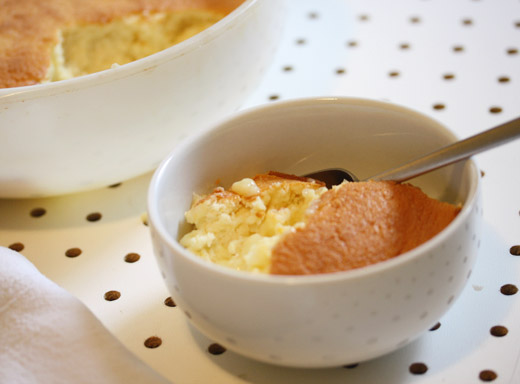 This is one of those amazing desserts, that completes more than one task while it’s in the oven. It creates a moist spongecake on the top, while hiding a luscious lemon curd beneath. Chances are, you have all of the ingredients to make this “cake” already in your kitchen. Which is a good thing, because I have a feeling you’ll be making it frequently… and often.
Lemon Pudding Cake
from Gourmet Magazine
2 large lemons
1/4 cup all-purpose flour
Rounded 1/4 teaspoon kosher salt
3/4 cup plus 2 tablespoons sugar
3 large eggs, separated
1 1/3 cups whole milk
Preheat the oven to 350 degrees. Butter a 1 1/2 quart baking dish, or other shallow baking dish. Set aside.
In a large bowl, whisk together, flour, salt, and 1/2 cup plus 2 tablespoons sugar. In a separate bowl, whisk egg yolks, milk, zest and juice together until blended. Add wet ingredients to dry ingredients, whisking just until combined.
In another bowl, with an electric mixer, beat egg whites until they hold soft peaks. Gradually, beat in remaining 1/4 cup of sugar until whites hold stiff peaks. To lighten, whisk about a quarter of the whites into the yolk batter. Then fold the remainder of the whites gently but thoroughly into the batter.
Pour into the prepared baking dish. Place in a hot water bath, and bake 45-50 minutes, or until golden brown and puffed. Transfer to a cooling rack. Serve warm, or at room temperature.
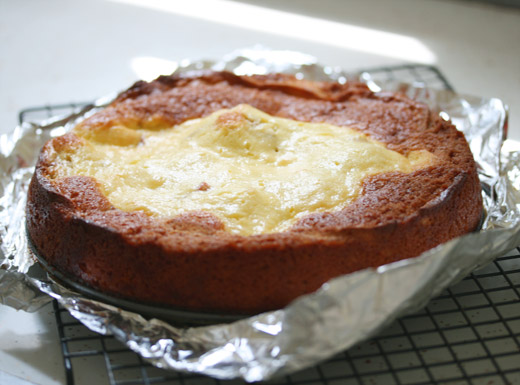
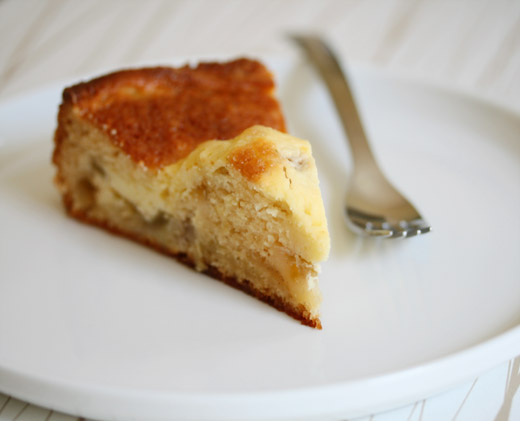
I like cheesecake; but I don’t love cheesecake. So why am I presenting you with a cheesecake recipe, and imploring you all to make it? Because I guess it would be more fitting if this cake were called a cheese cake– a cake with some cheese in it.
This recipe is one that displays the wonderful alchemy that is baking. There is no crust to speak of, but once baked, the simple cake batter seeps up around the sides of the cake, creating a crust that is chewy and containing for the rest of the goodies in this cake. And what are the rest of the goodies? Rhubarb, of course!
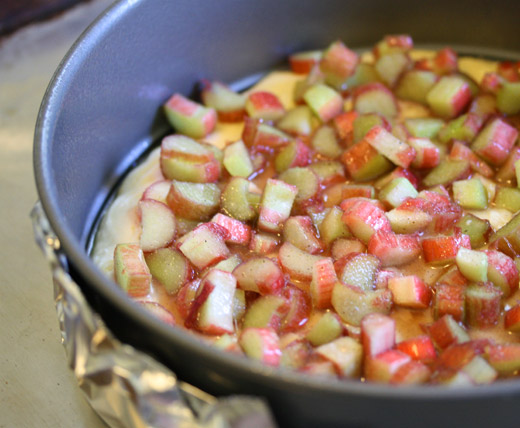
When I originally found this recipe it called for blueberries– a solid fruit choice. But rhubarb has just hit the markets out here, and blueberries, well they’re still on some truck from California or Florida. And besides, I am one of those people who loves rhubarb. I sliced the thin stalks, tossed them in sugar and a bit of cardamom, and then proceeded with the recipe.
The rest of the assemblage is very straightforward, though two bowls (ok, three if you count a bowl for the rhubarb) are needed. You have a stiffer cake batter spread in the bottom of a springform pan, you sprinkle on the sweetened rhubarb, and then you pour a more-liquid, ricotta custard on the top. One hour later, and presto-chango you have a lovely, springtime dessert.
This cake is not too sweet, and has the subtle bite of the rhubarb. I served it with slightly sweetened creme fraiche-whipped cream.
Rhubarb Ricotta Cake
adapted from King Arthur Flour
For the rhubarb:
1 1/2 cups (about 4 stalks) rhubarb, cut into 1/4 inch pieces
1/3 cup (2 1/4 ounces) sugar
1/4 teaspoon ground cardamom
pinch of salt
For the batter:
1 cup (5 ounces) all-purpose flour
3/4 cup (5 1/4 ounces) sugar
1 1/4 teaspoons baking powder
1/2 teaspoon kosher salt
1/3 cup milk
4 tablespoons unsalted butter, at room temperature
1 egg
1 teaspoon vanilla extract
For the ricotta custard:
2 eggs
1 1/4 cups (10 ounces) whole milk ricotta cheese
1/3 cup (2 1/4 ounces) sugar
1/2 teaspoon vanilla extract
Preheat the oven to 350 degrees. Grease, or coat with cooking spray, an 8 or 9 inch springform pan.
In a small bowl toss the rhubarb with the sugar, cardamom, and salt. Set aside.
In a medium-sized bowl, whisk the flour, sugar, baking powder, and salt. Add the milk, butter, egg, and vanilla, and beat until smooth. Pour the batter into the prepared springform pan. Spread to the edges of the pan, the batter will just cover the bottom. Sprinkle on the rhubarb evenly, pouring on any juices that have collected as well. Set aside.
In another medium-size bowl make the custard. Beat the eggs until frothy. Add the cheese, sugar, and vanilla, beating until blended. Pour the custard onto the cake.
Bake for 55 to 60 minutes. Cake will be golden brown around the edges, and firm to the touch. Remove from the oven, cool for 15 minutes, then remove the outer ring of the pan. Cake can be served slightly warm, or at room temperature.
I love a slaw. Not the traditional coleslaw, laden with weepy, white cream-based dressings, but a slaw nouveau is what I’m talking about. A bit of cabbage, some acid– be it astringent vinegar, or tangy citrus juice, you can’t forget the olive oil, and some other stuff: nuts, herbs, thinly sliced onion, other vegetables, fruit even– you name it, I’ve probably thrown it in a salad bowl.
What is so satisfying about a slaw is that they’re sort of seasonless. In the winter, when I tire of roasting my vegetables, when I want a vegetable to make some noise, have a crunch, I can always get a head of cabbage, slice it thinly, make a slaw, and chew ’til my heart’s content. In the summer, when I’m wilting from heat exhaustion, and can’t imagine turning on the stove, I turn once more to the lowly head of cabbage, and slice up a little sustenance. Whether they’re cellared, or fresh from the earth, cabbage, be it green, red, Napa, or Savoy is always there for me.
So when I saw this recipe for Fergus Henderson’s Red Salad, on Food52, I felt as if I had found a kindred spirit in Mr. Henderson. His recipe was simple, and it captured the ease of making a slaw. So he calls it a salad rather than a slaw, potato, po-tah-to? There were no real measurements, no persnickety directions– just delicious food.
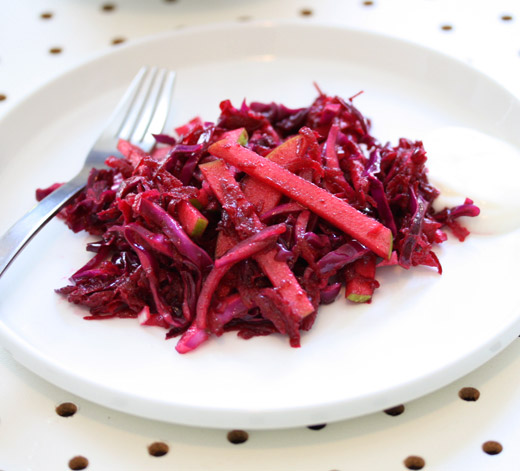
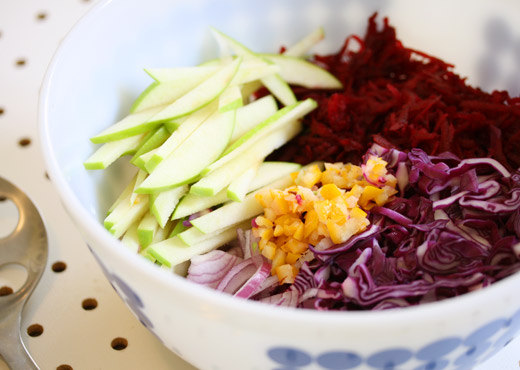
The salad is red for two reasons: raw, grated beets and red cabbage. It’s a bit of mess grating the beets, but it’s only for a moment– and well, wear an apron– problem solved. The beets bleed, making the rest of the contents of the bowl a bright, sanguine color, so you’re not really sure what you’re eating, you just know that it’s very good.
I did change the recipe a bit. I added some green apple; sliced into matchsticks, this added a sweetness and an additional crunch. I also substituted the capers for some preserved lemon. I had them in the fridge, and I love the salty acidity. I served the slaw with some plain yogurt rather than the suggested creme fraiche. It mingled with the slaw, and was a bright, pleasing pink. I loved this slaw; it will definitely go in my repertoire. Hopefully you’ll love it too.
Crunch, crunch.
Red Salad
adapted from Beyond Nose to Tail by Fergus Henderson
For the salad:
2 medium beets, raw, peeled and grated
1/4 head of red cabbage, thinly sliced
1/2 a red onion, thinly sliced
1/2 a green apple, cored, and sliced into matchsticks
1-2 tablespoons preserved lemon, minced
For the dressing:
a glug of olive oil
balsamic vinegar, to taste
salt and pepper, to taste
Lightly toss all of the salad ingredients together. Add the oil and vinegar, and the salt and pepper. Toss again. The salad should become glossy, and will get more red as it is mixed. You want the dressed salad to be slightly acidic, but well balanced. Adjust the seasoning, according to taste. Slaw can be eaten right away, with a dollop of yogurt.
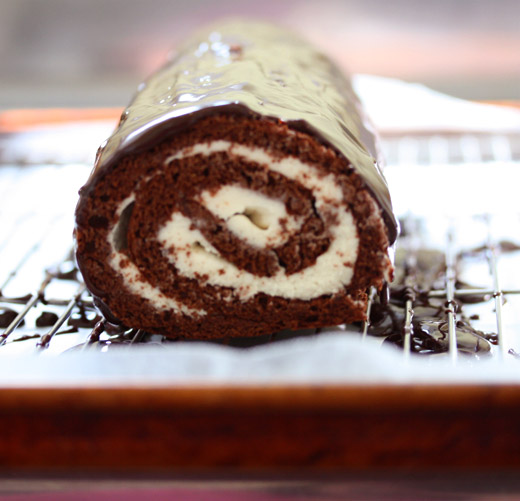
I teach a baking class at the local community college. The class is an introduction to baking, so I’ve taught the basics: biscuits, scones, shortbread cookies dipped in chocolate, brownies (chewy and cakey), pies, quiches, and now I’m getting ready to teach a short unit on cakes. So I decided to include a Swiss Roll– a rich chocolate sponge cake, rolled around a light vanilla cream.
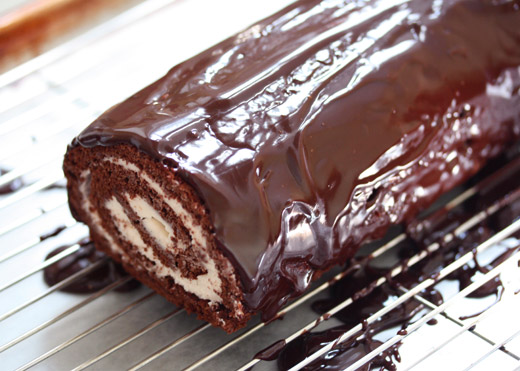
To try it out, I made the roll last week. Gilding the lily, I decided to enrobe it in a shiny chocolate ganache. As I was applying the final layers of ganache, I stepped back to look at my handiwork, and that’s when I realized– I had made a giant Ho Ho.
And I couldn’t have been any happier!
I was not a Hostess kid, but I do remember snacking on the odd Ho Ho from time to time. I would bite off all of the “chocolate ganache” and then attempt to unfurl the cake and cream. Unsuccessfully. The cake was dry and flavorless and the cream was not scented with pure vanilla, it was just sweet. The unfurling always turned out to be more of a breaking.
But let me tell you, that home baked, with a buoyant chocolate sponge and a delicious, light buttercream, this giant was sublime. I understand why this combination got so popular. And I didn’t even want to unfurl it.
The chocolate sponge is adapted from a recipe by the brilliant Flo Braker. Her book, The Simple Art of Perfect Baking is spot on. She is meticulous, and although this book is a baking book, her recipes are not too sweet. This sponge is not quite a genoise, it is enriched with egg yolks, making the cake moist and pliable without having to brush it with a simple syrup.
While a Swiss Roll is typically made with sweetened whipped cream, I opted for buttercream instead. It has a staying power that a wet whipped cream does not. And I’m the teacher– I get to do that now. The ganache is rich with bitersweet chocolate, with a bit of corn syrup added to improve the shine. Ganache is great. It can hide a multitude of sins, like cracks in the cake, pours on easily, and hardens to a lustrous sheen.
The cake was divine. Every student oohed and aahed over their rolls. It reminded each person of their childhood– but tasted even better!
Chocolate Swiss Roll/ Giant Ho Ho
Chocolate Spongecake Sheet
from The Simple Art of Perfect Baking by Flo Braker
1/2 cup (50 grams) unsifted cocoa powder
2 tablespoons (25 grams) unsifted cake flour
4 eggs, at room temperature
1/2 cup (100 grams) plus 2 tablespoons (25 grams) sugar
1 teaspoon vanilla
Position rack in the lower third of oven, and preheat to 425 degrees.
Lightly grease a jellyroll pan (12 by 15 inches), line with foil, leaving a 2 inch overhang on the shorter sides, and spray with cooking spray. Set aside. Sift the cocoa powder, and the flour together.
In the bowl of a stand mixer crack 2 full eggs, and 2 yolks. Reserve the 2 egg white in another bowl. Begin to whisk the egg yolk mixture, slowly adding the 1/2 cup of sugar. The mixture will become light and thick. This will take about 3 minutes. Add the vanilla, and beat again to mix. In the separate bowl, with a hand mixer, if you have one, beat the egg whites, slowly adding the additional 2 tablespoons of sugar, until medium peaks are formed. Set aside.
Fold half of the egg white mixture into the yolk mixture. Sprinkle half of the cocoa powder mixture into the egg mixture and fold completely. Repeat steps another time with the egg white and the cocoa powder mixture until all is thoroughly combined.
Quickly pour into the prepared jellyroll pan, spreading evenly. The cake will continue to spread when it is baked, so it’s not important that the batter be completely covering the pan. Bake 7 to 8 minutes. It is better to underbake then to overbake, which will make the cake difficult to roll.
Immediately remove the foil, which will still have the cake attached. Place it on a work surface, and put a clean kitchen or tea towel over it. Quickly begin to roll the cake with the towel in the center, pulling off the foil as you go, making a cylinder. Roll completely and leave to cool to room temperature, in this rolled position, with the towel still in place.
Vanilla Cream Filling
1/2 cup unsalted butter, softened to room temperature
1/4 cup whole milk
3-4 cups (give or take) powdered sugar
pinch of kosher salt
1 tablespoon vanilla extract (I used vanilla bean paste)
In the bowl of a stand mixer, beat butter until light and fluffy, about 2 minutes. Add the milk and 2 cups of powdered sugar, and continue to beat until well combined. Add additional sugar in increments, tasting for sweetness. When frosting is sweet enough for your taste, add vanilla and continue to beat until no graininess is detected. Scoop into a smaller bowl, and set aside.
Chocolate Ganache
3/4 cup heavy cream
2 tablespoons dark corn syrup
6 ounces bittersweet or semisweet chocolate, chopped into 1/4 inch pieces
pinch of kosher salt
In a small saucepan, place all of the ingredients. Warm over low heat, just until chocolate is melted. Stir to combine, and set aside.
Assembling the roll:
Unroll the cake, and remove the towel. Spread the cream filling (it is easiest is the filling is kept at room temperature), evenly on the inside of the cake. (You may have some cream left over.) The cake will have a bend in it from the rolling/cooling process. This will make it easier to roll completely filled. Gently roll the cake. Turn it over, so the seam is underneath. Trim the ends, so the cake is squared off, and even. If possible, refrigerate for one-half hour to firm-up the roll.
Place roll on a rack, over a cookie sheet. Pour on the ganache, if necessary, paint ganache on to cover cake completely. Let ganache firm up either in the refrigerator or at room temperature. This will take about 1 hour.
all rights reserved

