April 27th, 2006

Gettin' Fraiche

Maybe it is the French-ification of American cuisine, or perhaps it is that the entire culinary world is getting downright bourgie, or maybe it is just that creme fraiche is tangy and delicious, but perhaps you too have noticed it creeping onto menus and into recipes a lot more lately. I can see why, the creamy mouth feel, the crisp flavor, the cooling appeal. Let’s face it– Creme Fraiche is ‘da bomb!

But for many, it is still somewhat difficult to find. You may have even resorted to using sour cream, a paltry second in terms of complexity. Well, look no further, creme fraiche is infinitely easy to make. It is possible to have a small jar of the stuff, quietly cooling in the fridge, by this time tomorrow. Suzanne Goin, in her fabulous book Sunday Suppers at Lucques, taught me how to make creme fraiche, and now dear readers, I am teaching you.

Making creme fraiche is not a secret, or at least it shouldn’t be. Simply take one cup of heavy whipping cream, and heat gently on the stove to body temperature. Remove the cream, place in a glass jar, and add two tablespoons of buttermilk. Mix, and cover loosely with plastic wrap. Then set the jar on the counter, and leave overnight, or up to 24 hours. I was doubtful myself that much of anything would happen. But the next day, the cream had thickened to make creme! Refrigerate, and the creme fraiche will thicken even more. The creme fraiche will stay fresh, covered in the fridge, for a few weeks. The best part is, new batches of creme fraiche can be made by using this original creme fraiche starter, instead of buttermilk. Subsequent batches will be thicker and tangier.

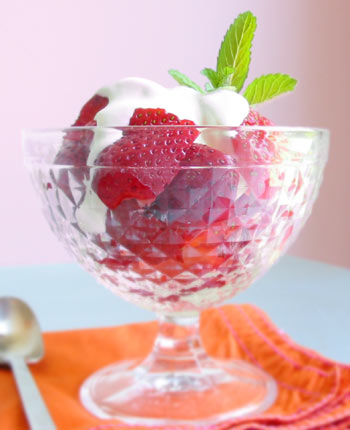
I have been using my creme fraiche in everything. Spooned on a simple bowl of sliced strawberries; enriching whipped cream, and dolloped along side a slice of apple cake; along side a piece of chicken, accented with freshly chopped, springtime herbs; the possibilities are endless. So go ahead and get bourgie. Now that spring has arrived, throw on a tank top, slather on the Coppertone, then head to the kitchen to get fraiche yourself.

Pin It
April 25th, 2006

I'm Green with Garlic

I try not to be a stinky girl, but sometimes, I just cannot help myself. I open my mouth to utter a statement, and the sweet smell of garlic halitosis, wafts out instead. And let me tell you, I simply do not care. Especially this spring, upon the discovery of a beautiful springtime vegetable, Green Garlic.

When I spotted green garlic at Monterey Market, its wispy tendriled roots staunchly holding clumps of sandy dirt and emitting a mild garlicky fragrance from the small tangle of vegetables, I knew that I had to take home a few to cook with right away. Available for a few short months each spring, March through May, green garlic is simply the younger sibling to the more mature, bulbous variety that you may cook with everyday. This childish young’un is everything that the older counterpart is, and so much more– tender, delicate, grassy, with just a hint of garlic flavor, and the subtle crunch of a leek.

Since that fateful day, I return to the market at least weekly to feed my addiction. While the green garlic may smell like that ever stinking rose, the flavor, even when eaten raw, is complex, earthy, and not a bit overpowering. Depending on the freshness of the green garlic you obtain, it can be used almost entirely, stalk to bulbous root tip. I have served in hashes, sauteed it in pilafs, shaved it raw in vinaigrettes, or my personal favorite, quickly tossed it in a pasta.

A simple pasta, made in a flash while the spaghetti is cooking, this pasta could not be simpler, or more delicious. A few minced anchovies start the sauce out with a healthy dose of olive oil. As the anchovies melt, leaving behind a murky brown melange, in goes a good dose of crushed red pepper flakes, for a kick. Finally the star of the show, green garlic, the root end sliced thin, while the green stalk is julienned into matchstick-sized pieces, is tossed in the pan, to quickly sautee, while still remaining crisp. By this time the pasta should be finished cooking, and added to the sauce. A little pasta-cooking water, a handful of freshly grated Parmesan cheese, and some minced parsley, salt and pepper to taste, and dinner is served.

Green garlic can be a bit difficult to find; I suggest trying to locate it at a farmer’s market, or a good green grocer’s. But for those of you who haven’t had it, seek it out– you are in for a treat! Just make sure your dining companions eat it too, and enjoy an evening of garlic halitosis together.

Pin It
April 20th, 2006

A Simple Bourgie Hash

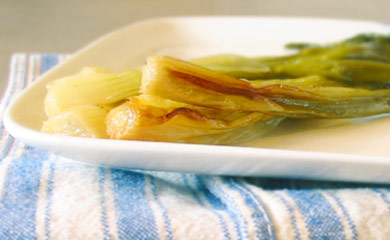
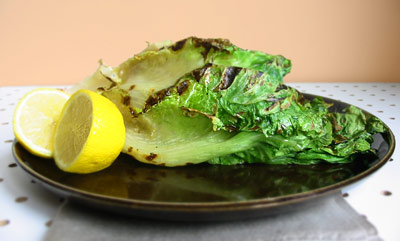
Sunday Brunch. It seems that lately I have been having guests over quite often to partake in that not-quite-breakfast-but-certainly-not-lunchtime, ritual. It is a wonderful way to entertain– more relaxed, carefree, an assemblage of sorts. There is no worry over what wine to serve (mimosas do just perfect), no sit-down courses to worry about getting on the table at the right moment, and dessert? No one really expects a ganache covered cake at 11:30 in the morning! (Though at my house one would rarely be turned away either.)

But what do you serve? With so many options it can be a bit of a conundrum. There are always the standards. Crisp waffles, their crannies cradling pools of melted butter; or stacks of fluffy pancakes, teetering tall on a crisp, white plate, but you have to wait for those entrees. Irons must be piping, griddles must be hot, there is turning and flipping, then placing in a warm oven where they inevitably get the tiniest bit soggy as you wait until all of the batter is cooked. Then there are the multitudes of egg dishes, runny yolks seeping into slices of fried bread, swooping in beside slices of crisp bacon. Not a bad option, but what to do when you want something more, something a wee bit bourgie. Why, you turn to the Bourgie Hash.


A dish that is delightfully simple to make, yet delicious to eat. In fact I prepared many of the components of this hash the night before only to reheat, and assemble Sunday morning. Yukon gold potatoes were cubed and sauteed until golden brown and tossed with a bit of freshly minced dill. Golden and chiogga beets were sweetly roasted and peeled, cut into cubes similar in size to the potatoes. Nubbins of asparagus spears were blanched, and stalks of green garlic were sliced and sauteed. The piece de resistance, flaked pieces of locally smoked trout added a salty smokiness to this brunch time treat.

And of course, could you really have a hash without an egg or two thrown in for good measure? This is perhaps the most challenging part of the entire event, and each person poaches slightly differently. I cracked an egg in a shallow pool of simmering water, quickly brushing the lingering whites to the top of the yolk with a spoon. Let the egg simmer for 2-3 minutes, then remove to paper towel-lined plate with a slotted spoon. The first few eggs may seem a bit daunting at first, but you will get the hang of it. And once you puncture the white, releasing the sunny yolk into the bed of hash, lending a creaminess to this light springtime hash, it will all seem worthwhile.

Now I made this hash as a rite of spring, overflowing with the vegetables that looked freshest, and most tempting at the grocer’s. But you should try it with any combination that sounds best to you. Sauteed in a skillet, topped with an egg, this hash is sure to delight even the most bleary-eyed of guests on your next Sunday morning brunch.

Pin It

The Oreo is a thing of beauty, the perfect marriage of chocolate and cream all sandwiched together in a harmonious union. I love them, but I do feel guilty eating them. The urban legends (or maybe they are not quite legends) about the cream being composed entirely of wobbly, fatty lard have even made the glutton in me stop and reflect before gorging myself on a neat stack of these processed treats.

Last week I was at the Berkeley Public Library, browsing through the cookbook section. (Yes, this public library, despite its rather paltry fiction section, does have a solid cookbook section.) I spotted the book Retro Desserts by Wayne Harley Brachman, a book filled with desserts from Grasshopper Pie to Lemon Pudding Cake to, you guessed it, Chocolate Sandwich Cookies with Vanilla-Cream Filling. Why, that sounds an awful lot like my beloved Oreos. I checked the book out, and rushed home to get my sugar-high.

The cookies where a cinch to make, crisp and crumbly, with just the right amount of vanilla cream oozing out of the sides of the cookie when a bite was taken. These sandwich cookies tasted surprisingly like those store-bought cookies, only dare I say– better. The cookies had a pleasing brittle quality to them, they cracked not languished when you tried to bend them. But the crispness of the cookie was perfectly mediated by the luscious, though not overly sweet, cream center.

I would even say that I would use the chocolate cookie recipe again to sandwich other fillings: peanut butter, mocha buttercream, or now that the spring and summer months are upon us, ice cream. If you would like to make your obsession with chocolate sandwich cookies known, and whip up an almost guilt-free batch of your own, try them yourself.

Note: The recipe does call for a bit of shortening, I used the trans-fat free variety to maintain a modicum of health.

Chocolate Sandwich Cookies with Vanilla-Cream Filling
from Retro Desserts

Makes 30 sandwich cookies

For the Chocolate Wafers:

1 1/4 cups all-purpose flour
1/2 cup unsweetened Dutch process cocoa
1 teaspoon baking soda
1/4 teaspoon baking powder
1/4 teaspoon salt
1 1/2 cups sugar
1/2 cup plus 2 tablespoons (1 1/4 sticks) room- temperature, unsalted butter
1 large egg

For the Vanilla-Cream Filling:

1/4 cup (1/2 stick) room-temperature, unsalted butter
1/4 cup vegetable shortening
2 cups sifted confectioners’ sugar
2 teaspoons vanilla extract

Set two racks in the middle of the oven. Preheat to 375 degrees.

In a food processor, or bowl of an electric mixer, thoroughly mix the flour, cocoa, baking soda and powder, salt, and sugar. While pulsing, or on low speed, add the butter, and then the egg. Continue processing or mixing until dough comes together in a mass.

Take rounded teaspoons of batter and place on a parchment paper-lined baking sheet approximately 2 inches apart. With moistened hands, slightly flatten the dough. Bake for 9 minutes, rotating once for even baking. Set baking sheets on a rack to cool.

To make the cream, place butter and shortening in a mixing bowl, and at low speed, gradually beat in the sugar and vanilla. Turn the mixer on high and beat for 2-3 minutes until filling is light and fluffy.

To assemble the cookies, in a pastry bag with a 1/2 inch, round tip, pipe teaspoon-size blobs of cream into the center of one cookie. Place another cookie, equal in size to the first, on top of the cream. Lightly press, to work the filling evenly to the outsides of the cookie. Continue process until all the cookies have been sandwiched with cream. Enjoy!

Pin It
April 13th, 2006

Lookie Here!

We’ve all heard it it before, resemblances– dogs looking like their owners (or vice versa), children looking like their parents, or what about the couples that dress like twins, in their matching parachute pant warm-up suits? But what about fruit resembling famous, old Jewish comedians?


I was cleaning strawberries for lunch, as part of my “5 a day for proper nutrition” kick, my husband was in another room writing a chapter on composer Morton Feldman, as part of his dissertation, when I squealed with glee and excitement. I beckoned Brian to the kitchen to see this marvel of nature, a strawberry that looked like a face. That’s when Brian pointed out the berry’s resemblance to another, more famous in most circles Feldman, Marty Feldman.

Now is it a berry that looks like Feldman, or a Feldman-shaped berry? Despite the strawberry’s speckled white right eye, it was downright DELICIOUS! That’s the kind of tribute that Marty probably would have very much enjoyed.

Pin It

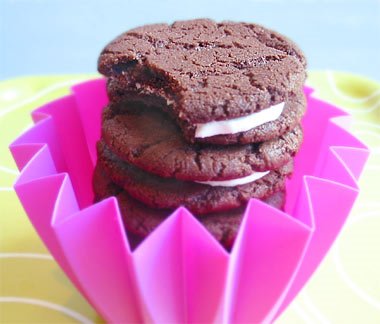
Easter by far has the greatest confections. Cadbury’s Creme Eggs with sugary sweet fondant center– love them! Peeps, I gladly gobble up, the more stale the better. And Reese’s peanut butter eggs– bring them on, I am an equal opportunity sweet treat fanatic. Why is it that ordinary candy tastes all the more sweet when eaten in the spring, and ovum-shaped?

But despite my love of the sugar parade, even I have my favorites. And Cadbury Mini Eggs do it for me every year. They look a bit run-of mill, just a candy-coated, solid milk chocolate, mini-egg. But to me they are things of beauty, the soft pastel coloring, the crisp sugar shell protecting the smooth chocolate center– mmm. They are a bit more difficult to find than your average box of Peeps, or even than their gargantuan sister, the Creme Egg. But it is the thrill of the chase, when you spot that lone bag, sitting on the drugstore shelf, signaling you that Easter is fast approaching. I always buy a few bags when I find Mini Eggs, to ensure that some of these pastel babies make it into my belly each day from late February to mid-April.

But this year eating them plain was not enough. I decided that they had to be baked with too. I thought long and hard. Brownies? They might burn. Cupcake toppers? As charming as that might be, it was a little expected. And then it came to me, in a flash of inspiration: Thumbprint Cookies, little nests to house the precious eggs. So here they are, a Jewish girl’s take on Easter fancies.

I found a recipe for thumbprint cookies here, used ground pecans rather than ground walnut pieces, and simply omitted the jam placing a Mini Egg or two into the center of each cookie. The cookies were dense, rich with butter, and not too sweet, the perfect compliment to the chocolatey candy of the Mini Eggs. Equally as important to me, when all assembled they looked delightful, the perfect baked showpiece for my beloved Mini Eggs. It is like the Easter Bunny himself came by and laid these perfect pastel confections in individual nut-covered nests all for me! And I’m sure he would lay some for you too!

Pin It

My mother lived for the first part of her life in South Dakota. Eventually, the disparity in the weather– summers that were sweltering, and winters that were frost-bitingly cold– became too much for my grandparents to put up with, and they moved with their four little girls to sunny California. Of course the weather did not seem like a deal breaker to my mother. She sloshed about in the snow, wearing layers of woolen clothing in the winter, and in the summer came a much-needed break from parochial school, with all of the nuns barking orders, and afternoons were spent soaking up the sun as my grandmother tended to the vegetable garden.

50 years later, in response to the “new” craze for locally grown produce, my mother still talks about all of the food my grandma would can and put up for the winter, and the steady stream of vegetables that came from the earth each summer. Crisp carrots, earthy radishes, and peppery scallions were ready to be harvested almost daily during the spring and summer months, and my mother still recalls with fondness the plain, but certainly not bland, scallion sandwiches she would consume each year. Simple they were– garden-variety scallions, cleaned and trimmed were placed on a slice of fresh white bread slathered with mayonnaise. Sprinkled with salt and pepper, another clean slice of bread was placed on top, and the sandwich was slightly smooshed together, then promptly gobbled up.

That was it. Nothing fancy, nothing over the top, but to hear my mom speak of those sandwiches, they were like a little piece of delicious summertime. To me, the memory is sentient; I can just imagine my mother, her little Kewpie doll forehead gleaming in the sun, sitting on the edge of the porch and having this afternoon snack. But I cannot however, imagine eating a sandwich composed entirely of raw scallions– too strong, too crunchy, too oniony. But braised scallions, delightfully desiccated– now that I can do.

Inspired by a recipe from Molly Steven’s fabulous book, All About Braising, I set to work on a simple braised scallion, imbued with the feeling of those summertime sandwiches my mother so loved. The recipe couldn’t be easier. Just gather a passle of scallions cleaned and trimmed in a large Pyrex baking dish, dot them with butter, season with salt and pepper,and add about 1/2 cup of water. Cover the baking dish with foil and cook for 35-40 minutes in a 350 degree oven. Remove the foil, crank up the heat in the oven to delicately brown the scallions, evaporate any water, and turn the butter into a glaze. That’s it. So easy and so good.

The scallions turn sweet, beautifully wilted– a whole other vegetable. Not to be relegated to a salad any longer, these scallions make an ideal side dish, or even an addition to a not-so-pungent sandwich.

Pin It
March 30th, 2006

The Anti-Borscht

Borscht, that often cold, Eastern European, potato-laden, crimson soup– it’s not one of my favorites. I love soup, and I love potatoes, and beets are my BFF (best friends forever), but all simmered together, eehhh… However, looking through the SF paper last week, the food section of course, I saw a recipe for an altogether new beet soup that I knew that I had to try.

Nowhere in the article did it mention that this was a bourgie soup, but made with bright golden beets, and embellished with creme fraiche, how could it not be? I quickly deemed it the Anti-Borscht and the Bourgie Beet Soup. Simple in its composition, using golden rather when ruby beets, and made with just a handful of ingredients, the soup was beautiful to behold and delicious to taste. So rarely do you obtain a soup that is so clear, so honestly golden in color, I was shocked by its loveliness. It almost seemed a shame to slurp it up. But I was happy I did.

Light, creamy, buttery, the soup tasted earthy, but not overpowering. Perhaps if you closed your eyes and tasted, the soup was even reminiscent of a light corn soup eaten in August– that is how sweet it was. Although golden beets have little difference in flavor than the traditional red fleshed sort, due to its sunny color and the addition of some luscious creme fraiche, this soup was both smooth and delicate.

There is something so lovely about a bowl of soup for lunch. Healthy and hearty, with a crust of bread, and in this case some peppery radishes, it just felt like spring. And beets are insanely good for you, high in potassium and folic acid; they are wonderful steamed or roasted as well. If you would like the recipe for this Bourgie Borscht the recipe is here, along with several other delicious sounding springtime soups.

Pin It

I love Thai food. The interplay of unique flavors, the balance between salty and sweet, the clean palate, all make up entirely new taste combinations. I recently picked up Jeffrey Alford and Naomi Duguid’s brilliant book, Hot Sour Salty Sweet: A Culinary Trip Through Southeast Asia. This enormous book is filled with both tales of the authors’ travels throughout this region of the world, as well as easy-to-follow recipes of the delicious sorts of food eaten on their excursions. While flipping through the pages, dog-earring the recipes I had to try, I came to a recipe for Pomelo Salad that looked intriguing.

The pomelo, a typical Southeast Asian citrus fruit, now sold in the U.S., looks like a giant grapefruit. Usually less juicy than a common grapefruit, with a thick spongy skin, they can range in flavor, from quite sour to pleasantly sweet. You never know what kind of pomelo you will end up with until you try it. I scored an enormous pomelo for my salad. Cutting off the pithy outer skin to behold the gorgeous segments of fruit, I tasted, expecting a sour melange of citrus. The pomelo that I obtained was actually very similar to a Ruby Red grapefruit– rosy exterior, and sweet-sour taste. In fact, my pomelo was so similar to a grapefruit, and the salad was still so delicious, I think I would use grapefruits in the future.

I made the typical lime juice dressing complete with the salty, marine kick of Thai fish sauce. I dry roasted peanuts and coconut, diced shallots, chopped mint, and deseeded chiles, careful to avoid any contact with my eyes. The salad is meant to be assembled at the last minute, so all of the flavors stay crisp and clean. My kitchen counter looked like an apothecary shop, with all of the little bowls carrying dishes of chopped or sliced ingredients, strange on their own but beautiful tasting when married together.

Finally I was ready to toss and serve. Each dish was emptied into my bowl of pomelo supremes; I tasted, and the combination was ideal. Salty and sweet, with a kick from the chiles, and washed with a freshness from the addition of chopped fresh mint. Crunching on the dry-roasted peanuts, and savoring the bits of grated coconut, I imagine this salad to be the perfect balm for a hot summer night, when just the idea of turning on the stove makes you break out in a sweat.

This recipe originally calls for pomelos, but can be easily adapted with Ruby Red, or Rio Star grapefruits. Served with butter lettuce, it makes a delightful midday meal.

Pomelo Salad
adapted from Hot Sour Salty Sweet

Serves 2-4 depending on sides

3 tablespoons Thai fish sauce
3 tablespoons fresh lime juice
1 tablespoon palm, or brown sugar
1 pomelo, or 2 medium grapefruit
2 tablespoons dry-roasted grated coconut
2 tablespoons dry-roasted peanuts, coarsely chopped
1 tablespoon chopped shallots
1/2-1 cup fresh mint leaves, chopped
2-3 bird, Thai, or Serrano chiles, finely chopped, or to taste
Bibb, or butter lettuce, cleaned for garnish

In a small bowl mix together fish sauce, lime juice, and sugar. Blend until sugar has completely dissolved. Set aside.

Peel the pomelo or grapefruit, then cut out segments of fruit, leaving behind the bitter pith. Place the fruit in a bowl, reserving the juice from the fruit in another bowl.

In a dry skillet, over medium heat, roast both the coconut, and the peanuts until toasty, and light brown in color. Chop the peanuts after roasting if necessary.

Salad should be fully assembled just before serving. Add the roasted peanuts and coconut, the shallots, chiles, mint, and pomelos to a large bowl and toss. Pour the lime dressing over, and continue to toss. Taste and adjust seasoning, if the dressing is too pungent, add a bit of the reserved grapefruit juice.

Serve immediately on a bed of lettuce.

Pin It
March 23rd, 2006

Limp, Wilted, Yet Delicious

Never did I think that words like limp and wilted would describe something so utterly delightful. These adjectives call to mind a soggy salad, vegetables left too long in the refrigerator, or even overcooked spaghetti noodles. But they also describe, quite aptly I might say, a simple, unadorned celebration of a new way to prepare a rather standard green vegetable. And with that glowing introduction, I give you, Grilled Escarole.

March is the most difficult month for me. Yes it is the beginning of spring, the start of a season filled with juicy berries, fuzzy stone fruit, and multitudes of light lettuces. But spring is just spring by the calendar year. Even in California, a place that is teeming with produce, the bounty doesn’t really start to get going until mid-April. And so I struggle with March. Cabbage, potatoes, broccoli, oranges, and mandarins just aren’t doing it for me anymore, I need something more from the green grocer’s, so I begin to scavenge.

And when I scavenge, there are times when great things happen. I trudge home from the market, pulling out the lonely head of escarole from my shopping bag, because at the grocer’s it was something new, something hearty. I still am unsure exactly how I will prepare it. I taste it raw, ever so slightly bitter, I chew and chew the toothsome leaf. Deciding it must be cooked, I quickly peruse my mental log: saute, simmer, stir-fry…too drab. How about grilling?

I take out my grill pan, setting it on the stovetop to preheat while I prepare the escarole. The preparation couldn’t be simpler. Simply wash the entire head, then slice the escarole into quarters through the root. Brush the quarters with olive oil, season with salt and pepper, then set in piping hot grill pan. Grilling for 2-3 minutes a side, the escarole gets pleasantly charred, and ravishingly wilted (ravishing? yes, ravishing).

Squeezed with lemon, and served with grilled sausage, and roasted new potatoes, this grilled escarole made me even enjoy the same-old potatoes once again.

Pin It
© 2024 wordpress test site
all rights reserved