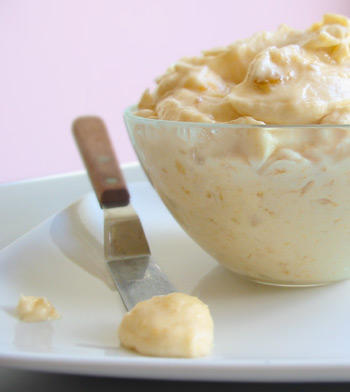
My uncle used to be a chef. He worked for a catering company in the 80′s. On his last visit, we were chatting about the work he used to do, hors d’oeuvre de riguer, and monstrous brides. Somewhere in this same conversation we were discussing wedding cakes, and he mentioned that apricot buttercream was all of the rage in the 80′s. Apricot buttercream? Why that sounds delicious! How did such a delicious combination of butter, powdered sugar, and apricot preserves ever fall out of favor? Why aren’t people making huge vats of apricot buttercream and frosting everything in sight? This delightful concoction was something I had to try.

Now longtime readers know that I claim to not be much of a baker, but I love a little something sweet on an almost daily basis. And while I might not be a baker of grandiose proportions, I do have an active imagination, an imagination that dreams of creating adorable confections that lead me to semi-homemade creations of the week.

In my book, there is nothing wrong with using a cake mix from time to time. In fact, there are people out there (you know who you are, and wave your cheating flag high) who have never made a cake entirely from scratch. While cake from a mix is fine, homemade frosting is truly delicious, easy to make, and will bring the cake from an average, perfectly acceptable dessert to a stupendous, dreamy sweet of immense proportions.

How about some Babycakes with Apricot Buttercream and Chocolate Ganache? Bigger than a petit-fours yet smaller than a slice of cake, these cakes feel all the more special because they are individual, self-contained units. It’s like receiving your very own diminutive cake for dessert. With a biscuit cutter, simply cut out individual rounds from a standard sheet cake. Slice the rounds in two, fill with the homemade buttercream of your choice, and spoon luscious, rich chocolate ganache over the top. I adorned each babycake with a single candy violet, for both color, and the crispy, perfume-like flavor.

There is something so delightfully greedy, and self-indulgent about having a babycake versus a slice of actual cake for dessert. Both are charming and decidedly sweet, but only one is well…bourgie. So go ahead, all you cheaters out there (me included), mix up a batch of buttercream, and go to town.

Pin It
October 13th, 2005

Pop Goes the Citrus

It’s October. A wonderful month, when you can actually see the change of seasons as fallen leaves crunch beneath your feet. The scarf that is hanging on the hook by the front door beckons you to grab it, and tie it snuggly around your neck, and the end of the month with all of its “BOO’S,” costumes, and enough candy to rot the teeth right out of your head, is just a few short weeks away. Yes, I love Halloween. Alas, I do not dress up anymore, but I remember my costumes fondly: Lucille Ball, with a giant orange wig; the Futuristic Girl, with a silver skirt a la Judy Jetson; and the requisite Black Cat, leotard and all.

With all of the candy lining the grocer’s shelves, it got me thinking about my favorites; Candy Corn, sweetly striped; Russell Stover’s marshmallow pumpkins; and those hard bricks of bright pink popcorn that my mother and I devoured every year. It wasn’t that my mother was junk food junkie, nor was she a health fanatic, she just has a soft spot for brightly colored, Halloween candy. It’s becoming harder and harder to find those leaden bricks of sugary confections, and they are not something I should probably eat anyway, with the money I have sunk into proper orthodonture work, but there are times when I get a hankering for the salty-sweet goodness of popcorn and a bit of sugar.

And so I give you Citrus Scented Popcorn. Making your own popcorn is easy, and it can be adorned any which way that you choose. For pennies on the dollar you can eat piles of this demurely sweet snack food, and save the worry about going to the dentist for another day. I jest, this popcorn is perfect– not too sweet, just a bit salty, and flavored with fresh orange zest, it is decidedly fresh in flavor. Made in October, it’s quite festive too. Boo!

A delightful salty-sweet snack, this popcorn is reminiscent of kettle corn, but is enriched with fresh orange zest.

Citrus Scented Popcorn

1/8 cup neutral tasting oil, such as canola, or vegetable
1/2 cup popcorn kernels
2 tablespoons butter
1/2 teaspoon salt
6 tablespoons sugar
zest of 1 orange

In a small bowl mix the sugar, salt, and orange zest, set aside. In a medium sized, lidded saucepan, pour in the oil and the popcorn kernels. Place popcorn over medium heat, secure lid, and begin to shake the pan gently. It is important to keep the popcorn moving in order to avoid scorching. Continue shaking the pan, until you begin to hear kernels popping, about 4 minutes. Once popcorn begins to vigorously pop, turn off the heat, and allow kernels to finish popping.

Pour popcorn out and into large paper grocery bag. In the same saucepan, melt the butter. Pour melted butter onto to the popcorn, then pour in the sugar-orange mixture. Close the bag, and shake popcorn vigorously to season evenly. Pour the popcorn into a bowl, and eat up.

Pin It

I never knew how easy it is to make English Muffins for yourself, perhaps even easier (or at least less rising time is called for) than when you are making a loaf of bread. Recently I brought out my sourdough starter, a few hours later, and a after bit of muscle-building kneading, I had a dozen English Muffins. Chewy on the inside, crisp on the outside, tart with sourdough, and with nooks and crannies to put Mr. Thomas to shame, my English Muffins made me feel like a real baker, which we all know I am not.

English muffins are not baked like a loaf of bread, rather they are made on the stovetop, and take a matter of minutes to cook. After the initial, size-doubling rise, the dough is flattened into a square, about one half of an inch high. This dough is then cut, with a circular cookie cutter, or even a large drinking glass, the rings are set on corn meal, and allowed to rise for 15 minutes. After these minutes have passed, preheat a cast iron, or other heavy bottomed skillet for 5 minutes over medium-low heat. Then coat the skillet in a few tablespoons of corn meal, place the still doughy muffins into the pan, and cook away.

The English Muffins should take about 7 minutes per side; they will develop a chewy, bubbly crust, and will no longer be tacky to the touch. What is so amazing about the baking of English Muffins, is that you actually see the baking process, unlike in an oven. You see the muffin puffing up, the webbings of dough forming, the crust actually browning, and unlike baking bread, you can taste the fruits of your labor almost immediately.

And really, what could be bourgier than an English Muffin? They are a like a blank canvas, calling out for which ever decadent toppings you choose. You have the basics, butter, honey, or jam, but what about a poached egg, gorgonzola cheese and slices of fresh, grainy pear, for a late night snack? The possibilities are endless. English Muffins can be made with virtually any kind of bread of dough, sourdough, basic white, or a heartier whole grain. Simply follow the instructions listed above, and you too will be reveling in nooks and crannies in no time.

Pin It
October 6th, 2005

Liquor Me Up!


I’m having a sweet, delicious, and greasy doughnut makin’ party this weekend, and I have been racking my brain about the beverage situation. What is the ideal beverage to serve along aside doughnuts? The answer of course is coffee. But how do you make coffee alcoholic, thus making it appropriate for a soiree? Kahlua of course. And what about making your own coffee liquer? Well, it can be done in a matter of moments, will make your house smell scrumptious, and get your tastebuds appropriately percolating.

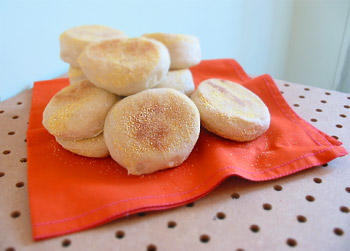
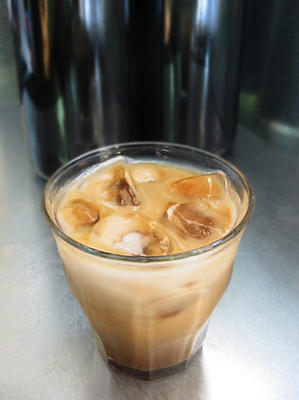
When making flavored alcohol at home, the cheaper the better. No Grey Goose, or even Smirnoff vodka here, just VODKA, the kind that comes in a plastic jug and is hidden at the bottom of the shelf at the liquor store. You want the liquor to be absolutely flavorless; that way it will take on the flavors with which you are infusing it.

Mixed with cream and served over ice, or splashed in coffee, this coffee flavored liquer will add another homespun dimension to the festivities. Made with instant coffee and a handful of other ingredients, this liquer is hardly rocket science, but it is tasty. Think of it as alcoholic diner coffee.

Coffee Flavored Liquer

3 cups water
3 cups sugar
2/3 cup instant coffee
2 cups vodka
2 teaspoons vanilla extract

In a large saucepan, combine water, sugar, and instant coffee. Bring mixture to a boil, and simmer for 5 minutes. Remove from heat, and cool to room temperature. Stir in the vodka and the vanilla extract, pour into bottles, and store at room temperature.

Pin It
October 3rd, 2005

Figs, Figs, and More Figs

I have always loved figs. I have just loved them in varying degrees. When I was young I used to stand at the kitchen sink with my mother, turning each fresh fig inside out, gazing at the hundreds of greasy eyeballs that were the flesh staring back at me, then scraping this flesh clean with my front teeth, and discarding the peel. Time-consuming, and labor-intensive yes, but I didn’t like the skins. To me, fig skin was like peach skin– you could eat it, but why would you want to? Leathery, and almost fuzzy, I left the skin, and precious bits of flesh alone. But I have grown, seen the error of my ways, and one day I just began gobbling up the entire fig, skin and all, and since that time I have never looked back.

And with that introduction, I give you Broiled Figs. Now in order to enjoy this dish, it is necessary to eat up the entire fig– so finicky eaters beware. What could be better than ripe, warm fruit? Broiling fruit used to be somewhat in fashion. I remember my mother serving a broiled half grapefruit, with sugar and butter, as a starter at dinner parties. Well, broiled figs are the same concept. Simply slice the fruit in half, place in pan, flesh side up, top with lumps of brown sugar, and a sprinkling of cinnamon, and broil for 4-6 minutes. The figs will begin to fall apart, the sugar will carmelize, and pools of delectable cinnamony fig juice will settle in the pan.

Now I know that adding sugar to a fresh, ripe fig, may seem to be gilding the lily, but in this case I say– gild away. Revel in the decadence of this dish while you still can. Enjoy the charred crispness of the fig skin, and the pillow soft texture of the flesh. In fact, this dish is even ideal for less than perfectly ripe figs. When the fig has too much resistance to be eaten raw and unadorned, it can still be the ideal fruit to package in crisp sugar, and broil to perfection. Broiling only intensifies an already perfect fruit. Give these charred wonders a try as an accompaniment to your next weekend brunch. With a soft-boiled egg, and a piece of tart sourdough toast, what could be finer?

Pin It
September 29th, 2005

Party On! With Fig Crostini

The Fig and Ricotta Crostini were a huge hit at the cocktail party. Crisp yet creamy, earthy yet slightly sweet, the dichotomies are endless, but the natural flavor of this hors d’oeuvres is fleeting, as figs are only in season for a few short months. With just a handful of ingredients, they embody the simplicity of the food at this cocktail party.

Maybe I should change that final sentence to say: “Simplicity embodies the way that I cook.” Perhaps it is because I live in the Bay Area, a place that has so many wonderful shops, like Monterey Market and The Cheese Board, to make my life easy. Or maybe Alice Water’s is to blame, whose philosophies behind food preparation have made it into the lexicon of how we cook. But I don’t really like my food fussed with. If you are fortunate enough to have marvelous ingredients, let the flavors stand out.

That’s a lot information I imparted to you, tolerant reader, for just one recipe, and it’s not even a recipe really, but more of an assemblage. So let the assemblage begin:

  • Crostini can be either made or purchased, but it is infinitely tastier (and cheaper too) to make them yourself. Slice a baguette, brush both sides with olive oil, season with salt and pepper, and bake at 400 degrees for approximately 7 minutes per side.
  • Use fresh ricotta if possible. It’s drier, has a more subtle mouth feel, and is brimming with good ‘ol lactose. If you can’t find fresh ricotta, use the ricotta from your grocer’s, just let it drain in a sieve for at least one hour before using. This should allow some of the whey to drain out, and give the ricotta the drier consistency that you are trying to achieve. Top each crostini with a milky dose of ricotta cheese.
  • Finally top the crostini with one quarter of a fresh fig. Either green or brown figs work equally as well, it is simply a matter of preference. With a sprinkling of balsamic vinegar, and a chiffonade of fresh basil, this hors d’oeuvre has the perfect amount of acidity, and herbaceous flavor.

So there you have it, the ideal starter for your next fall fete. Elegant and simple, the hors d’oeuvre is perfect for people (like me) who don’t want their food played with too much.

Pin It
September 27th, 2005

Sweet Success!

It can be done! With a little help from some downright amazing cheeses, mother nature can take the credit for the stunning produce, and a bit of ingenuity, each contributing in its own way, to a scrumptious party. Here is a quick trip to a very bourgie cocktail hour.

Polenta Squares topped with Onion Confit and Greek Olives

Polenta, purchased in the bulk section of the market as corn meal, is cheap, 75 cents a pound cheap, and is truly the chameleon of any party. Cooled in a large pyrex pan, the polenta pleasantly congeals leaving you with a delightful, creamy concoction.

Fig and Fresh Ricotta Crostini

Earthy fig segments, nestled on a slathering of fresh whole-milk ricotta, all atop a crisp homemade crostini– ask yourself this question: Is it less expensive to purchase an armful of baguettes, or bags full of prepared crackers? The answer will always be to purchase the baguettes.

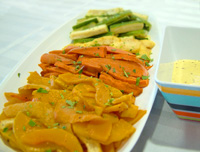
Roasted Vegetables with Roasted Garlic and Stone Ground Mustard Aioli

Just a simple crudites platter made more seasonal, and more delicious by roasting slices of winter squash. You can’t have a party without veg, so here is a new way to try it.


Spicy Pickled Vegetables

Pickling vegetables is in right now. So why not jump on the band wagon by mixing up a batch of these colorful and piquant carrots and radishes. This a recipe that is super simple and makes a ton of veggies, but it can easily be reduced. I pickle radishes and small carrots. Try to use the small carrots (not the baby carrots in bags). But if you are having trouble finding this size, use regular carrots cut into batons.

Spicy Pickled Vegetables

3 pounds raw carrots and radishes, cleaned
3 cups apple cider vinegar
3 cups water
1/2 cup packed brown sugar
1 tablespoon mustard seed
1 teaspoon whole black peppercorns
1 1/2 teaspoons cumin
2 teaspoons crushed red pepper flakes
3 cloves peeled garlic

Bring the vinegar, water, and brown sugar to a boil. Add all of the spices and the vegetables and simmer together for approximately 10 minutes, or until the vegetables are crisp tender. When the vegetables are cooked until crisp tender, pour them into containers, liquid as well, and store in refrigerator until use. The pickling liquid is potent, you may want to pour out liquid by half, and add more water, after a day of cooling in the refrigerator. Vegetables last a week and a half, stored properly.

Pin It
September 23rd, 2005

Can it be Done?

The Mission: cater a cocktail party for approximately 50 people, in a beautiful gallery space. The rub? Do so on a budget, a tight budget, a paltry $150 budget. In addition to my money woes, the gallery does not provide a stove, oven, or refrigerator, and preparation time is limited. So this is going to take a bit of time, careful thought, and innovation. And by innovation I do not mean sculpting giant cheese wheels, but rather using everyday ingredients in a unique manner.

Knowing that all of the hors d’oeuvres have to be prepared and served at room temperature, there’s only one option– revel in this fact! Throwing a party of entirely room temperature foods is relatively low-stress. Due to the budget, the preparation has to be entirely done by me and me alone. That means all the food has to be out and ready before the guests arrive. A buffet is a great option; not only can the food look impressive while laying out, set-up and tear-down is kept at a minimum.

And then there is the food. A few things to remember: vegetarian is cheap and delicious; have a small selection of foods from crudites, to cheeses, to assembled hors d’oeuvres; and while variety may be the spice of life, it is the downfall of many catering gigs. It is much better, and more cost effective, to have a handful of recipes that are fresh, and excellently prepared, then it is to have a boat load of clumsy, mediocre, and unattractive fare.

When designing a banquet on a budget, eating seasonally becomes all the more important. Now is a particularly wonderful time to do this. The earth is in limbo about what season it is. Summer stone fruit is taking its last gasps, while tomatoes still abound in the markets, and sturdy winter squash are starting to rumble into the grocery. Knowing that I want to take advantage of the plethora of produce available, what’s better, and more cost effective, than throwing a vegetarian feast? With a little help from the basics like polenta, extraordinary cheeses, unusual spices and fragrant fresh herbs, I am gaining confidence that not only can this cocktail party be done, but it can be done well.

Stay tuned to find out how the cocktail party went, photos of the event, and recipes for some of the food.

Pin It
September 20th, 2005

Asian Dumplings: Part Two

I have received lots of questions about making Asian-style dumplings since the post. So let me demystify the process; it’s really not that hard.

  • I buy wrappers at an Asian grocery. I am sorry to say, that while I may be industrious enough to make dumplings, I draw the line at making the wrappers as well. Either gyoza wrappers (typically round in shape), or wonton wrappers (typically square in shape), are widely available at any good grocery store or an Asian market.
  • Take some liberties with the fillings. Depending on which lucky person is getting the dumplings (it might simply be you who is planning on gorging yourself) you have some leeway with how you want to fill them. Usually the filling is raw. The dumpling will be going through some sort of cooking process that will in turn cook the filling.
  • Aaah, the cooking process. Now you have many options. There is always the deep fat fryer, but for those of you are health-conscious, or who would never think to fry at home, you can always pan-fry your dumplings. Similar to how one cooks a potsticker, you pan fry the bottom of your dumpling until a crackly, light brown color is achieved. Then pour a few tablespoons of water into the skillet, cover the pan, and let the water cook out, thus steaming and completing the cooking process. You also have the option of simply steaming the dumplings either in a conventional, or a bamboo steamer. This should take approximately 6 minutes. And finally, you can drop your dumplings into stock, cook for around 5 minutes, and make an Asian style soup. With greens, such as bok choy, scallions, and a drizzle of sesame oil, I can’t think of a more perfect way to enjoy your dumplings.
  • And finally the nimble fold. There are all sorts of ways to fold a dumpling, depending on the shape of the wrapper (round wrappers work best for gyoza shaped dumplings), and there is really no wrong way to fold a dumpling. Just make sure the dumpling is firmly closed. The easiest way I have found to do this is with a spritz bottle full of water. Lay out several wrappers, fill them with a teaspoon of your filling, then lightly mist them with water, and fold away. The water makes the surface of the dough damp, making it easier to adhere to itself.

So that’s it. Not too bad, right? Dumplings freeze beautifully, and for all of the work, you probably want to make enough to feed a small army. Now get cooking.

Pin It
September 16th, 2005

Dumplings: Part Two

This past weekend was not simply a weekend of one type of dumplings, but rather of two. Call me a girl with too much time on her hands, or simply a glutton for punishment. That’s fine, I’ll concede on both accounts. But I know that for all of my industriousness now, I will be well-fed when the winter months roll around. Saturday I found myself looking to the East for inspiration with Asian-style dumplings, and Sunday I ventured over to Italy (in my mind that is) and whipped up several batches of ravioli.


Ravioli are good, but they are delicious when made at home. Now I’m not expecting you all to run out and buy pasta makers (unless you want to), but if there is a shee-shee market near you, or an Italian delicatessan, it is possible to buy sheets of egg pasta, ready for the filling of your choice. With a little bit of time and creativity, and a modicum of patience, you can make ravioli that are infinitely more tempting than anything you can buy.

It’s the filling and the sauces that are special. For this batch I went for something simple– baked butternut squash, mashed roughly with salted, fresh ricotta cheese, and a grating of spicy nutmeg. For the sauce, I chose the standard.– sage and brown butter. Why improve on perfection? Torn bits of just-picked sage, fried quickly in an amalgamation of butter and a little bit of olive oil, makes for an unctuous, delectable meal. There are times when classic combinations should shine through, and this homemade ravioli supper was one of those times. The sweetness of the squash was an ideal compliment to the earthiness of the sage.

But feel free to experiment with fillings: pea and mint; potato, shallot, and asiago; or the classic meat. After filling them with about one to one and one half teaspoons of filling, you can then fold them any which way you choose. Large or small, circle or square, what is important is the pasta to filling ratio. You want to be able to taste the pasta as well, with the filling simply tumbling, not exploding out of the pasta casing. Ravioli, similar to the Asian dumplings I made over the same weekend, freeze beautifully. And when you just don’t know what to cook for yourself, won’t you be happy to have an arsenal of ravioli in the freezer to make a scrumptious meal?

Pin It
© 2024 wordpress test site
all rights reserved