
I’m back in Connecticut now, but here’s one I baked while I was in California. Chocolate-Cherry Swirl Bread.


I’ve been in California for over a week helping my mom recuperate from knee surgery. This trip has been not been like my usual jaunts to California filled with friends and frequent trips to my favorite haunts. No, this trip has been all about my mom. (And bread, the bread must go on!)

I’ve actually been doing quite a bit of cooking, trying to make whatever appeals to my mom. There has been meatloaf. Two kinds of soup– chicken noodle one night, potato-leek just last night. And then there was this applesauce. I know what you might be thinking, is she really going to give us a recipe for something so base? Well, I am, but this applesauce was so simple, so delicious, it had me knocking my forehead, exclaiming why had I not thought of this before?

My mom was ensconced in pillows, her knee elevated, watching the Barefoot Contessa, when she remarked “That looks good.” I came into the room and briefly watched Ms. Garten work her magic with a pile of apples, peeled, cored, and cut into fourths. She tossed them with zest, cinnamon, and sugar, put them in a lidded Dutch oven, and popped them in the oven. In a little over an hour, the apples were tender, she took a whisk to the whole mess, and the apples broke down into sauce.
The next day I made a batch of applesauce, same method, different ingredients.
We had a bunch of apples lying around, and some had seen a better day. What could be better than to give them a new life in the form of sauce? The original recipe called for quite a bit of ground cinnamon. I’m not such a cinnamon fiend, so I jut used a few cinnamon sticks to scent rather than to season the applesauce.

My applesauce was finished in just under an hour of baking. Many of the apple chunks had completely fallen apart into sauce, and the rest I simply stirred into chunks– no whisk needed. The house smelled wonderful while the sauce was baking. The sauce was delectable– aromatic, slightly sweet, intensely appley. Baking the sauce was so easy, no scorched pot, you just pop it in the oven, and that’s it. I’ve definitely found my new standby.
Dutch Oven Applesauce
inspired by Ina Garten
6 apples, mixed variety, baking and eating, peeled, cored, and quartered
1 orange, zest and juice
2 tablespoons butter
2 teaspoons vanilla extract
1/4 cup brown sugar
2 cinnamon sticks
pinch of salt
Preheat the oven to 350 degrees.
Toss the apples and the rest of the ingredients in a lidded Dutch oven. It is not necessary to mix well. Cover, and bake for approximately 1 hour.
Apples should be very tender, and falling apart. If they are too firm, cover the pot again, and continue cooking for 15-30 minutes. Stir the apples well either with a whisk, or a spoon. Empty sauce into a dish, and enjoy either warm, or room temperature.

Recipe: Dutch Oven Applesauce
My mom lives in the San Francisco Bay Area and I live in Connecticut, but we talk on the phone all the time. This is how our conversations have gone as of late:
Mom: Hi, hon.
Me: Hi.
Mom: What did you do today?
Me: Made bread.
Or sometimes they go:
Mom: Hi.
Me: Let me call you back, I’m covered in dough!
Or :
Mom: Let me guess what you did today. Made bread? What kind was it?
You guessed it, I’m up to my eyeballs in breads; but it’s for a pretty good reason. I’m working on another cookbook, entitled United States of Breads. For those readers that have my first cookbook, United States of Pie, this book will be like my first—a celebration of regional, historical recipes from around the country.

I have scoured libraries, vintage cookbooks, newspaper clippings, and food-splattered memorabilia from across the nation in search of homey, satisfying, unique, and delicious bread recipes to bring into your kitchen. Some are for delicious standards like: buttermilk bread, sweet potato biscuits, and sourdough breads of all kinds. I have also updated classics for gooey monkey bread, corn breads, and Parker house rolls. I’ve found unique recipes for soft brown bread with grits, Amish dill bread, and raised pumpkin rolls, just to name a few. The list of breads is ever-growing!
In my research, I found that America has a wonderful tradition of bread baking. From baking powder biscuits, to quickbreads, yeasted rolls and sweet breads, as well as flatbreads, women have been proofing yeast, rolling out dough, and patting it into pans, for centuries, and I feel like the time has come to celebrate this work. So as much as I love a chewy baguette, forming a boule, or those crusty artisinal loaves, that’s not what United States of Breads is about. There are enough bread cookbooks that attempt to teach you how to make those kinds of breads at home. This book is for the home cook. The breads are sturdy. They are loaves. They are rolls and spirals. This book is for the cook that wants to sink her hands into a living, breathing pile of dough, the cook that yearns to come home to the smell of a fresh-baked loaf, the cook that gets excited by a pan of sticky buns.

At least that’s what I hope it will be!

For those of you that follow me on Twitter, @Adrienne_Kane, maybe you’ve seen me posting quite a few bread pictures lately. (For those of you that don’t—get on it!) Well, those pictures will definitely keep coming. I’ll start labeling them #USofBreads and #cookbook. I’ll also be posting pictures here on Nosheteria, entitled The Proof. That way you can check in and see how I’m doing, and just what I’ve been baking.
The manuscript is due in the fall. That means I only have a few seasons to go. So, if you’ll excuse me, I’ve got some bread to bake.

This is what we had on New Year’s day at my house:

And it was perfect!
The holiday season is over, and as much as I heartily welcome it each year; I am always ready to bid it farewell in January. Having the holidays fall on a a Tuesday this year really messed with my head. I can only handle merriment once a week and it’s usually on the weekend. Therefore, Monday felt like Saturday, and Tuesday was Sunday for sure! And Joe’s special is the perfect food to eat on a lazy Sunday– which is why we had it on New Year’s day. (Got that?)
Growing up in the San Francisco Bay Area I remember Original Joe’s, I don’t however remember Joe’s Special. Maybe that’s because when I was a kid, I didn’t like eggs. Yup, I wouldn’t eat them, especially scrambled, as they are in this dish. I am still quite particular about the egg. I much prefer them homemade than slung at me through a diner window, where they can often be too wet, and too chunky. But that’s not what you get in Joe’s Special, this is a dry, savory scramble.
I’ve grown up some. Now I understand the appeal of a scramble; they’re nourishing and wholesome– simplicity as its finest. While this dish of frozen spinach, ground beef, and scrambled eggs is hardly haute cuisine, it is a piece of Americana. Joe’s Special is easy, relatively quick, and delicious. The perfect dish to have for a Sunday supper, or a New Year’s day meal.

Joe’s Special
adapted from Saveur magazine’s 101 Classic Recipes
2 tablespoons olive oil
5 cloves garlic, minced
1 medium onion, finely chopped
8 ounces ground beef
1 10-ounce package frozen spinach, thawed and squeezed dry
8 eggs, lightly beaten with salt and pepper (truth be told, I used only 6 eggs)
1/4 cup grated Parmesan cheese
In a large, nonstick skillet, heat oil over medium-high heat. Add onion and garlic, season with salt and pepper, and cook until soft, about 5 minutes. Add ground beef, cook, breaking up into small pieces, until browned and all of the moisture has evaporated, about 5-10 minutes. Add spinach, and cook until heated through.
Add eggs, and cook, stirring constantly, until eggs are cooked, in small curds, and the mixture is mostly dry. Season with salt and pepper. Serve sprinkled with Parmesan cheese.

Recipe: Joe's Special

Today, it seems like everyone has an iPad, or a smart phone, or at the very least a laptop. If you want the answer to something you simply Google it, and in a matter of millionths of a second, you have pages (electronically speaking, of course) of answers. It’s instant gratification.
The same holds true for recipes. You want to bake a pie, or fry up some chicken, make a pot of spaghetti sauce, or sear a pork loin, and you turn to your computer to see how other people around the world have accomplished that task. (Some of you might also go to your bookshelf, and thumb through the pages of a cookbook to find a recipe, and as a cookbook author– I thank you!) Me, I do a little bit of it all: I use my computer, I scan through my cookbooks, and sometimes I just wing it. But I have to say, that I do love a handwritten recipe.
I have always been a culinary bibliophile, and in the past few years it has become a bit of a sickness. I haven’t quite reached hoarder proportions, but I love an old cookbook. The spiral-bound notebooks, the community association compendiums, and the books sponsored by women’s auxiliaries, all have a place on my bookshelf. And every once in a while I get a bonus feature in an old cookbook bought at a used bookstore– a book that has been lovingly used by another cook before me. Out will fall a crumpled, folded slip of paper, another recipe. I call these delights recipes within a recipe.

Rarely have I actually cooked from one of these (often times they don’t appeal), but they are like riding in a time machine, and peeking into another person’s kitchen. Like in this mimeographed (remember those?!) copy of LAZYMAN’S (beef) STWE, with all of its odd punctuation, and typographical errors, this recipe utilizes a variety of convenience foods. I think about the woman who cooked this dish in Osterville, Massachusetts. Why this stew? Was she working, and this dish, with its canned sliced mushrooms, was a time saver? Who was she cooking it for? Was this even a she? (Looking at the note scrawled at the bottom of the page, the cursive looks very feminine, though.)
There is something about a handwritten note tumbling from the spine of a book that makes me take a moment and reflect.
I love to go for walks in the evening. It can be very voyeuristic. As the hour goes from twilight to night fall, I watch people shuffle home. It is before they have drawn their curtains. As I walk along, I see my neighbors in their kitchens, beginning to prepare the evening’s dinner. I wonder what they are cooking, who they are are cooking for, and how their day was. To me, these handwritten recipes give me a similar feeling. Glimpses of a different time and place. A surprise in the ordinary. A mini history lesson. An exercise for my imagination.
I don’t find these recipes within a recipes everyday, or even all that often. But when I do they are a like a special gift. I read them. (Sometimes photograph them.) And then I fold them back up, and slip them back into the same book. When this book is no longer needed by me, I want others to find them, to have the same experience that I have. And I don’t mind that they may think that I stirred up a pot of Lazyman’s Stwe.

I am Adrienne Kane and I am a waffle snob. I like them light and crisp– airy almost. When they come out of the iron, and before they hit the plate, and steamy condensation sets in, the waffle must be dry and toasty, never soggy and chewy. I have found the only way to get the texture that I am seeking is with yeast. I thought that I had found the ideal raised waffle, that was until I looked back to 1896, and found one that I liked even more.

Sometimes oldies are goodies, and in the case of these raised waffles, from the Original Boston Cooking-School Cook Book 1896, this recipe is really old, so it must be really good. Right?
My first foray into the land of raised waffles was with Marion Cunningham. I had no problem waiting the requisite eight hours to let the yeast proof, and the batter rise. You just mix up the batter the night before, go to sleep, and finish it off the next morning. Cunningham’s recipe provides ethereal waffles each time, but she calls for an entire stick of butter to be melted and added to the batter.

Her addition makes a lovely, golden-brown waffle, but, dare I say it?– her waffles are a bit too buttery. The entire stick of melted butter was a bit alarming, but it was a weekend treat, so I went with it. But when I saw another recipe for raised waffles, I decided to give it a shot. The Boston Cooking School is downright abstemious in comparison, using just a tablespoon of butter, and it differs in separating the eggs, and beating the whites until stiff peaks form, and then folding them into the batter. This makes an even lighter batter, and light batter equals light waffle.

And I loved them! These waffles are everything I swoon over with raised waffles: crisp on the outside, yeasty and delicate on the inside. The perfect vehicle for maple syrup. And because of only the moderate amount of butter they were not too heavy.The recipe makes about eight waffles, depending on the size of your iron, but the batter will stay, covered in the fridge for a few days. I’ve found that the mixture gets more yeasty, and sour as time progresses– like a sourdough waffle, which I also love, but that’s another story.
Go ahead and give both recipes a try, and tell me which one you like better!
Raised Waffles 1896
adapted from The Original Boston Cooking-School Cook Book by Fannie Merrit Farmer
1 1/2 teaspoon yeast
1/4 cup warm water
1 3/4 cup milk, warmed (I use whole)
1 teaspoon salt
1 tablespoon butter, melted
2 cups flour
2 eggs, separated
Dissolve the yeast in the warm water. In a medium-size bowl, mix the milk, salt, and butter. Stir in the yeast mixture, and the flour. Mix until combined. Cover the bowl, and let rest overnight.
The next morning the mixture will be be bubbly. Add the egg yolks the batter, blending well. In a separate bowl, stiffly beat the egg whites. Fold into the waffle batter.
Cook as directed in your waffle iron.

Recipe: Raised Waffles 1896

Is everyone out of their turkey-induced haze?
Have you all thought of new and exciting ways to eat your Thanksgiving leftovers?
Are you hating turkey by now or are you still in love with the bird?
They, being magazines, cookbooks, the internet etc. tell you to average one pound of turkey per person for the Thanksgiving meal. I, ever dutifully (and thinking about how each person would like a little packet of leftovers), obliged to the extreme and allowed two pounds per person. But with the feast that lay before my guests last Thursday: two kinds of dressing, a duo of cranberries, mashed potatoes, yams, brussels sprouts with chestnuts, balsamic glazed onions, and gravy– lots of gravy, the turkey was almost inconsequential.
Don’t get me wrong, the bird was delicious! Burnished a lovely brown and basted with butter by me, and carved then reassembled magnificently by trusted guest. But I only had two little slices Thursday night, and was left with much more than the requisite pound of leftovers.
So there were turkey sandwiches, and of course a turkey pot pie. And then there is my favorite leftover of all– turkey soup. I am an organized cook– some might say I’m even a bit dogmatic. Thursday evening, post-dinner and pre-pie, the carcass always goes in a stock pot along with some aromatics and fresh water, then it simmers away into a rich stock. I drain the pot shortly after all the guests have left, the stock goes into the fridge, and then I tumble into bed. This is my Thanksgiving ritual.
The soup that’s made from the turkey stock changes from year to year. This time around I finely chopped leeks and celery, grated a few carrots, sprinkled in some chopped dill, and shredded what was left of the turkey. And then I made rivels and let the whole batch simmer away. What’s a rivel? Not quite a noodle, not quite a dumpling. Chewy. Sustaining, Carbohydrate-laden. Homey.
Need I go on?
I liked them more than chucking in some egg noodles, or a handful of rice. If you’re going to go through the trouble of making stock, don’t you also want to complete the task by making something delicious and homemade? I can tell these rivels will become a mainstay in my recipe repertoire this season, maybe they’ll become one for you as well. Go on, enjoy some rib-sticking soup!
Rivels
from From Amish and Mennonite Kitchens by Phyllis Pellman Good and Rachel Thomas Pellman
1 cup flour
pinch of salt
1 egg, beaten
1/4 cup milk
In a medium-size bowl, combine flour and salt. Add egg, stirring to combine. Add milk. Work the dough, clumping mixture together making crumbs of different sizes.
Drop the rivels into boiling soup, stirring the soup continually so the rivels don’t pack together. Simmer for approximately 15 minutes, or until rivels are plumped and cooked through.
Rivels will continue to adsorb stock, so additional stock may be needed when reheating any leftovers.

Recipe: Rivels (little dumplings)
I know that it’s almost Thanksgiving. (Gobble gobble, to all of those omnivores out there!) Most of you already are busy planning and cooking your meal. You will have the much-loved side dishes to be paired with the turkey: stuffing is a definite, most likely you’ll have mashed potatoes, maybe you’ll indulge in some creamed onions. While baking an additional pot of baked bean, might be too large an undertaking for you this holiday, I must leave you with this one final recipe before we sign-off for turkey day.
Beans? You might be saying. She’s leaving us with a bean recipe? Yes! These slow-cooked beans were that good.

I hadn’t had baked beans in years. And, come to think of it, I don’t know that I had ever eaten a true pot of baked beans. The baked beans I had eaten came from a can. They were shiny, and coated in a saccharine liquor. Frankly, I was not such a fan; maybe that’s why I hadn’t eaten them in so long!
But over the weekend I wanted to cook something warm and satisfying– something that tasted homemade, without being much fuss, that would be a harbinger of the week to come. So I soaked a pound of navy beans, and broke out my Grandma’s old, cast-iron Dutch oven. After a few hours of baking, what I had was not the sticky-sweet beans of my childhood– it was something much, much better.

I guess the word that most aptly describes these baked beans is moderation. They were moderately sweet, with just a few tablespoons of brown sugar, and a few tablespoons of molasses. They weren’t a side dish, they were my supper. With a slice of brown bread, and a kale salad they were the ideal close to a weekend filled with planning for the upcoming holiday meal.
Have a wonderful Thanksgiving! I understand if this bean recipe is cast aside in favor of more traditional holiday accoutrements, but remember it for when the holiday’s over. When you’re in need of some soothing this winter season, this dish hits the spot!
Baked Beans
1 pound dry navy beans
1/2 pound apple-cured bacon, chopped
3 tablespoons brown sugar
3 tablespoons molasses
1 1/2 teaspoons dried ground mustard
5-8 cups water
salt and pepper, to taste
Soak the beans overnight. The next day, drain and rinse.
Preheat the oven to 325 degrees.
In a large Dutch oven, mix beans, bacon, brown sugar, molasses, and mustard. Pour in water, enough to cover the beans by about an inch. Cover the pot with either a lid, or a piece of foil. Bake 2-3 hours, checking the beans every hour to make sure there is still enough liquid to cover. If the pot begins to get dry, add additional boiling water.
After about 2 hours begin to check the beans for softness. (I do this by tasting a few beans at a time.When all of the beans are soft, they’re done.) When the beans have softened sufficiently, season with salt and pepper, and remove the cover. Continue to bake for 45 minutes, stirring the beans occasionally. This ensures that bacon browns sufficiently, and excess liquid is cooked out.
Remove pot from the oven, cover, and let cool a bit. The beans will suck up more liquid as they cool. Eat either at room temperature, or reheat. More water can be added to loosen the beans to desired consistency.

Recipe: Baked Beans
I mentioned last week that I would be doing a local television spot. Well, I did it; and it’s up on-line. The host and I chatted about pumpkin pie (complete with roasting your own pumpkin). Then I demonstrated making the filling, which couldn’t be any simpler. If you’re looking for a holiday dessert recipe, this one is a classic– rich and delicious.
For those of you in the New Haven area, I am also appearing at the main branch of the New Haven public library to talk pie tomorrow at 6 pm. There will be samples, so come down, I’d love to see you!

It’s November, and Thanksgiving is early this year. If you’re anything like me, you’re already making mental checklists of everything you want/need (really, is there any difference?) to cook and bake for this holiday that beats all other holidays, culinarily speaking.
I’ll be baking a pie this week on local television. (For those of you who want to see the segment, I’ll link to it when it’s on-line.) In preparation for Thanksgiving, and since I now reside in New England, birthplace of the pumpkin in this country, I’ll be making the fall classic– pumpkin pie.

But this post is not about the pie part of pumpkin pie; it’s about the pumpkin. For those of you who have never roasted a pumpkin, I implore you to give it a try this year. Homemade pumpkin puree is richer, smoother, more pumpkin-y. It really is delicious– and so easy to make there is hardly a recipe for it. You just have to make sure that you buy the correct type of pumpkin. You don’t want to eat the jack-o-lantern sort (very stringy!), you want a sugar pumpkin, also known appropriately as a pie pumpkin.
These are the diminutive, round sort, that are found in the produce section of your supermarket, or at farmer’s market this time of year. They usually weigh between 3 and 5 pounds.
To roast a sugar pumpkin, preheat the oven to 375 degrees. With a sharp knife, cut off the stem end, then slice the pumpkin in half. Scoop out all the guts, and discard them. Place the pumpkin, cut side down, on a baking sheet. Roast for anywhere from 45-70 minutes. The time will depend on the size. You want the pumpkin to be soft, and completely cooked. You should be able to pierce it easily with a fork.

When finished, the skin should simply peel from the flesh, but let the pumpkin cool slightly, you don’t want scorched fingertips. Puree the pulp until smooth in a food processor. The next step is a bit time consuming, but in my opinion, very important. You have to let the puree drain for a few hours, or overnight, in a cheesecloth-lined colander. Pumpkin contains a lot of water– too much water, if you ask me. If you’re going to use the puree for pie filling, you want it as concentrated and dry as possible. Draining the puree is necessary so the filling doesn’t lead to a soggy crust.

Once the draining is complete, you’re good to go. The puree lasts in the refrigerator for a few days, or it can be frozen for a few months. Give roasting a pumpkin a try– your pies will thank you!

Recipe: Pumpkin Puree
- Cashews with Indian Spices
- Chocolate Guinness Cake
- Pie in Connecticut
- Cheese Blintzes
- Black Bottom Cupcakes
Now Available
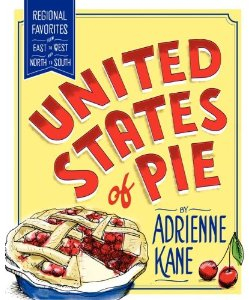
A new cookbook of regional heirloom American pies, from long-lost recipes to classic favorites, sweetly illustrated and chock-full of time-tested baking tips and secrets for perfect pies.
"This colorful, varied collection by a blogger, recipe developer, and food writer may well be the definitive resource on the all-American pie." --Publisher's Weekly
Recent Posts
Search
Categories
- Baking
- Breads
- Breakfast
- Fruits
- Meat/Fish
- Misc.
- Pasta
- Press
- Salads
- Sandwiches
- Soups
- Sweets
- Uncategorized
- Vegetables
Archives
Twitter Feed
© 2025 wordpress test site
all rights reserved
all rights reserved