October 23rd, 2012

Potato Leek Soup Plus

There is something about potato leek soup that is humbling. It’s cold outside and you pour yourself a cup. You slurp it down while wearing fingerless gloves. Maybe you’re in a barn. It is dusk. Dark clouds are rolling in. It is all very Dickensian.

Humor me.

That might be the potato leek soup that is composed of three ingredients– leeks, potatoes, and water.

But this is the potato leek soup that is made on a Sunday afternoon, at the close of a full weekend. You may be miles away from a barn, but it is still humbling… and satisfying to boot. There  are more than three ingredients in this recipe, but not too many more. In fact, the soup comes together in under an hour, always a welcome direction when you’re busy.

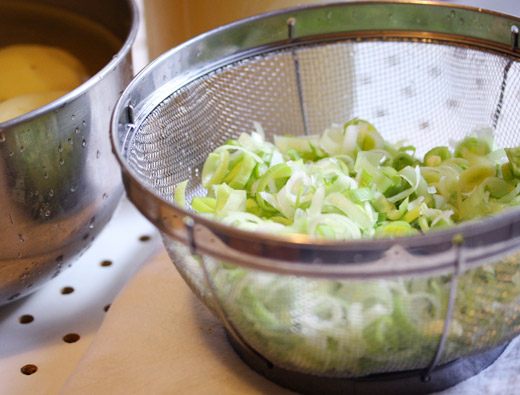
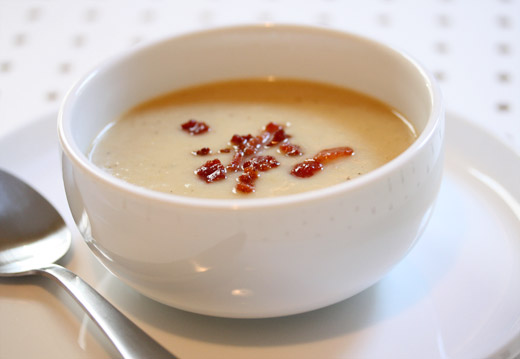
So let’s get down to the “plus” business. Well, there’s stock used instead of water. This adds another dimension of flavor. I also use a bit of bacon. Chopped into bits, and then rendered, I use the fat to saute the leeks. I also add about a tablespoon of Dijon mustard to the sauteed leeks. This adds a different dimension of heat– the kind that tickles the back of your throat. Then I add the potatoes. I use a waxy variety, like a sweet yet earthy Yukon Gold kind. I simmer this concoction until the potatoes fall apart, then I continue to puree the soup with an immersion blender. Finally, the piece de resistance, after turning off the heat, I add 1 cup of grated, sharp cheddar cheese.

The residual heat from the soup melts the cheese, which lends a salty, savoriness. The cheese doesn’t get melty, and stringy–French Onion Soup-style– rather, the flavor of the cheddar is simply absorbed into the soup. Delicious, right?

I promise this soup is warm and homey, even if you live in a hi-rise apartment building, you have to cut the fingers off of a pair of gloves, and you haven’t read any Dickens since sophomore year of high school!

Potato Leek Soup Plus

Olive oil
2 slices bacon, chopped
1 tablespoon Dijon mustard
3 cups sliced leeks, white and light green parts only
2 pounds Yukon gold potatoes, peeled and chopped into large chunks
4 cups chicken or vegetable stock
1-2 cups water
1 cup grated white cheddar cheese
salt and pepper, to taste

In a dutch oven, over medium heat, heat a bit of olive oil. Add the chopped bacon, and fry, stirring frequently, until bacon is crisped and fat is rendered. Remove the bacon with a slotted spoon and drain on paper towel-lined plate. Leave the fat in the pot.

Add the leeks, and a bit of salt. Saute until wilted. Add in the mustard, mixing thoroughly. Add the potatoes, mixing well with the leeks. Pour in the stock and 1 cup of water, and bring to a boil. Reduce heat to a simmer, partially cover, and let cook for 30 minutes. After time has elapsed, potatoes should be tender, and falling apart.

Remove pot from heat, and puree with an immersion blender until smooth. If soup is too thick at this point, add another cup of water. Sprinkle in cheddar cheese, stirring well to blend completely. Season with salt and pepper, and serve sprinkled with bacon bits.

Any leftovers, can be stored in the fridge, and reheated, cheese and all, with no problem.

Pin It

I am American. As if you didn’t know that from the title of my latest book, or the subheading of this site. But another way to tell my nationality is my undying love for all things peanut butter. THIS is the true way to tell when you are dealing with an American.

I ‘ve found that people of different cultures don’t really understand what all of the peanut butter fuss is about. Some even think it’s kind of gross– the horror! I have an Israeli friend who feels only moderately about the spread. There is an English friend of mine who detests the stuff, and her son, while born in England, has lived half of his life in the states– even he can’t stand peanut butter. What can I say, there must be something genetically amiss! I cannot imagine my childhood without peanut butter and jelly sandwiches. But, I will be culturally sensitive. More peanut butter for me, and for all of the other peanut butters junkies out there!

Which brings us to this recipe; it’s been bookmarked in my recipes folder for quite some time. I finally got around to making this dessert last weekend, when I was in charge of the dessert course at a dinner party. This recipe combines another combination made in culinary heaven– peanut butter and chocolate. Think of the Reese’s Peanut Butter Cup, now think of it in bar form.

They were amazing.

The blondie part of this concoction was the peanut butter. It’s important that you use the natural style, or what I like to call, the good-for-you peanut butter. While Skippy has its merits, because this is the only peanut butter flavor in this dessert, you want the unadulterated peanut butter. The blondies are moist and chewy, and baked just with brown sugar so they stay that way.

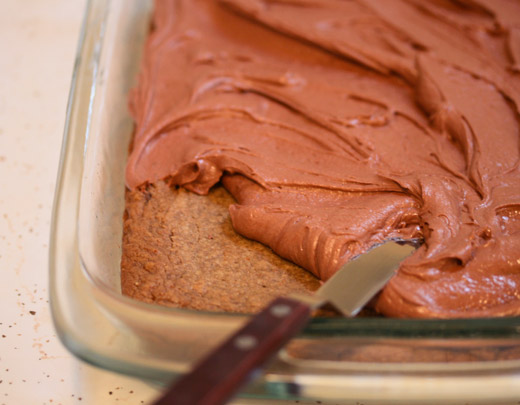
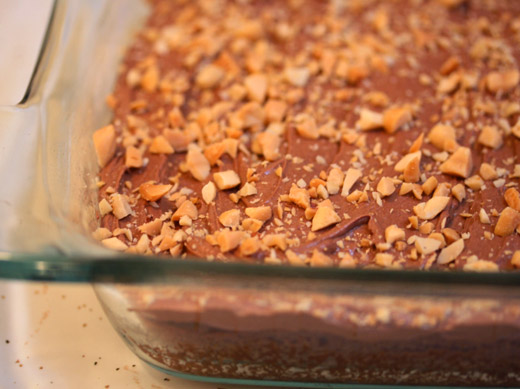
The milk chocolate frosting couldn’t be simpler– basically melted milk chocolate chips and cocoa (and yes, butter too). And the recipe makes plenty of frosting. You’re not skimping here; you’re not just reaching the corners of the baking pan. There is enough chocolate to go around! The only amendment I made to the recipe was a sprinkling of coarsely chopped, salted peanuts. Because that’s how I roll when it comes to my desserts.

Peanut Butter Blondies with Milk Chocolate Frosting
from Joy the Baker

Peanut Butter Blondies

10 Tablespoons unsalted butter cut into 5 cubes
2 cups dark brown sugar
1 cup smooth and natural peanut butter
2 eggs
2 teaspoons vanilla extract
1/2 teaspoon salt
2 cups flour
1 teaspoon baking powder

Preheat oven to 325 degrees F. Grease a 9×13-inch pan, line with parchment paper if you have it on hand, then grease the parchment paper. If you don’t have parchment paper, these blondies will be just fine.

In a medium saucepan over medium heat, melt butter and sugar together until the butter is just melted. Remove from the burner and allow to cool for 5 minutes, then add the peanut butter. Stir until incorporated. Allow to cool for 5 minutes more, then whisk in the eggs and vanilla extract. You want the sugar, butter and peanut butter mixture to be cool enough that the eggs won’t begin to cook when they’re added in.

Whisk together salt, flour and baking powder. Add dry ingredients all at once to the wet ingredients. Stir until just incorporated. Pour the thick batter into the prepared pan and smooth out. Bake for 20-25 minutes, or until a skewer inserted in the center of the blondies comes out clean. Remove from the oven and allow to cool to room temperature before frosting.

Milk Chocolate Frosting

6 Tablespoons unsalted butter, softened
3 Tablespoons unsweetened cocoa powder
1/4 teaspoon salt
1 1/2 – 2 cups powdered sugar
3 Tablespoons milk
3/4 cup milk chocolate chips, melted
chopped salted peanuts, optional

In the bowl of a stand mixer, beat together the butter, cocoa powder and salt. Add 1/2 cup powdered sugar followed by 1 tablespoon milk. Beat well. Add another cup of powdered sugar, followed by 2 tablespoons of milk. Melt milk chocolate chips in the microwave or in a double boiler. Add melted and slightly cooked milk chocolate the frosting and beat to incorporate. Add the final 1/2 cup of powdered sugar if you need a bit more thickness. Spread evenly over peanut butter blondies. If using, sprinkle with chopped peanuts

Pin It
October 10th, 2012

Pie Dough 101

Flaky, buttery, short, and golden brown– pie dough can be the thing that turns a pie from simply a good dessert to truly a great masterpiece. But dough seem to be the most intimidating process for many home bakers. Whenever I teach a class, or give a demo, there are always a multitude of questions about the ingredients, the process, and hints for making that pile of flour into a delicious dough. Undoubtedly, there are more than a few home bakers that will raise their hands, and timidly state, “I have made a pie before, but I just buy the pre-rolled, frozen crusts. Dough scares me.” I understand, but that’s such a shame. If you’ve gone through the trouble of making a filling, don’t you want to make the dough as well?

So I knew that I wanted to pay special care to the chapter on pie dough when I wrote my book. Dough does not have to be scary; the rolling pin is your friend. With a bit of practice, just a bit, you will be rolling out pie dough like a pro. I swear. While I can’t leap out of the computer screen, and climb into each and every one of your kitchens, I’ve decided to give pictorial example of each step, along with some helpful hints. (That’s the next best thing, right?) The recipe I tell my beginning students to start with is my recipe for Standard Pie Dough. I’ve used it elsewhere on this site, but the recipe is at the bottom of this post as well.

Let’s begin, shall we?

The first thing to do is aerate your dry ingredients (flour, sugar, and salt), with either a whisk, or you could sift them all together. You want your dough flaky and light, and one way to ensure this is to mix them well, and to incorporate air.

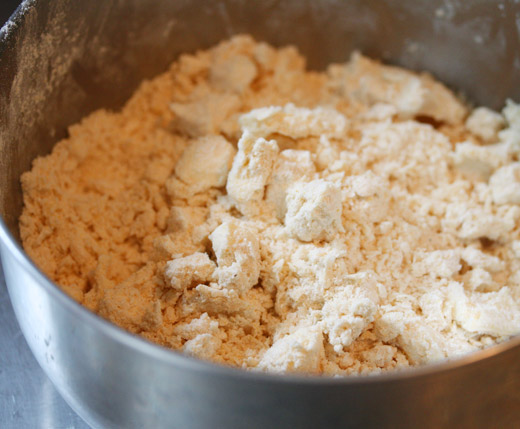
Next you incorporate fats, in this case shortening and butter. I know that some cooks would never use anything as pedestrian as vegetable shortening. Well, in this case, I do– butter for flavor, and shortening to ensure flakiness in the finished product. For beginning bakers, I find cold shortening more pliable, more lenient, and a bit easier to work with  than all butter. The fat is cut into 1/2 inch chunks, and tossed in the dry ingredients. Then you want to work the fat into the flour mixture, always with your hands. Some cooks swear by a mixer, or food processor; I swear by your hands. In the finished crust, melted fat is what creates the flakes. You want some disparity in the size of fat pockets in the dough. That is most easily achieved by blending the fats with your hands. A machine works too quickly; it is too mechanized. You want an end result where the mixture that looks nubby, like gravel.

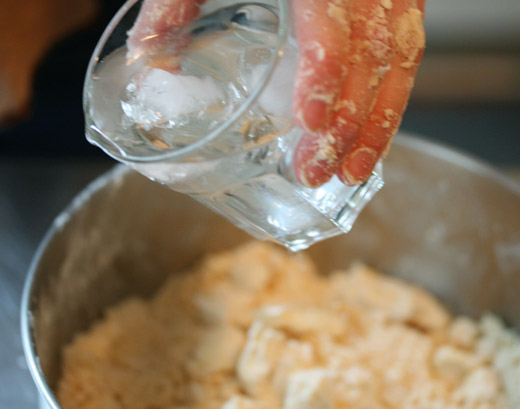
Next you add the ice water. If I haven’t said this enough, everything must be cold. This step is one of the most frustrating for beginners, because rarely will the amount of water added be the same. The ratio changes due to external temperature, humidity, the size of the fat chunks that were added, etc. It’s usually between 6-10 tablespoons though, and not less than than 3. Water should be added a little at time. You don’t have to be gentle. In fact, you want to be working as quickly possible, handling the dough very little at this point. You don’t want to knead the dough, as much as pat it into a mass. Still with me?

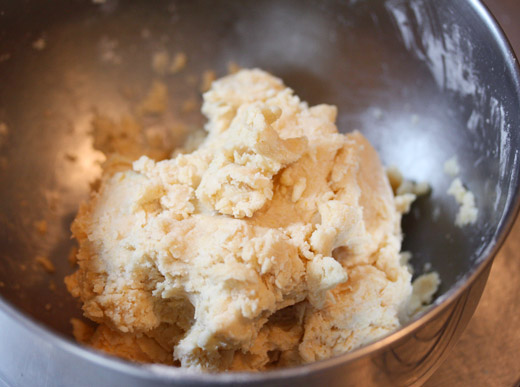
How do you know when you’ve added enough water? See how the dough is cleaning the sides of the bowl. See how it now is more of a mass, than just a bowl of ingredients. Those are good signs. The dough should not be as sticky. Maybe you heard a little squish sound as you were bringing the dough together. Those are all good signs. I have found that it’s better to add a bit too much water than too little when making dough. Having a dough that’s too dry will be difficult to roll out, it will tear and be sticky. When a dough is wet, you will only need to make sure your rolling surface is well-floured.

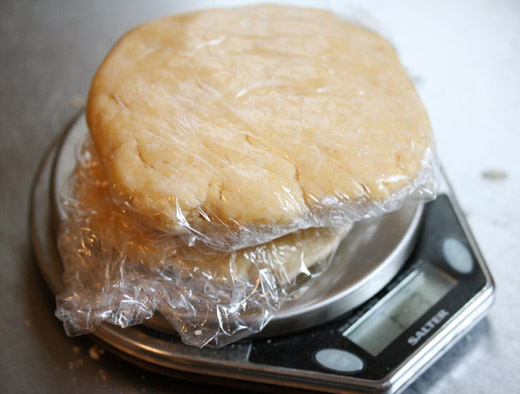
Last step is to separate into rounds, press the dough together, and wrap in plastic. Then you need to let rest in the fridge. This is an important step. You’ve played with the dough for awhile; it’s important to let the gluten in the flour relax before rolling it out. This will also contribute to a short and flaky dough. The dough needs to rest for a minimum of 1 hour, but will last in the fridge for 2 days. It can also be frozen for up to one month. Just defrost it in the fridge before use.

Got it? Get baking!

Standard Pie Dough
from United States of Pie

2 cups all purpose flour
2 tablespoons sugar
1 teaspoon Kosher salt
6 tablespoons unsalted butter, chilled and cut into ½ inch cubes
6 tablespoons vegetable shortening, chilled and cut into ½ inch cubes
6-10 tablespoons ice water

Makes enough for one 9-inch double-crusted pie, or two 9-inch pie shells.

In a large bowl whisk together the flour, sugar, and salt until well blended and free of lumps. Add the butter and the shortening to the flour mixture and toss gently to coat. With your fingertips, blend until the mixture resembles a coarse meal. Work the fats into the flour, rubbing the larger pieces of butter and shortening between your fingers until the mixture resembles gravel.

Sprinkle on the water, one tablespoon at a time, starting with 3 tablespoons, then gradually adding more water if needed. Blend with your fingertips, as little as possible, pulling the meal together and creating a dough. The dough will become less sticky, and more of a mass when enough water has been added. Finally, knead minimally in the bowl to make sure the dough has just enough moisture.

Separate the dough in half. (One mound of dough should weigh approximately 10½ ounces.) Place each half on a sheet of plastic wrap and seal. Gently form into a disk, roughly ¾ inch tall. Place the wrapped dough in the refrigerator for at least one hour or up to two days before rolling out. Dough can be frozen for up to 1 month, and defrosted in the refrigerator before using.

Pin It

My mom always made the best Rice Crispy Treats– me, not so much. It’s taken approximately 33 years to make a treat that rivals hers. I know, you’re probably reading this and thinking, just follow the directions on the back of the box, and there you go. But my mom’s are great– gooey, chewy, sometimes they have chocolate chips mixed in. Maybe it was just that I thought mine sucked, that made hers all the better.

Her recipe is not a secret. She would tell me that she just used more butter, a whole bag of mini marshmallows, and however much cereal she liked. And she worked fast. Getting the rice crispy goo into the pan in a speedy fashion was key.

So this week I decided to give the Rice Crispy Treat another try. But never one to leave well enough alone, I modernized the treat with the addition of brown butter, and a little extra salt. And these cereal bars were, in one word, amazing. And addictive. There’s another word for you!

I did as my mother told me, and I added more butter– in this case, a lot more butter. While I suppose you can make Rice Crispy Treats with just a few tablespoons, I wanted this to be a rich dessert, redolent of brown butter– so I added a stick. I slowly browned the butter, waited until it got that nutty aroma, and that warm brown tone, tossed in some kosher salt, and melted an entire bag of mini marshmallows.

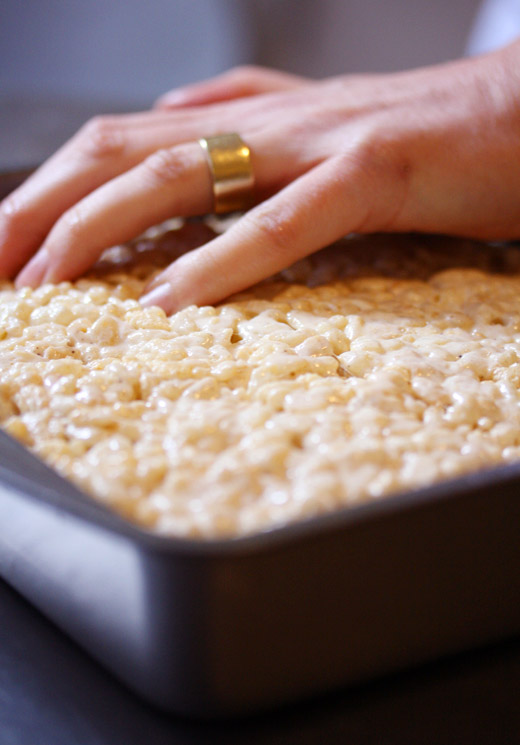
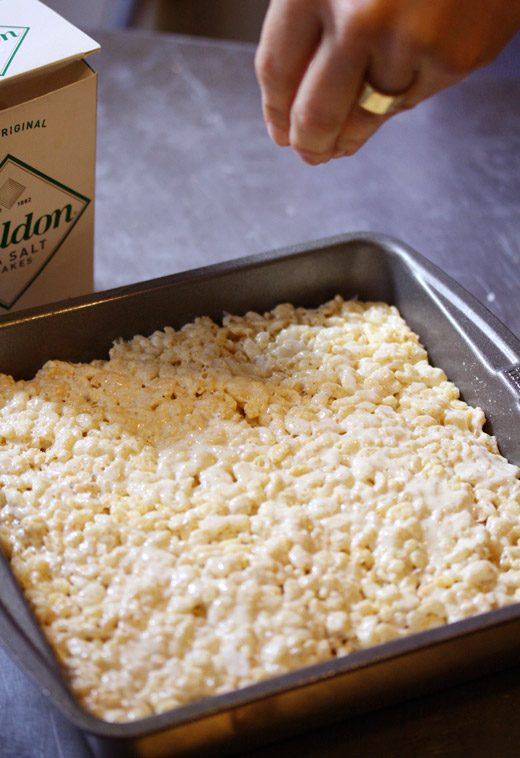
The marshmallows made a lustrous creme, I chucked in the cereal, and coated each piece of cereal in the goo. Working quickly, I pressed the cereal into the pan. Then I upped the ante  by sprinkling the top with a bit of Maldon salt.

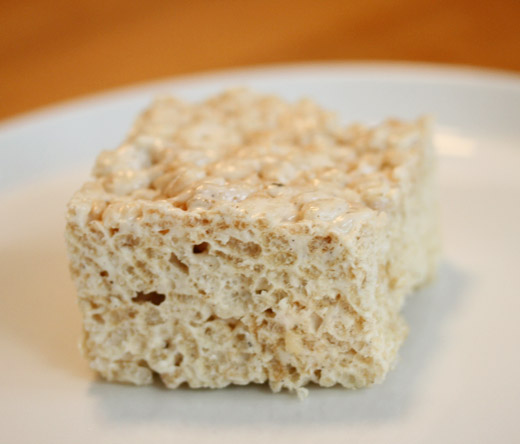
While these weren’t the Rice Crispy Treats I grew up with, they maybe… just maybe, were better. They were Rice Crispy Treats plus. Sweet, salty, delicious, oh! and I almost forgot to say, SO easy to “bake.” They take just a few minutes to have a little piece of decadence.

Brown Butter Rice Crispy Treats

If you choose to sprinkle Maldon, or fleur de sel on the top of these treats, as I did, I would cut down on the use of kosher salt in the marshmallow goo to 1/8 teaspoon. If you’d like to omit the Maldon, use 1/4 teaspoon.

1 stick unsalted butter
1 10-12 ounce bag mini marshmallows
1/8-1/4 teaspoon kosher salt
6 cups crispy rice cereal
sprinkling of Maldon salt (optional)

Lightly grease a 9-inch pan. Set aside.

In a light-bottomed pot over medium heat, melt butter. Continue to cook, swirling the pan occasionally, until butter begins to brown, and emits a nutty aroma, about 5-7 minutes. Turn off the heat. Add the marshmallows, and stir, until melted smooth. There should be enough residual heat in the pan to do this.

Add the cereal, stirring well to completely coat. Pour the mixture into the prepared pan, and working quickly, press the cereal together, and evenly into the pan. If using, sprinkle the surface of the treats with Maldon. Wait until cooled, about 1 hour, and enjoy.


Pin It
September 26th, 2012

Plum Busy-Day Cake

I love dessert– a tall layer cake, a slice of pie (duh, I wrote a book about that one!). I’ll even take a cookie. But what I really love, are trustworthy, un-embellished, not-too-sweet, single layered, coarse crumbed cakes. My friend calls these cakes abstemious– but he’s a wordsmith.

I have a few of the recipes that I fall back on time and again. The French yogurt cake is a delicious standard. There is a lemon glazed beauty (also with yogurt) that is as good for afternoon tea as it is for dessert. But the recipe that I find myself returning to, and yes, toying with ever so slightly, is Edna Lewis’s Busy-Day Cake from her marvelous book, The Taste of Country Cooking.

I don’t know about where you live, but here in CT, we still have plums, and better yet, we have Italian prune plums. This type of plum is perfect for baking, but not so much for eating out of hand. The fruit comes away from the stone easily, they hold their shape well in the oven, and the flavor truly concentrates, making a scrumptious, plummy elixir. When I saw them at the market, I knew that a cake must be made with them.

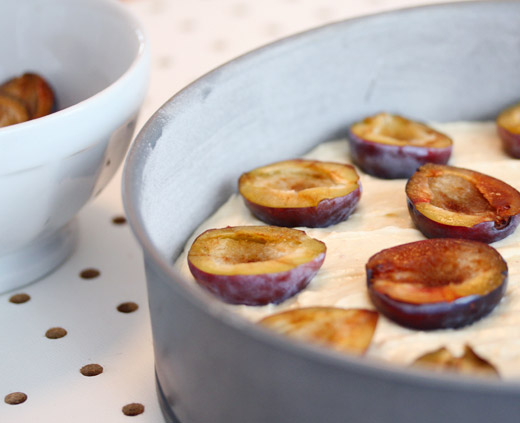
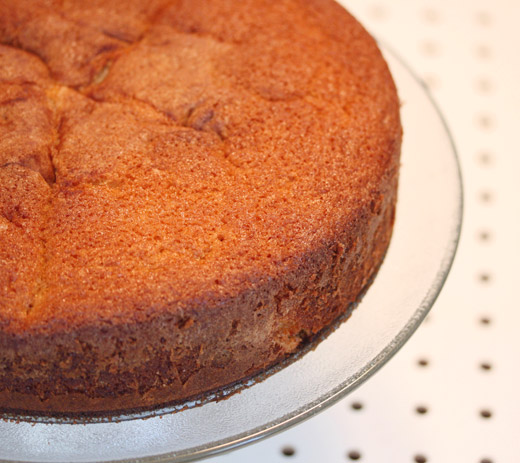
I decided that a Plum Busy-Day Cake would be the best option for the fruit. I also had a bit of almond meal, and substituted that for some of the flour, figuring it would give the cake more of a nubby texture, rather than a nutty taste. So, I laid out my half-plums on top of this amended batter, dusted it ever-so slightly with some cinnamon-sugar, and popped it in the oven. 40 minutes later this is what I got:

Where did my plums go; all of them sunk!

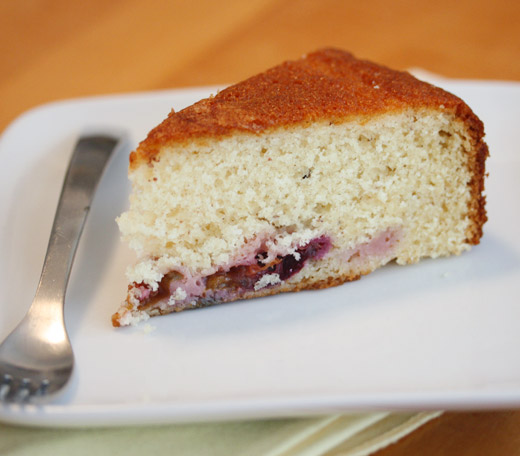
The baking powder, and there is quite a bit in this cake recipe, activated, but the batter wasn’t sturdy enough to withstand the plums on top. Each fell towards the bottom of the cake.

But the plums turned out to be a delicious surprise. They’re a jammy, sweet-tart layer at the bottom of the cake. The cake still sliced beautifully, the almond meal was delightful, and the cake, while not what I expected, was a homey treat.

Plum Busy-Day Cake
adapted from The Taste of Country Cooking by Edna Lewis

8 tablespoons unsalted butter, at room temperature
1 1/3 cups granulated sugar
3 eggs
1 3/4 cups flour
1/4 cup almond meal
1/2 cup whole milk, at room temperature
1/4 teaspoon salt
2 teaspoons vanilla
4 teaspoons baking powder
light grating of nutmeg
8-10 Italian prune plums, halved
sprinkling of cinnamon-sugar

Preheat the oven to 375 degrees. Butter and flour a nine-inch springform pan, an set aside.

Using an electric mixer, beat the butter and sugar together until light and fluffy, about 3 minutes. In a separate bowl, whisk the flour and the almond meal together. Add in approximately 1/2 cup of the flour mixture, and beat until combined. Then add approximately 1/4 cup of the milk, and blend until well combined. Continue adding in the flour mixture, followed by the milk mixture in 4 parts, ending with the flour mixture. Add the salt, vanilla, baking powder, and nutmeg, and mix well.

Pour the batter into the prepared pan. Smooth out the batter, and then place the plums, cut side up, in concentric circles. They will not touch. Sprinkle lightly with cinnamon-sugar.

Bake for approximately 40 minutes, or until golden brown, and a toothpick inserted in the center of the cake comes out clean.

Pin It
September 20th, 2012

Little Red Hominy with Cheese

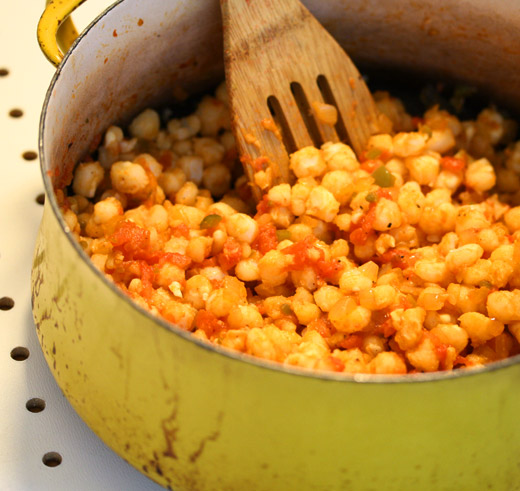
I must admit, it was the name of this casserole that got me at the start. It reminds me of nursery rhymes. As I glanced through the list of ingredients, trying to determine how the recipe got its moniker, I realized that the “little red” was in reference to the light tomato sauce that’s made in which to stew the hominy. Simple enough. Now I felt a little slighted by the name, but the recipe did look good.

I am not big on casseroles. It’s not that I don’t like a one pot meal, it’s just that I don’t think that everything has to go together, but this casserole was more of a side dish– a side dish I could do.

So I just popped out to the store to pick up a can of hominy. Who knew that would be the most difficult part of the assembly? Hominy was nowhere to be found at my regular grocery store. They had canned corn, they had grits, but I was out of luck for hominy. So I went to a Mexican grocery and found one, lone can. That was all I needed!

For those that have never tried hominy, or don’t know much about it, I always describe it as bloated corn. It’s popular in the Southwest, and in Mexico. Corn is soaked in a water bath of calcium carbonate, or lye, the kernels swell, fall from the husk, and they develop a smoky, intense flavor. I know that bloated anything may not sound so appetizing, but I assure you it’s delicious. If you like corn tortillas, made from masa harina, which is ground hominy, you will like whole hominy. While you can find hominy dried (requiring you to soak generously), it is usually found, ready-to-cook, in a can. This recipe called for the canned variety, so I was in luck.

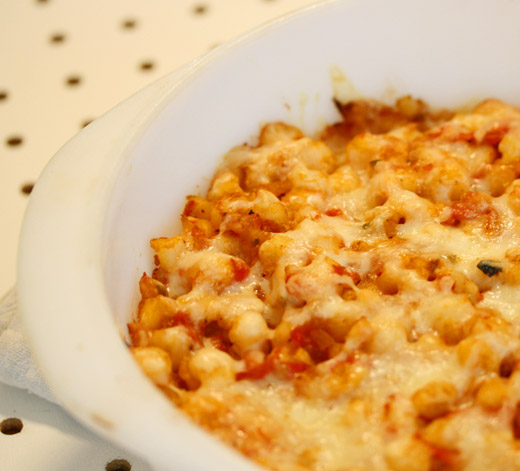
The casserole, made with pickled jalapeno, tomatoes, and Monterey Jack cheese has a Mexican-American feel to it. It’s slightly spicy, a bit cheese-y, and totally satisfying. I really liked it, and I’m not even a casserole queen. If you are, go wild with it!

Little Red Hominy with Cheese
adapted from The Grains Cookbook by Bert Greene

2 tablespoons butter
1 medium onion, finely chopped
1 clove garlic, minced
1 cup tomatoes, peeled, seeded, and chopped
1 teaspoon tomato paste
1/2 teaspoon sugar
1 large pickled jalapeno, diced
1 large can (29 or 35 oz) hominy, drained and rinsed
salt and pepper
1 1/4 cup Monterey, Jack cheese, grated

Preheat oven to 350 degrees.

In a Dutch oven, over medium heat, melt the butter. Add the onion, and saute until translucent, season with salt and pepper. Add the garlic, and cook until fragrant. Stir in the tomatoes, tomato paste, and sugar. Cook for 5 minutes. Add the pepper, and continue cooking, stirring occasionally, for an additional 5 minutes. Sauce should be chucky, and mostly cooked. Stir in the hominy, and season with more salt and pepper. Remove from heat.

Add about 3/4 cup of cheese to the hominy mixture, thoroughly mixing. Pour hominy mixture into buttered casserole, spread evenly, and top with remaining cheese.

Bake for 45 minutes, remove from oven, let stand for 5 minutes, then serve.

Pin It
September 17th, 2012

Dessert Course

Last week I was in Philadelphia. Not for vacation, not to see the Liberty Bell, nor Reading Terminal Market. I was in class. QVC class. Yep, in a few months I’m going to be on that famed shopping network promoting my cookbook. (Aaaahhh! Live television gives me the vapors!) But before I can do this, I had to get trained in the nuances of what it means to be on television– QVC -style. That meant a trip to the Philadelphia area, which is where QVC is located, and a long and grueling day of media training.

Now I’m not complaining. I needed it. And it was only one day, but by the end, I was in media overload.

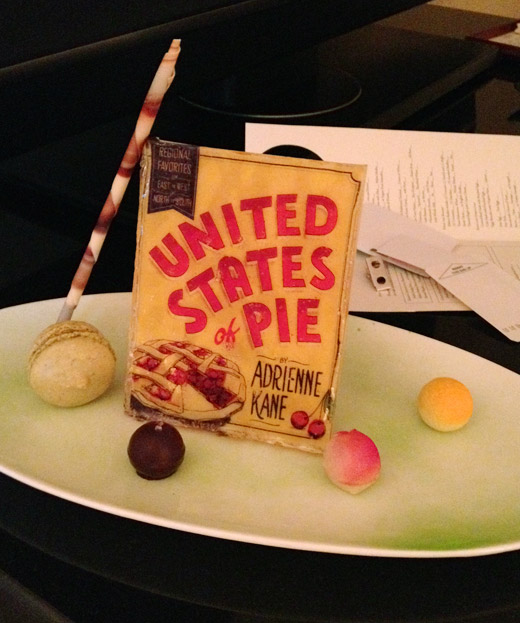
That evening, after sitting in traffic on the expressway, then fighting more traffic in the city, I was more than happy to fall backward onto my cushy king-sized hotel bed overlooking the Philadelphia Art Museum. So I ordered room service (something I haven’t done in quite awhile). When the waiter came to my door a half hour later, I expected to see my salmon entree. It was there alright, with a little something extra too.

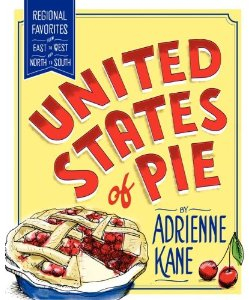
Excuse the dim photograph. And excuse the backdrop of the flat screen television, and the stack of papers behind. But what you are looking at is a copy of the cover of my cookbook superimposed on a giant slab of white chocolate, coated in gelatin. Oh yes!

There were some bonbons, and a macaron, but the piece de resistance was that replica. I didn’t quite know what to do, so I just thanked the waiter profusely, and chortled embarrassingly. I guess the pastry chef must have had some extra time and some extra chocolate on her hands that day.

As I finished my salmon that night, and was about to dive into my dessert course, I found that the replica was one of those edible, inedible foods, kind of like fondant, but the bonbons were delicious. Good thing that I ordered room service that evening! Who knows what would have happened to the replica of United States of Pie?

Pin It
September 11th, 2012

Penne alla Vodka

Last year my dear friend moved away. And he left me booze, a lot of booze. This friend was not implying anything about my alcohol consumption, it was just that he was moving cross country. You know how grumpy police can be about traveling with open containers, especially over state lines. So when he moved, I became the owner of the remnants of his well-stocked bar.

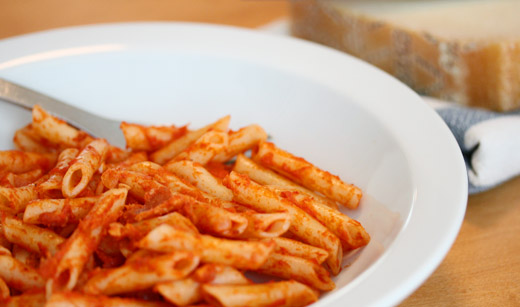
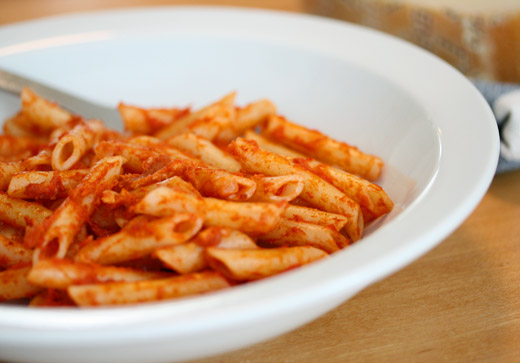
Most of it is gone, save for the rhubarb and the orange bitters (a little goes a long way!), and a very large bottle of vodka. I am not much of a vodka drinker. If given the choice between a vodka or gin martini, the gin wins out every time. So I’ve begun to search for ways to use up my vodka. And one of the best things to cook with vodka has got to be Penne alla Vodka, essentially marinara sauce, enlivened with vodka, and enriched with cream.

Growing up in California, I had never seen or tasted this Italian-American classic. Sure, in the Bay Area we had the usual checkered tablecloth, candle in the empty Chianti bottle joints. They served the delicious standards, meat balls, bolognese, and pesto sauces, each with a cloth napkin to slip under your chin to protect from splatters. But that rich sauce, with the bite of vodka was something that I hadn’t really tried until I moved to the East Coast where it seemed to be a standard.

Of course, as with most any popular dish, the origins are up for debate. There is some specious talk of this pasta dish actually being Italian, from Bologna or even Rome. But food historians largely claim this classic as an Italian-American standard hailing from New York City around the mid-1970s or 1980s. To me, this seems like the most likely assertion. Pink pasta– only in America!

The dish can be made vegetarian with the omission of pancetta, but I enjoy the salty bite. While this dish doesn’t taste boozy, the vodka adds another dimension, a tanginess, a slight bitterness. Penne alla Vodka is one of those dishes that can be made in virtually moments, with relatively few ingredients– perfect for a week night meal. Check back in with me and my bottle of vodka, to see how many times we make it!

Penne alla Vodka

enough for 1 lb. of penne

1 tablespoon olive oil
1/4 lb. pancetta, diced
1 medium onion, diced
2-3 cloves garlic, minced
1/3 cup vodka
26 ounce can tomato puree
1/2 cup heavy cream
salt and pepper

In a large skillet, or Dutch oven, over medium-high heat, add olive oil and pancetta. Saute until pancetta becomes light brown in color, begins to crisp, and renders most of its fat. Add the onion, and continue cooking until onion becomes translucent. Season with salt and pepper. Reduce heat to medium-low, and add the garlic, continue cooking until garlic becomes fragrant, and begins to soften, about 1 minute.

Add the vodka. (Do not pour directly from the bottle as there is a chance for the vodka to flambe.) Cook the alcohol off, and reduce the mixture by half, this will take 3-5 minutes. Pour in the tomato puree, add salt and pepper, and bring sauce to a simmer. Partially cover pot, and cook for about 15 minutes. Add cream, cook for an additional 5 minutes, and finally, taste for seasoning. Sauce is now ready. This recipe will make plenty of sauce for one lb. of pasta.

Pin It
September 4th, 2012

Cream Corn 2.0

Soup or side dish. That’s a difficult one.

Cream corn straddles those two food groups. So let’s just call it a soupy side dish.

Cream corn is good, some might even say great. It is soothing, comforting; it screams summer. (For those of you that haven’t ever had fresh cream corn, it may scream, “I come from a can!”. That’s fine too.) But this cream corn is updated. And might I say, it may be better than the cream corn of yore?

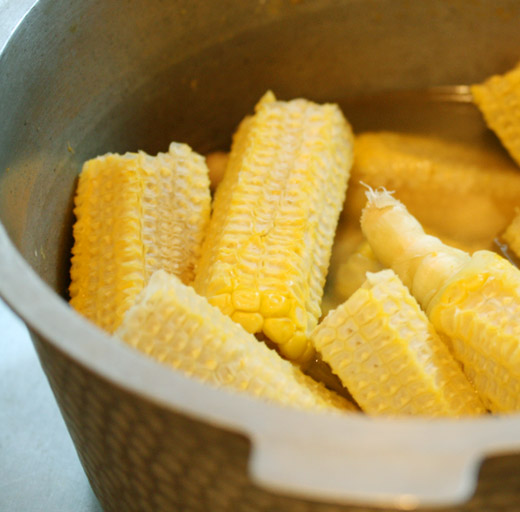
Sadly, I know that in many parts of the country the corn crop this year is dismal, but here in Connecticut it has been stellar. (Not to rub it in.) The corn I’ve been getting at the farmer’s market is super sweet, and bursting with juice. I’ve been buying a lot of corn, and have been making it every which way, so I had planned on making cream corn. As I sliced the kernels from the cob, juice was flying every which way. I nibbled the naked cob, and it was milky and sugary. It seemed a shame to just chuck the cobs. So I threw them in a pot, covered them with water, and boiled them.

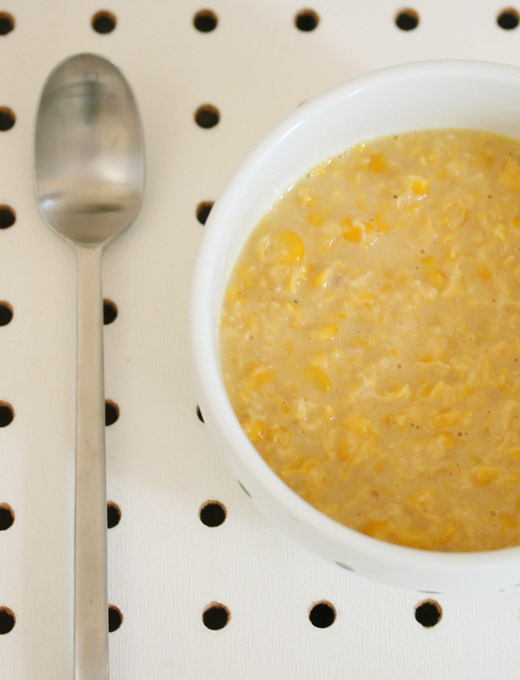
After about an hour, I discarded the cobs, salted the stock, and the sweetest, corniest liquor was born. Corn stock– the perfect liquid for cream corn. The stock was murky, slightly opaque, so when I added it to the kernels, it was creamy and smooth, not watery and dietetic. Corn on corn action!

Sure, I added a splash of cream, and used sweet cream butter. I also used my immersion blender a bit– because I’m crazy like that, but the cream corn was rich, delicious, and well– almost healthy.

I’m going to make another batch while corn is still in season, and put it in the freezer. I’m sure nothing would make me happier than to be eating summery cream corn in the dead of winter.

Cream Corn

This is more of a guide, than a hard and fast recipe. Toy with the proportions, and come up with something you love.

6 fresh corn cobs, kernels removed
4 cups water (approximately)
2 tablespoons unsalted butter
1 tablespoon olive oil
1 shallot, finely diced
salt and pepper
1/4-1/2 cup heavy cream

Place the naked corn cobs in a large saucepan, cutting in half if necessary. Just about cover the cobs with water, and bring to a boil. Adjust heat to a simmer, partially cover, and cook for about an hour. Taste the stock, it should be sweet and corny. Discard the cobs, season with salt, and set aside.

In a large pan, or Dutch oven, melt butter and olive oil over medium heat. Add shallot, and cook until translucent. Add the corn kernels, stirring well, and season with salt and pepper. Cook, partially covered, for about 10 minutes, or until corn is sufficiently softened.

Pour in some of the corn stock. Depending on how soupy you want your cream corn, this can be just a bit, or up to a few cups. Bring to a simmer. Turn the heat off, and if desired, pulse quickly with an immersion blender, to make the mixture chunkier. Add the cream, and taste for seasoning.

I actually had my creamed corn as an entree (not really a soupy side dish at all!), with a salad of tomatoes and basil on top. It was delicious.

Pin It
June 27th, 2012

Two Pies, If You Please


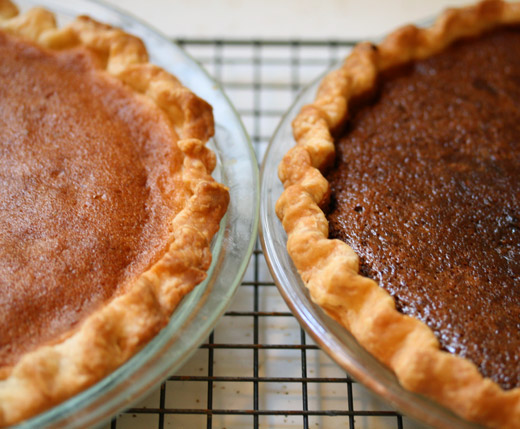
This is a picture of the two pies I brought down to Washington, DC with me last week– in that horrible heat wave that struck the East Coast. These pies were cooling on my kitchen counter in Connecticut ready to make their debut at the NPR studios in DC. They were covered in pure white, flour sacks, nestled in the backseat of my car, and transported, out of Connecticut, through New York, down through Jersey, skipping through Delaware, stopped in traffic in Maryland, and finally, on to Dupont Circle.

There they stayed overnight, sitting on a hotel windowsill, until they were tasted the next day by Linda Wertheimer, host of NPR’s  Morning Edition. Ms. Wertheimer didn’t simply have a sweet morning snack, these pies played an integral part in my interview for the show. We talked pie! And the interview began with a sampling of these two pies from my book.

The pie on the left is a Bakewell Pie. It hails from the Northeast, and the recipe, from 1886,  is one of the oldest recipes I adapted. The base of the filling is raspberry jam, crowned with an almond sponge. I think it makes a wonderful breakfast pie (if you’re into that sort of thing, which I am). The pie on the right is Chocolate Raisin, from the West– specifically Southern California. This dense pie is studded with chopped raisins, and tastes like a Raisinet. Need I say more?

The interview was recorded as part of NPR’s Pie Week, which kicks off July 2. My interview will air on the Fourth of July, and I couldn’t think of a nicer way to celebrate our nation’s independence. There has been a whole bunch of activity on Twitter about Pie Week– pictures, recipes, recollections, etc. If you’d like to check it out, search Twitter for #PieWeek.

Pin It
© 2024 wordpress test site
all rights reserved