Attention all New England pie aficionados! I will be appearing tomorrow evening at Bishop’s Orchard at 6pm. For those who aren’t familiar, Bishop’s Orchard is a farm stand, market, winery, and well, an orchard in Guilford, CT. I will be there to sign books, demo pie crust, and talk pie with whoever has questions, or just wants to go on about their favorite summer fruit pies.
You can reserve a spot for this event by calling RJ Julia Booksellers at 203.245.3959. I hope to see you there. Let’s talk pie!


Oh yes, I did!
Homemade Sriracha-lime mayonnaise, spicy, citrusy, and smooth. I may just be a mayo convert!


Each season NPR.org selects its best cookbooks.
And guess what?
United States of Pie was chosen!
To read the article, and to see the other cookbooks selected, go here.
Let’s take a moment and think about pie.
I actually took way more than a moment to think about, bake, and research, this outstanding, American culinary tradition. I took about a year.
Maybe you guys have noticed the image on the right-hand side of your computer screen. I put the picture of a book cover up awhile back, and left it at that. Well, that friends, is my new cookbook, United States of Pie. And, it’s out today!

As with virtually all books, this too has a back story.
When my husband and I moved to Connecticut four years ago, I was homesick. We had been living in Manhattan for two years, and although we had forged a new life for ourselves on the East Coast, I brutally missed my family, and our life in California. I started to cook rather obsessively. And with the all of this cooking, I did something new for me, I started to bake.
Now, I grew up with pie. My grandma was the pie baker in my family, and we had a pie at every holiday and every family get together. I always had my favorites, and Grandma was generous with her sugar– if I had a hankering for a slice of pie, I need only to ask. This generosity can actually be a disadvantage. I never baked my own pie until I lived in Connecticut. But when I finally did (and it took a bit of practice), I was hooked.

My husband works at Yale, and in those first months in New Haven, when he would go off to teach, I would go to campus too, wandering the quads, and getting lost in the vast libraries. One day, Brian suggested I look at Yale’s cookbook collection– just to see what it was like. And that’s where the story of my cookbook really begins. The collection at Yale was interesting, and old, very old, spanning the country, telling a story of how we cooked and baked in the near and distant past. These were the sorts of books I could (and did) get lost in. In short, I was fascinated by these cookbooks– and thought that other readers might be too.
The recipes I found were from housekeeping guides, farm manuals, restaurant cookbooks, and mimeographed pamphlets from church dinners, and community bake sales from around the country. Many of these recipes were rough, to say the least– they lacked precise measurements, baking times and temperatures– but I had a feeling that they were culinary gold.

I brought these books home, and I began to bake, sometimes taking inspiration from just the title. I made a lot of pie over the last year, and I savored every bite. I loved the work, and I hope that you love this book. Some of the recipes are new, others reimagined classics, but each pie offers a glimpse into what Americans were eating for dessert throughout this country.
The book is set up by region, and the pie that I offer you today is Rhubarb Pie or Pie Plant Pie. It hails from the Midwest. Although rhubarb is grown throughout this country, it lays special claim to this region. The winters may be tough in the Midwest, but this hardy perennial keeps growing with little care. Pie Plant got its moniker because there really is no more delicious thing to do with a few stalks of rhubarb than make a pie with it.

Standard Pie Dough
from United States of Pie
2 cups all purpose flour
2 tablespoons sugar
1 teaspoon Kosher salt
6 tablespoons unsalted butter, chilled and cut into ½ inch cubes
6 tablespoons vegetable shortening, chilled and cut into ½ inch cubes
6-10 tablespoons ice water
Makes enough for one 9-inch double-crusted pie, or two 9-inch pie shells.
In a large bowl whisk together the flour, sugar, and salt until well blended and free of lumps. Add the butter and the shortening to the flour mixture and toss gently to coat. With your fingertips, blend until the mixture resembles a coarse meal. Work the fats into the flour, rubbing the larger pieces of butter and shortening between your fingers until the mixture resembles gravel.
Sprinkle on the water, one tablespoon at a time, starting with 3 tablespoons, then gradually adding more water if needed. Blend with your fingertips, as little as possible, pulling the meal together and creating a dough. The dough will become less sticky, and more of a mass when enough water has been added. Finally, knead minimally in the bowl to make sure the dough has just enough moisture.
Separate the dough in half. (One mound of dough should weigh approximately 10½ ounces.) Place each half on a sheet of plastic wrap and seal. Gently form into a disk, roughly ¾ inch tall. Place the wrapped dough in the refrigerator for at least one hour or up to two days before rolling out. Dough can be frozen for up to 1 month, and defrosted in the refrigerator before using.
Rhubarb (Pie Plant) Pie
1 recipe Standard Pie Dough
1 lb. (4 cups) rhubarb, cut into ¼ inch slices
1¼ cups sugar
¼ cup all purpose flour
½ teaspoon orange zest
1/8 teaspoon freshly grated nutmeg
pinch of kosher salt
2 tablespoons unsalted butter, cut into ¼ inch cubes
optional:
1 tablespoon cream
1 tablespoon turbinado or sanding sugar
Preheat oven to 425°.
In a large mixing bowl, combine the rhubarb, sugar, flour, orange zest, nutmeg, and salt, and toss well to coat.
Roll out one portion of the dough on a well-floured surface until it is about 1/8 of an inch thick, and will fit a 9-inch pie plate. Gently pick up the dough and center it over the pie plate. Ease the dough into the inner ring of the plate. Pour in the rhubarb filling and shake pie gently to spread evenly. Dot the surface of the pie with the butter.
Roll out the second portion of the dough, to equal proportions as the first. Lay the dough over the filling. Trim the sides of dough to leave a one-inch overhang. Fold the two pieces under and together, and then decoratively crimp the perimeter. With a sharp knife cut 5 vents into the surface of the pie.
If using, with a pastry brush paint the surface of the pie with cream, and sprinkle with sugar.
Bake for the pie for 15 minutes then reduce the heat to 375°. Continue to bake the pie for another 40-45 minutes, or until the crust is golden brown. Allow the pie to cool to room temperature before enjoying.

Recipe: Rhubarb Pie
Do you ever start one project, and by the the time you’ve finished it, it is almost unrecognizable from what it was meant to be? I do. It happens to me all the time– when I’m getting dressed for the day, running errands, and especially when I’m cooking.
When I’m cooking I like to call these events improvisations. Don’t have any green onions? I’ll add the usual yellow Spanish sort. Out of sour cream? Plain yogurt works just as well. I’ll make a prescribed meat dish a vegetarian entree instead, and so on. These improvisations can be liberating. It is freeing to use a recipe simply as a guide.
So while this improvisation happens more often than not when I cook, baking is another story. Baking can be finicky. There is melting, aerating, and tempering, that all have to be done just so. If you stray too far from the recipe you can have a flat cake, or a cookie with too much heft. But sometimes, there is a bit of wiggle room. It’s possible to improvise, and the results can be pretty spectacular.

Just one of these adaptable recipes is the French yogurt cake. It can be made in a springform pan. It can be made in a loaf pan. I’ve tried it with Greek yogurt as well as plain. It can be baked with melted butter, or oil. I’ve had it flavored with lemon; I’ve had it flavored with rum. It is the little black dress of the cake world. And like the little black dress, you never really can have too many. So when I saw another recipe for a loaf version of this cake, I decided to give it try.
That’s when a million other ideas got thrown into the mix.

We all know it’s spring. I’ve packed away my winter parka. I’ve had the first springtime asparagus. I foraged for ramps last weekend, and rhubarb is beginning to stretch its spindly legs. So when I saw some rhubarb at the market, I had to bake with it. I thought I would macerate it briefly in a bit of sugar, and layer it in the yogurt cake. That was it.
Once home, rhubarb sliced and wilting away in sugar, I began to take out the ingredients for the rest of the cake. Out of the cabinet tumbled some brown sugar. This got me thinking about crumbs, namely those bulbous crumbs that sit on top of crumb cake. Wouldn’t that be lovely? The tart rhubarb was demanding a sweet crumb to play with. So I made some crumbs.

And this Rhubarb Yogurt Cake is what I came up with. All at once, a simple yogurt cake turned fancy. The cake was not too sweet. Ideal for dessert, or breakfast, if you’re that type of person. (I am!) And because of the yogurt, the cake stays moist for days. I like this cake so much, an improvisation just might become a tried and true recipe!
Rhubarb Yogurt Cake with Crumb Topping
adapted heavily from Bon Appetit magazine May ’12
For the rhubarb:
2 stalks rhubarb, cut into 1/4 inch dice
1/4 cup sugar
1/2 teaspoon ground ginger
1 tablespoon cornstarch
pinch of kosher salt
For the crumb topping:
1/4 cup brown sugar
1/3 cup flour
1/2 teaspoon ground cinnamon
pinch of kosher salt
3 tablespoon unsalted butter, melted
For the cake:
1 1/2 cups flour
2 teaspoons baking powder
3/4 teaspoon kosher salt
1 cup sugar
3/4 cup Greek yogurt
1/2 cup vegetable oil
2 eggs
1/2 teaspoon almond extract
Preheat the oven to 350 degrees. Grease and flour an 8 1/2 by 4 1/2 inch loaf pan.
In a medium sized bowl toss the rhubarb with the sugar, ginger and salt. Set aside.
In another medium sized bowl, whisk the brown sugar, flour, cinnamon, and salt together. Pour in the melted butter. With a spoon, moisten the dry ingredients and break any large clumps of the mixture apart, creating sizable crumbs. Set aside.
Whisk together the flour, baking powder, salt and sugar together. In another bowl, whisk together the yogurt, oil, eggs, and almond extract together until well-incorporated. Fold the wet ingredients into the dry, mixing until just blended.
Pour approximately 1/2 of the batter into the loaf pan, spreading to completely cover the bottom of the pan. Add the rhubarb mixture, and any juices that have collected. Evenly spread the rhubarb. Add the rest of the batter, covering the rhubarb completely. Sprinkle on the crumb mixture. The crumbs should evenly cover the surface of the cake.
Bake for approximately 1 hour, or until a tester inserted in the center of the cake, comes out clean. Cool for 15 minutes in the pan, then unmold, and cool completely on a wire rack.

Do I like bacon? Yes.
Do I LOVE bacon? Not really.
Do I find it physically painful for throw away food? Absolutely.
Do I love a new cookbook? You betcha.
What about magazines? Sure thing.
When needed, do I take Metro-North Railroad? On occasion.
Do I then complain about my bum falling asleep due to the uncomfortable seats? Every time.
What do almost all of these questions have in common? They led to me the making of bacon jam.

Not being the type of person that is absolutely ga-ga for all things bacon, bacon jam is not the sort of preserve that I would normally make. But as with virtually any food, there is a story behind it– here’s mine.
I had gotten the new book, The Back in the Day Bakery Cookbook, a little while ago. (It’s very charming, by the way.) I enjoyed thumbing through it, trying to decide which recipe to try first. Fast-forward a few days, the cookbook still sits, untested, its pages still unmarred by batter, and drips of vanilla extract. I’m taking the train back from NYC. Before I board the train, I stop at the newsstand to pick up a magazine for the trip. I grab Real Simple magazine– say what you will– I know it wasn’t Newsweek, but it wasn’t the Enquirer either! As the train rolls out of the station, I find myself reading an article all about food storage, and how long it’s safe to keep certain foods. (I don’t know who wrote the article, or what qualification they have to make these judgments, but still..) This forces me to think back on what foods I have sitting a home in my fridge. I seem safe on all accounts. And then I remember the lone pound of bacon that I had bought a couple of weeks before– the article had said that bacon is only good for two weeks. I panicked! Good thing my bum was sore so the pain took my mind off of bacon for the duration of the trip!
The next morning I stared at that lonely pack of bacon. What was I going to do with a whole pound? I only like pork so much. And then I remembered a recipe that I had seen in the newest addition to my cookbook library- Bacon Jam Empanadas. I only made half of the recipe– the jam part– but I’m glad that I did.
 Surprisingly, this was one of those recipes that I had just about each of the ingredients. This saved me from going to the store to buy more food for the item that was supposed to save me during my food storage crisis!
Much like fruit preserves, this jam is not too difficult to make, just time-consuming, and your kitchen will smell great every step of the way. And what you’re left with is a mason jar, full of sticky sweet, spicy, not too bacony stuff, to slather on biscuits or even savory scones. To me, the bacon jam kind of tasted like the bbq pork filling of a dim sum- style steamed pork bun. And that’s quite alright with me.
I’ve stayed fairly close to the original recipe here. You’ll see that it calls for one teaspoon red pepper flakes– that’s what I added, and the jam is quite piquant. I love the spiciness of the pepper, but if you’re sensitive, I would cut it down to half.
Bacon Jam
adapted from The Back in the Day Bakery Cookbook
1 pound applewood smoked bacon
1 medium Vidalia onion, sliced
3 garlic cloves, minced
1 teaspoon dried rosmary
1 teaspoon red pepper flakes
1/4 cup packed brown sugar
1/4 cup strong coffee
2 tablespoons water
1/4 cup balsamic vinegar
1/4 cup maple syrup
2 tablespoons bourbon
Roughly chop the bacon into 1 inch pieces. In a large skillet, or dutch oven, fry the bacon until just beginning to brown around the edges, but still a bit soft. Drain the rendered fat by pouring the bacon into a seive. Let the bacon continue to drain, and add one tablespoon of fat back to the skillet. Add the onion to the skillet and cook over medium heat until the onions are translucent and beginning to brown. About 10 minutes.
Add the garlic, rosemary, red pepper, sugar, coffee, water, vinegar, and maple syrup, and bring to a light boil. Add the drained bacon and bring back to a light boil. Then turn the heat down to medium-low in order to reduce the juices. You want the pot to be at a low, steady simmer in order to reduce substantially and to thicken. This process will take about an hour. If the jam becomes too dry, add an additonal tablespoon or two of water.
Remove the bacon jam from the heat, add the bourbon, and let cool for 20 minutes. Depending on your preference, pulse the jam in a food processor for a finer consistency. (I pulsed mine a bit.) Once cooled, store in a mason jar for about a week.

Recipe: Bacon Jam
If it’s your birthday, I will make you a cake.
I should clarify. If it’s your birthday, and you’re a dear friend of mine, who lives within a reasonable distance (walking or driving)– I will make you a cake of your choosing. It has become a sort of tradition since my husband and I moved to New Haven. I have baked a devil’s food cake with chocolate buttercream and mocha filling. There was the yellow cake with cream cheese icing and strawberry filling, deliciously sweet and very girly– especially for the middle aged man who requested it. And just last week, I made the Gateau de Crepes for a very special 40th birthday.

The cake is a doozy. This is not the sort of cake that one whips up in the morning and has for dessert that evening. It takes forethought, time, and patience. But you will be richly rewarded.
When my husband and I first moved the East Coast, we settled in Manhattan for a couple of years. I had long heard about Lady M Confections and their scrumptious Mille Crepes cake on the tony Upper East Side. (Does anyone really use the word tony to describe any place other than the Upper East Side?) One afternoon, a few months after we had been in the city, I made the trek from Morningside Heights to the Upper East Side, to experience a slice of the cake for myself.
The shop was still, sparkling clean, starched, almost antiseptic. I felt like I had to whisper. But there was the stunning cake, with layer upon layer of crepes and rich cream. It was perfect– symmetrical, geometrical, with a crisp top layer of bruleed sugar. I ordered a slice (it was expensive, but well-worth both the journey and the cost). I savored every morsel, eating slowly, and enjoying the escape from the bustle of the city.
A few years later, I discovered a similar recipe by Amanda Hesser. She wrote about loving the Mille Crepes cake at Lady M, and this was her homage to their recipe. I knew that I had to give it a try. And so the process began with making a million crepes.

Okay, it's really around twenty crepes!
Both the batter for the crepes and the pastry cream for the filling must be made the day before. Butter is browned (delicious!), eggs are separated, milk is poured, many pots are dirtied, and you’re on you’re way. There is no turning back now!
The next day the thin batter is is poured into a sizzling pan to make numerous delicate crepes, that wait to be sandwiched with cream. The cream is whipped and the pastry cream is folded into the whipped cream. This makes the lightest, vanilla scented filling you can imagine. Then the layering begins.

Almost there! As you reach the top, it is important to select a stellar crepe for the top of the cake; after all, this is the crowning achievement. I didn’t have a blow torch (I would be a danger with one of those!), so I dusted the top with powdered sugar.

This cake is definitely a showstopper. It is gorgeous both in taste and in looks. Ethereal, subtle, not to sweet– every element plays off of the next superbly. This cake is definitely an occasion cake. After all the work, you want the oohs and ahhs, you want to enjoy with loved ones, you want a glass of champagne– you want to celebrate a birthday!
You can find the recipe here.

Here’s a post that I never thought that I would write. Mayonnaise. The name alone used to send shivers up my spine, and now? Now the shivers stop at my waist.
Several years ago, I decided that I had had enough of my food taboos. I had never been an overly picky eater, but there were certain foods that were off limits: raw tomatoes (cooked were fine), nuts (especially walnuts), lamb (too gamey) to name a few. Frankly, it was exhausting. Systematically, I began to force myself to eat all of the foods that I once detested. Before long, the foods that I once reviled, I loved. It really was as easy as that. I believe that disliking certain foods is simply a matter of ones palate being unfamiliar with those flavors. Once I had eaten enough ripe, juicy tomatoes, I began to appreciate the grassy flavor, and detected the sweet taste. I began to see what all of the fuss was about.
Now I sprinkle nuts (yes, even walnuts) in salads, and bake with them to abandon. I love a good lamb shank, and will gnaw on a chop with the best of them, summertime tomatoes sprinkled with sea salt– bring it on! But the one food that still remained a taboo was mayonnaise. During my months of desensitizing, each time I would dip my knife in a glob of mayo, poised to slather it on a sandwich, I would literally gag. So I let pass, and thought I’m a Jew, I’m not even supposed to like mayonnaise.
But, I know, that’s a cop out.

I know that homemade mayo is far superior to the mass produced, straight from the supermarket shelf sort. (Really, isn’t that the case with most foods?) I had also read that mayo can be made in a snap with an immersion blender. I also had made a batch of arugula pesto (with walnuts!), so I could add a bit of pesto to my mayo, making a haute version of the condiment. Baby steps, you see.

Mixing the mayo up with an immersion blender was impossibly easy. One second you have oil in a bowl, the next second– mayo. I combined a bunch of recipes for mayo/aioli including all of the elements I liked– Dijon mustard, anchovy, lots of lemon juice, and of course, a few tablespoons of pesto.
I have to say, it was very good. So good, in fact, I had it on a chicken salad sandwich. I can not believe I jut wrote that! Yes, poached chicken, hard-cooked egg, and pesto mayonnaise. Maybe I’m growing up after all.
Arugula Pesto Mayonnaise
1 egg yolk
salt
1/2 teaspoon Dijon mustard
1 small clove garlic, minced
1 anchovy fillet, minced
juice of 1 lemon
1/3 cup vegetable or canola oil
3 tablespoon olive oil
2 tablespoons arugula or basil pesto (or to your liking)
With an immersion blender in a small bowl, pulse the egg yolk, salt, mustard, garlic, anchovy, and lemon juice until combined. Mixture will not be smooth at this point. Combine the oils. Add about half of the oil mixture into the bowl, and blend until beginning to emulsify. Slowly add the rest of the oil, and process until thick and opaque. Fold in the pesto. If mayo is too thick, add water, one teaspoon at a time. Thin it to your liking. Taste for seasoning, and serve. Mayo will remain fresh, covered in the fridge, for about one week.


This “compote” is just like baby food. If babies liked harissa.
And if pediatricians regularly recommended raw garlic as a part of an infant’s healthy diet. Or freshly ground caraway– babies probably don’t love that. And coriander seeds– those are probably a bit strong too.
Let me amend that last statement.
This “compote” looks just like baby food. It a puree after all. And maybe you’ll be as happy as roly poly baby after you eat it.
I ate a lot of ham over the holidays. Don’t get me wrong, I love a good ham. I also love all of the leftovers that come with the ham: the ham biscuits, the souffle with ham and Gruyere cheese, the fried ham steaks. (I am nothing if not resourceful. But I couldn’t face any more leftovers, therefore have stuck the bone in the freezer and will make split pea soup at a later date.) Come January I was ready to say farewell to the pig, and hello to some vegetables.
Enter the North African Carrot “Compote” from Mediterranean Harvest by Martha Rose Shulman. (By the way, I’m not sure why the word compote is in quotes; I’m just going with it.) This book had four recipes alone for carrot mezze, but this simple one was a standout to me, because I basically had all of the ingredients.
I made some rosemary-sea salt focaccia bread, hardly North African, but a delicious slathering tool and ate my “compote” right up. It’s spicy and savory, and yes, a more adult form of baby food.

North African Carrot “Compote”
adapted from Mediterranean Harvest by Martha Rose Shulman
1 pound carrots, peeled and sliced
1 large russet potato (about 1/2 pound), peeled and diced
2 tablespoons lemon juice
2 tablespoons olive oil
1 garlic clove, mashed to a paste with 1/2 teaspoon kosher salt
3/4 teaspoon caraway seeds
1 teaspoon coriander seeds
1 teaspoon harissa
Steam carrots and potato together until very soft, about 15-20 minutes. Mash with a mortar and pestle, or put through a ricer. (Using a food processor would just make the mixture gluey because of the starch in the potato.)
Stir in the lemon juice and the olive oil. Mash the garlic and the salt into a paste in a mortar and pestle. Add the spices, and continue to mash. It is not important that the seeds be completely ground, I liked mine with some body.
Add the paste, and the harissa. Stir well to blend, taste for salt, and then serve warm, or at room temperature.

Recipe: North African Carrot “Compote”
I recently taught an autumn pie class, and at the end of the course one of my students gave me a vintage Pennsylvania Dutch cookbook she had picked up at an estate sale. I had told the class that I have a fascination with heirloom cookbooks. The book was her thank you for teaching her to face her culinary fears of pie dough.
As I’ve looked through the book (it’s really more of a spiral-bound pamphlet), fascinated by the advice on how to make a meal out of so little, one recipe stuck out– noodles for soup.

When I was young, I remember my grandma, though not Pennsylvania Dutch, making the richest, most satisfying soup with her own homemade egg noodles. Any time she roasted a chicken, she always made stock from the carcass. She would drop off a large tupperware of the soup to my parents at work. The noodles were thick and chewy; and by the time my mom arrived home to heat the stuff up for dinner, the noodles had swelled to to such great proportions they practically had sucked up all the broth. I guess grandma’s noodles were more like dumplings, but they were delicious.
This Pennsylvania Dutch recipe is more precise, with strict instructions for both resting the dough, and drying the noodles before use. (My grandma never did either, hence the bloat!)

The recipe is hardly a recipe– just three ingredients that most everyone has in the kitchen. The directions are focused and are meant for a person who is somewhat skilled in the kitchen. And might I just say– the rolling pin must be your friend. This recipe is simple yet trustworthy, and make piles of thin, imperfect, and homey noodles, ideal for soup. It’s true these noodles were not my grandma’s, but they were reminiscent of them. I’m sure I’ll make them all winter long.

Noodles for Soup
from Old Pennsylvania Dutch Recipes
1 cup flour
1/2 teaspoon salt
2 eggs, beaten
Sift flour and salt together into a bowl. Make a well in the center of the flour mixture and add the eggs. Blend thoroughly. Knead the dough on a floured surface, cover, and let stand for 30 minutes.
Roll the dough to about 1/8 an inch. Turn the dough over, and continue rolling until paper thin. Allow dough to dry partially, about an hour.
Cut the dough into lengthwise strips, about 1/4 inch wide, and then cut into strips about 2 1/2 inches long. Separate noodles, and allow to dry for several hours at room temperature, until just about dry. Noodles can then be used immediately, or can be covered and held in the refrigerator until ready to use.
Recipe makes 2 cups of noodles, enough for a generous pot (6 cups) of soup. Simply add the noodles to stock, and allow to simmer for 15 minutes.

Recipe: Noodles for Soup
- Cashews with Indian Spices
- Chocolate Guinness Cake
- Pie in Connecticut
- Cheese Blintzes
- Black Bottom Cupcakes
Now Available
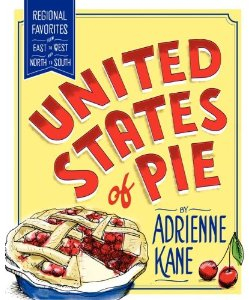
A new cookbook of regional heirloom American pies, from long-lost recipes to classic favorites, sweetly illustrated and chock-full of time-tested baking tips and secrets for perfect pies.
"This colorful, varied collection by a blogger, recipe developer, and food writer may well be the definitive resource on the all-American pie." --Publisher's Weekly
Recent Posts
Search
Categories
- Baking
- Breads
- Breakfast
- Fruits
- Meat/Fish
- Misc.
- Pasta
- Press
- Salads
- Sandwiches
- Soups
- Sweets
- Uncategorized
- Vegetables
Archives
Twitter Feed
© 2025 wordpress test site
all rights reserved
all rights reserved