November 19th, 2011

Buck Yeah– Scones!


I’m smitten with a lowly flour.

It all started last year with a trip to upstate New York. I went to the teeny-tiny, mill town of Penn Yan. It was quaint. But what do you do in a mill town except buy flours and grain? Not a whole lot. So, I filled the trunk of my car with stone-ground polenta, finely milled pastry flour, groats, and buckwheat flour.

The buckwheat flour was excellent, nutty, chewy, and somehow fluffy. I made filling buttermilk pancakes and delicate crepes– enjoying every mouthful. A few months after my trip, my supply quickly diminishing, a dear, like-minded friend moved away.  He left behind a cache of baking ingredients for me. As I was unpacking my new muscavado sugar, whole wheat pastry flour, and vanilla paste, I found his supply of buckwheat flour. Great minds and hungry bellies think alike!

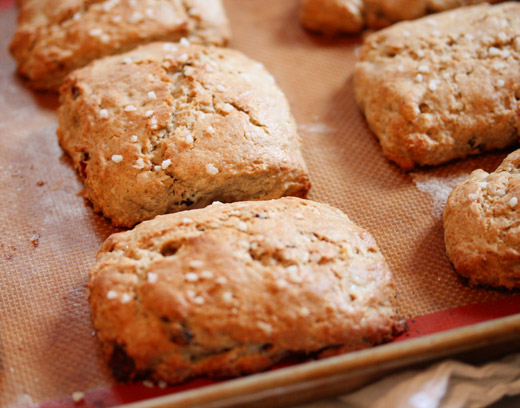
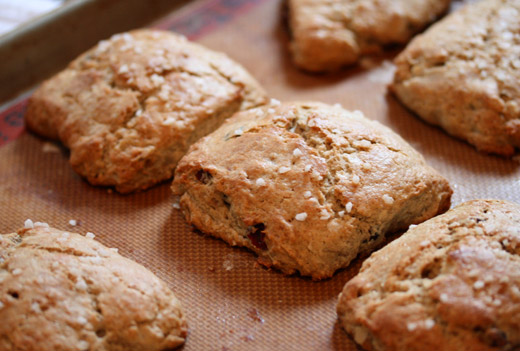
With my supply replenished without a trip to the health food store, I decided to mix things up a bit. Venturing away from the griddle, I made Buckwheat Cranberry-Walnut Scones. These scones gives the air of being healthy, but not obviously so. They are sturdy yet buttery, nutty from both the walnuts and the buckwheat flour, seasonal, from the cranberries, and meltingly tender.

See why I’m smitten? I guess it doesn’t take much for me. I have already started to think of different ways to incorporate this flour into the repertory. Let me know if there’s a way that you use buckwheat flour.

These scones just may be ascetic enough to make during your post-Thanksgiving weekend next week. Gobble, gobble!

Buckwheat Cranberry-Walnut Scones

1 egg
1/2 cup whole milk
1/4 cup heavy cream
1 1/3 cups all-purpose flour
3/4 cup buckwheat flour
1/3 cup brown sugar, packed
3 teaspoons baking powder
1/2 teaspoon salt
6 tablespoons cold unsalted butter, cut into 1/2 inch pieces
1/2 cup walnuts
1/3 cup cranberries

In a small bowl, whisk egg, milk, and cream and set aside.

In a medium size bowl, whisk both flours, brown sugar, baking powder, and salt together. Add the butter. With your hands work the butter into the flour mixture creating a coarse meal. Add the walnuts and the cranberries, tossing until well-incorporated. Pour in the milk mixture. With a rubber spatula or your hands, but the mixture will be sticky, work minimally into a loose dough. Gather the dough into a ball, and knead it about 5 times in the bowl.

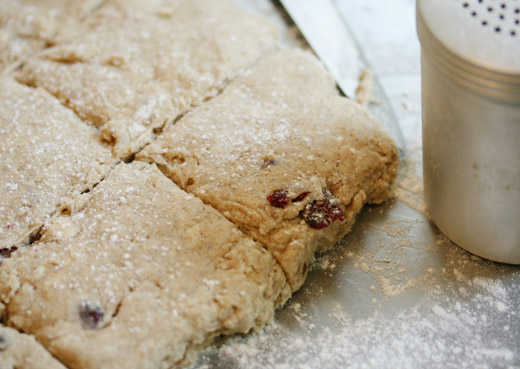
Turn the dough out onto a well-floured counter, and with floured hands, gently pat into an 8 or 9 inch square. Cut the dough into 9 scones, making 3 horizontal and vertical cuts. Place each scone on a parchment or Silpat lined baking sheet, about 1 inch apart. Place pan in the refrigerator and let the scones rest while oven is preheating, about 15 minutes.

Bake in a 425 degree oven for 15-18 minutes, or until golden brown on top. Cool on a rack and then serve warm or room temperature.

Pin It
November 9th, 2011

Cocoa Puffs for Adults

As a sit at my desk writing this I’m looking out the front window. Cars are speeding by, going home for the evening. Their headlights are on. I can’t see the drivers. It is dusk…

It’s also 4:30. Really?

Gag me. Daylight savings time has just ended.

I’ll get over it. It just takes me a few days. The highlight of standard time is, of course the fact that the mornings are a little brighter. (And it’s a good thing, I was beginning to feel like a farmer when my alarm went off.) Bright mornings mean bright breakfasts, and that to me means granola. Granola that’s just the slightest bit naughty.


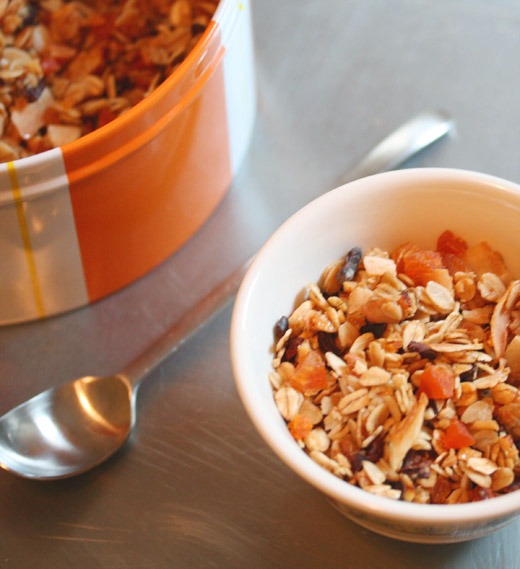
How is this granola naughty you might ask? By the addition of cocoa nibs– roasted and cracked cocoa beans. I love a good nib. They give you a hit of chocolate flavor, without being sweet. In fact, I have always thought that they were rather fruity. A nib is crisp, dark, mysterious– and perfect for making granola.

The nibs in this granola are sort of like an additional nut, and tossed with tangy dried apricots it makes the perfect not too sweet granola. I would even call this granola restrained. (If you think that eating chocolate first thing in the morning is restrained.)

Cocoa Nib Granola

2 cups rolled oats
1/3 cup cocoa nibs
3/4 cup shredded coconut, unsweetened
2 tablespoons vegetable oil
2 tablespoons butter
1 tablespoon honey
1/4 cup brown sugar
1/2 cup chopped raw almonds
1 teaspoon vanilla extract
pinch of salt
1/4 cup chopped dried apricots

Preheat the oven to 300 degrees.

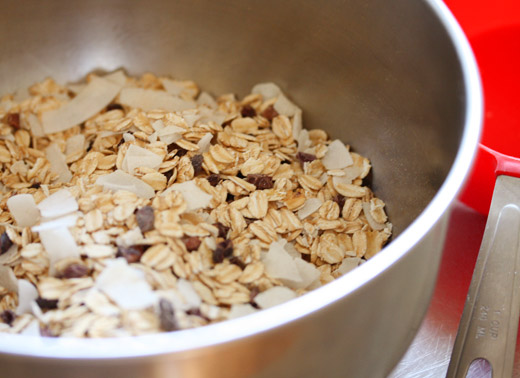
In a medium sized bowl toss oats, nibs and coconut together. Set aside.

In a saucepan over medium heat, melt the oil and butter. When entirely liquid, add the brown sugar, honey, and almonds, and cook for about 2 minutes, or fragrant. Turn off the heat and add the vanilla and the salt. Pour this mixture over the oat mixture. Toss well to coat, creating clumps of oats.

Pour onto a baking sheet and bake for 10 minutes, toss well, and then bake for an additional 10-15 minutes. Add the apricots, and toss again. Cool completely, and then store in an airtight container. Granola will last for quite some time, 2 weeks if you’re lucky.

Pin It
October 28th, 2011

Stuck On You

Do you know that song by Lionel Richie? “Stuck on you, got a feeling down deep in my soul…dah, dah, dah, Yes, I’m on my way–” (Hum the rest, because if you’re anything like me, you NEVER know the correct words to ANY songs.) Well, that song kept playing over and over in my head as I made this caramel corn.

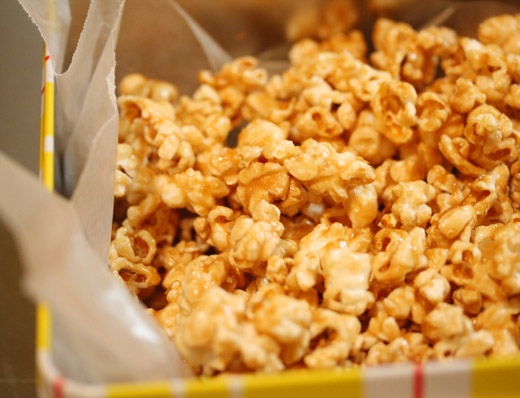
Making this caramel corn was a sticky endeavor. But it is delicious!

With autumn comes no more humidity on the East Coast. Yay! This means a variety of things are now possible for me. For one: pants. Now I can wear them and be comfortable. Not that I was going bottomless before, I was just much more likely to be in a dress or a skirt when it was sticky outside. I love girly clothes, but I also love my jeans.

Two: Dry air means not only is it possible to keep popcorn (a favorite snack of mine) without it getting stale and soggy, but it is also possible to coat said popcorn in salty sweet caramel, and snack ’til my heart’s content.

This recipe uses a candy thermometer, but it is not at all finicky. When making caramel it is important to boil the sugar to a certain temperature, in this case– 250 degrees. Other than that, you will most likely have the rest of the ingredients on hand– always a good thing. There is also a good dose of salt in this recipe. I like my caramel corn to have a salty kick. But you can use less if you like.

Once you have the caramel made, you’ll want to work fast. Pre-measure the baking soda and the vanilla, and make sure you have a clean, bowl, that is large enough to thoroughly mix the caramel with the popcorn.

Gently break up the caramel corn into sizable pieces once it is out of the oven. It will last in an airtight container for about 5 days. But it’s never lasted that long in my house.

Salty-Sweet Caramel Corn

10 cups of popcorn, either made in air-popper or on the stovetop. For the stovetop, 10 cups of popcorn requires 3 tablespoons of oil and 1/4 cup of kernels

1 cup packed light brown sugar
1/4 cup corn syrup, light or dark
6 tablespoons unsalted butter
3/4-1 teaspoon salt
2 tablespoons water
1/2 teaspoon baking soda
2 teaspoon vanilla extract

Preheat the oven to 250 degrees. Line a baking sheet with a Silpat, or parchment paper.

Place the popped popcorn in a large bowl, discarding any unpopped kernels.

In a medium saucepan melt sugar, corn syrup, butter, salt and water, stirring until smooth. Continue to whisk and simmer until mixture reaches 250 degrees with a candy thermometer, about 4 minutes. Remove the pan from the heat, and add the baking soda and vanilla. The mixture will bubble up, but continue to stir.

Quickly pour the caramel mixture over the popcorn, and with a rubber spatula, stir evenly but gently to coat. Pour coated popcorn on the baking sheet, spreading into a single layer.

Bake for 1 hour, stirring and turning every 20 minutes. Remove from the oven, cool slightly, and break up if needed.

Pin It
September 22nd, 2011

Confusion Galette

Fall can be a confusing time. Don’t get me wrong– it’s one of my favorite seasons. (Out of four, it’s probably number one!) For one thing, there is always the crisis of what to wear. Tights or bare legs? Sandals still, or do you move on to flats? Light sweaters in the morning, jackets for an evening stroll. You see– these are serious issues.

Once you have managed to get yourself dressed for the day, there is the issue of what to eat. It’s a good thing that I don’t find this issue quite so vexing. In fact, I rather enjoy these crossovers.

I was at the farmers market last week, and one of the vendors was selling rhubarb. Spindly and springish, this vegetable cum fruit actually grows from high spring to early fall. I bought some, and stuck it in the fridge until I decided what to do with it. A few days later I spotted black mission figs at the market, and knew that the kitchen was calling.

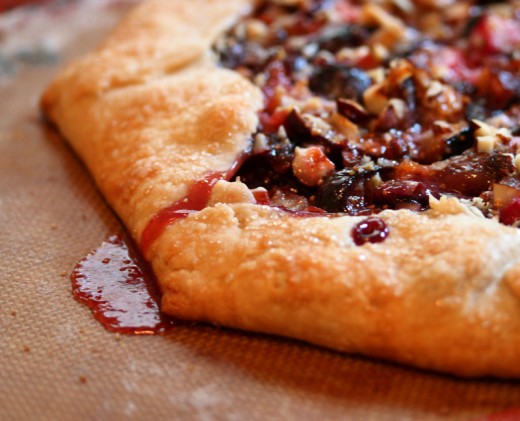
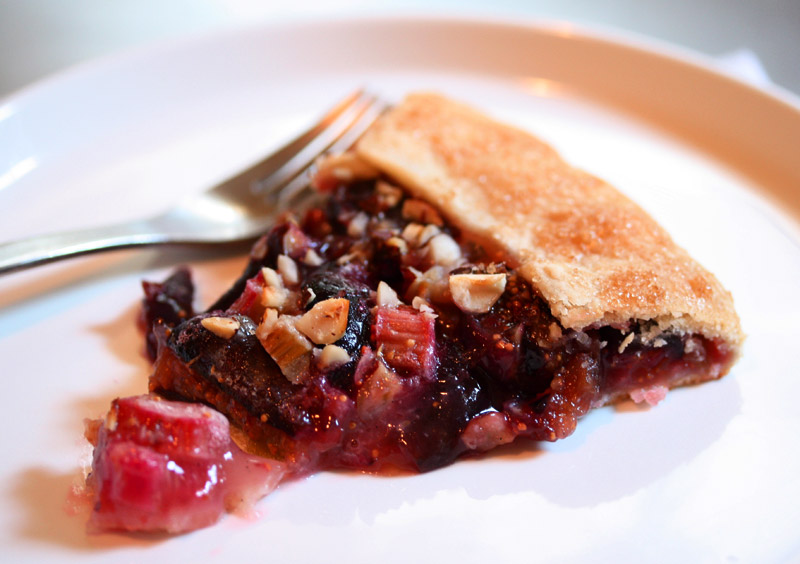
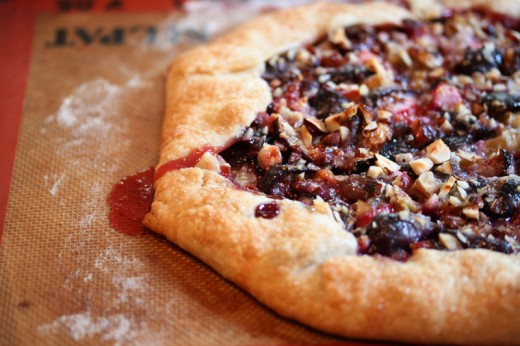
I went home and made a galette– the lazy man’s pie. The tart acidity of the rhubarb mixed with the richness and potency of the figs making the perfect combination. Neither one of these “fruits” is overly juicy, so they were an ideal match for an open-faced dessert, but the juices that they did create were intoxicating.

Simply kissed with sugar, and baked with crushed hazelnuts on top, this galette was just the dessert to eat on a fall day. And to quote Little Edie Bouvier Beale, I even found “the best costume of the day,” to wear while chewing– sleeveless dress, cardigan sweater, and flats.

Fig-Rhubarb Galette

2 cups rhubarb, cut into 1/2 inch dice
1/2 cup sugar
pinch of salt
2 cups fresh figs, cut into quarters
2 tablespoons flour
1 teaspoon vanilla extract
1/4 cup hazelnuts, roughly chopped

1 disc pie dough

Preheat the oven to 375 degrees.

In a medium sized bowl, toss the rhubarb completely with sugar and salt. Add the figs, flour, and vanilla, and toss gently trying to keep the figs in tact. Set aside.

Roll out the pie dough, approximately 12-14 inches around. Transfer the dough to a parchment or Silpat lined cookie sheet. Spread the fruit filling, leaving about 2 inches free around the perimeter of the dough. Sprinkle on the nuts.

Fold the dough over the filling, gently pressing the dough together as you go. This creates the crust; and the galette will be free-form. If you would like, brush the crust in cream, and sprinkle with turbinado sugar.

Bake for 40-45 minutes, then let cool on the cookie sheet, before slicing.

Pin It
September 8th, 2011

Back With Blueberry Muffins

Hello.

My word, it’s been a long time. A really looooooooong time. And it’s my fault—that’s right—you can place the onus squarely on me. I guess you could say that I’m not too great about keeping in touch. Apologies.

I have an excuse, a rather good one in fact. But first, I’m going to butter you up—with muffins.

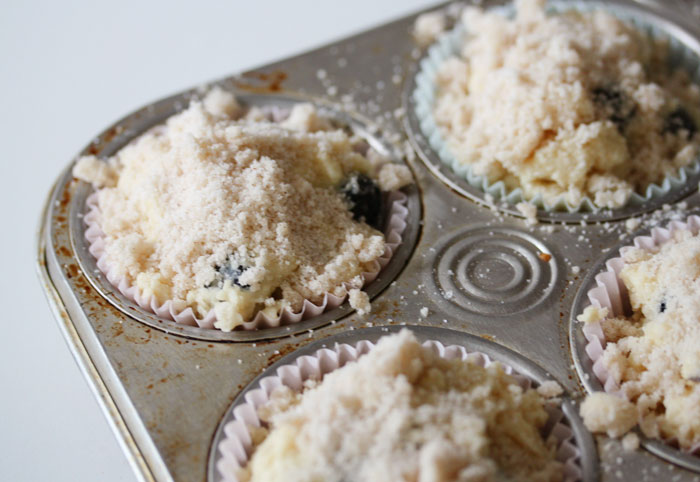
Muffins can be a tricky thing. Purchased on-the-go from a non-reputable coffee joint they can be a leaden, flavorless mass. Bought from a vendor at your local farmer’s market and they can have a crunchy sugar-coated top and chewy oats within. But when you are searching for the best muffin, when running to the farmer’s market, or even the bakery simply won’t do, you need to make them yourself.

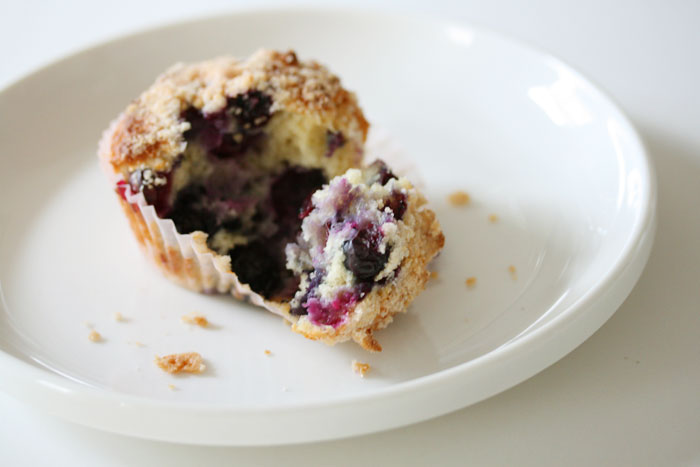
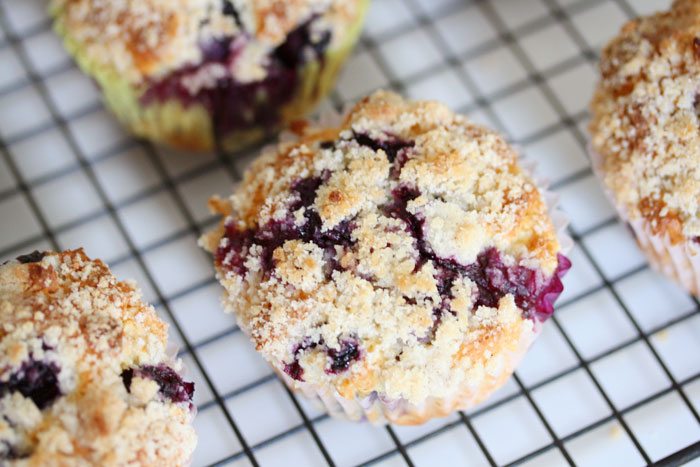
This classic blueberry muffin recipe is actually based on a Sour Cream-Peach Muffin that I found in Jim Fobel’s Old Fashioned Baking Book. You will notice that from my pictures, those do not look anything like peaches. They’re not—I made classic Blueberry Muffins. Oh, and I used yogurt, not sour cream. So I guess this recipe is truly inspired by Mr. Fobel’s.

These muffins are tender and moist, slightly sweet, and bursting with blueberries (or peaches, or plums, or nectarines, really, anything you have on hand). Made on a Sunday morning and enjoyed while still warm from the oven, I would say that they’re a perfect way to start off the morning.

Blueberry Muffins

adapted from Jim Fobel’s Old Fashioned Baking Book

makes 12 muffins

for the topping:

¼ cup flour
¼ cup sugar
¼ teaspoon cinnamon
pinch of salt
2 tablespoons unsalted butter, softened

for the batter:

1 egg
½ cup yogurt (low or full fat)
1/2 cup milk
1 teaspoon vanilla extract
4 tablespoon unsalted butter, melted
2 cups flour
½ cup sugar
1 tablespoon baking powder
¼ teaspoon baking soda
¼ teaspoon salt
1½ cups blueberries (if using frozen, don’t thaw)

Preheat the oven to 400°. Line twelve, 2½ inch muffin cups with paper liners and set aside.

Prepare the topping in a medium size bowl. Toss the flour, sugar, cinnamon and salt together. With a fork, or your fingers, work in the butter until oatmeal-like clumps are created. The topping should resemble streusel. Set aside.

In a medium size bowl, whisk egg, yogurt, milk, vanilla, and melted butter until smooth. In a large bowl, stir together the flour, sugar, baking soda, baking powder, and salt. Pour the yogurt mixture into the flour mixture. and stir quickly. Add the blueberries, and gently toss just until mixed. Batter will still be lumpy.

Spoon the batter equally into the muffin cups. The cups will be full. Quickly pat the topping onto the muffins.

Bake for 25-30 minutes. The tops should spring back when touched. Remove from the oven, let cool for 5 minutes, then remove from the pan. Serve warm. I like them split with a pat of butter smooshed inside.

Pin It
September 13th, 2010

I came, I saw, I lost

I am not a competitive person. Growing up, I never had any interest in organized sports. I was on the basketball team (B team, mind you) in middle school. There was one game that the coach had to call a time out because I got tangled in my jersey. Yeah. That’s how good I was. Trophies never interested me, nor ribbons. But when a friend of mine mentioned that he was thinking of entering a pie contest, in a county fair about an hour from where we live, I was immediately intrigued. This was one competition that I could get behind.
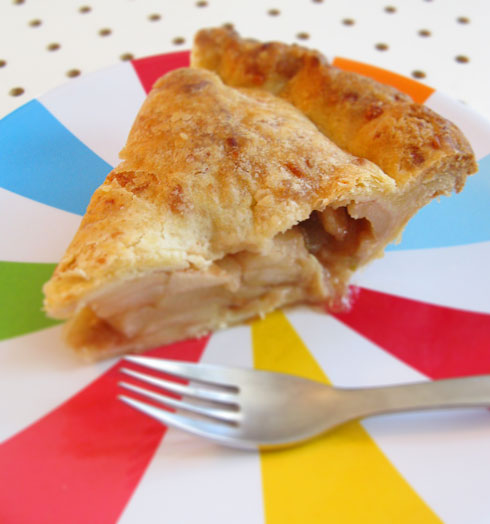
I entered an apple pie, he entered a pumpkin.

Now I know that me, a California girl, was taking a risk entering an apple pie in New England– home of the apple pie. But I figured I live in Connecticut now, I had to experience local color. I might not be a died in the wool Blue Blood, but I could dabble. So I made an apple pie– an apple pie with cheddar cheese crust to be precise. Borrowing from the New England tradition of eating a wedge of cheese right along side of their apple pie, I instead incorporated the cheese into the filling. This was a pie I have made several times for friends, and it has received rave reviews. (Pardon my conceit.)

When I dropped off the pie I should have known. It was taken from me, along with my registration, and put in a plastic bag– never good for maintaining a flaky crust. The participants also did not have an opportunity to name their pies. No judge was even made aware of the cheddar in the crust. I can only imagine the peculiar looks my pie received upon tasting. When I left the pie my pie for judging the next day, I shook my head to my friend. “I don’t have my hopes up,” I said.

The next evening we drove to the country fair. We shouldered our way in to the agricultural/food tent, and peered at the pies. There was my apple pie, a tiny slice taken out, all by its lonesome. Not a ribbon to be seen. Not even an honorable mention. I said it before– I am not a competitive person– but this is one contest I would have liked to at least place.

If it makes me feel any better, my friend, a wonderful cook in his own right, didn’t place either. Who knows, I might just have to enter again next year. Maybe with a more basic pie. Or maybe I will have to befriend a judge. A little nepotism never hurt anyone.

Pin It
August 26th, 2010

Dearths and Gluts

Remember the pathetic growing season I had last year? When I couldn’t get my tomato plants into the ground and had to “grow” them in pots? Then it rained practically all June long, leaving me with a few measly, watery tomatoes. This, my friends, is what I call a serious dearth. Well, this year we tried again. We actually got the tomatoes into the ground, in soil no less! They were slow going. Slow to ripen. But then they got a little crazy, bushing out, tossing their tomato cages out of the garden. If not for the care of a diligent and mindful friend while Brian and I were in California, I fear that we would have had to hack our way through the tomato jungle when we got home. In fact, we sort of did.

This was only one of our tomato harvests. I would say this is is only a quarter of what has been plucked and consumed.

That is what I would call a glut.

Granted, these tomatoes were Early Girls and Fourth of Julys. What month is it? Oh yes, it’s August– late August, but this is New England, so I’m not complaining.

In addition to giving everyone that I know fresh tomatoes, whether they want them or not, Brian and I have been eating tomatoes at just about every meal. This is what I have made lately:

  • Pappa al Pomodoro- excellent and satisfying, I will definitely make this again.
  • Seafood stew with crushed tomatoes
  • Tomato Champagne Salad- Booze and tomatoes, what could be better?
  • Tomato and Fresh Corn Salad with Creme Fraiche
  • Broiled Bluefish with Pico de Gallo
  • Canned tomatoes for the winter
  • Tomato Confit

I haven’t made tomato confit in a couple of years, but I had a ton of split tomatoes, waiting to be peeled. That’s olive oil, and the juices from the tomato that the fruit is swimming in. It’s pretty spectacular. I eat it on crusty bread, juice dribbling down my chin, or it’s amazing served over pasta or pan fried gnocchi. I wrote about it on iVillage, the recipe is over there. I’ll let you know if any other recipes occur to me that I have to share.

I’m off to eat more tomatoes!

Pin It
August 11th, 2010

In Berkeley

My word!  Is it August already?  Where is the summer heading to?

I had good intentions about blogging while I was in the Bay Area, I really did.  My days were full of family, friends, and food.  I know that sounds like the perfect thing to write about.  That’s sort of what Nosheteria is about, right? But, you know how it is– sometimes life just gets in the way of blogging!

It was good to be back in Berkeley though.  The restaurants, the markets, and yes, the politics.  I took this picture near my old apartment, not far from Berkeley Bowl– a market to beat all markets.  I’m guessing someone crawled up the billboard in order to leave their mark.  It’s kind of great.  Message received.

In Berkeley, some things never change.

Pin It
July 15th, 2010

LA Alliteration

As the weather got progressively stickier along the Eastern sea board, I began to count down the days until our annual trip to California.  There may be heat in the sunshine state, and thick smog hanging over the San Fernando Valley, but there is one thing there is not– swampy humidity.  I can handle a little bit of dry heat any day!

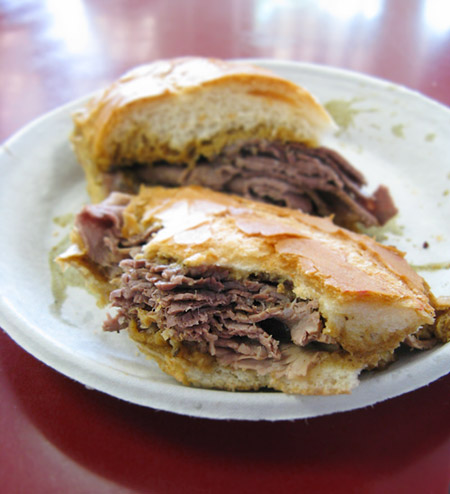
When we touched down in Los Angeles about one week ago, I already was dreaming about the food destinations we would visit.  The Santa Monica Farmer’s Market, with its numerous vendors hocking summer stone fruit, and perfect heirloom tomatoes, Susan Feniger’s newest restaurant, Street, a culinary homage to street foods around the globe, and who can ignore, one of my favorite old standbys, Philipe’s, for a classic French dip.

Philipe’s is the supposed originator of the French dip sandwich– a traditional roasted meat sandwich where the bread is dipped in a scrumptious, salty jus– and has been at it current location in downtown LA since 1951.  That’s the equivalent to Revolutionary War times in LA years!  And the sandwich, well, it’s pretty great.  I like the standard roast beef, but Brian has ordered both the lamb and the pork, which were very good as well.  But it is the jus that steals the show.  It is clear, meaty, and salty; the perfect accompaniment to this simple masterpiece.  You order your sandwich, specifying a single, or double dip (both pieces of bread dipped), and the sandwich is slung across the counter to you.  It is not dripping, just lightly submerged, and with a side of non-mayonnaisey coleslaw, a perfect lunch is had.

Then it was off to the funicular, just a mile away, near the LA Times building.  A funicular to nowhere, just the way I like it.  The tracks of this street car are about 300 feet long.  There are stairs along the perimeter, and I’m almost sure that you could climb the incline quicker than you can ride it.  But then you would miss out on the lore of riding in this trolley that has been around since 1901.

On my alliterative outing the cutest surprise was to be found.  Hundred of goats, had been “hired” by the city to clear the hillside of brush, and dried grass, near the funicular.  We sat at the top of the hill, watching the goats eat a hardy lunch with our own bellies full of French dip sandwiches.  I thought to myself– I love LA!

Next, we’re off to the Bay Area, where more food awaits…

Pin It
June 21st, 2010

A Pea is Born

First there were the radishes.  They seem like a distant memory to me now.  They grew, we ate, we conquered.  And for the first time, I decided to grow some peas– sugar snap peas to be exact.  If the the radishes were gratifying, these peas are, well… joyous.  Joyous?  Yes, joyous!

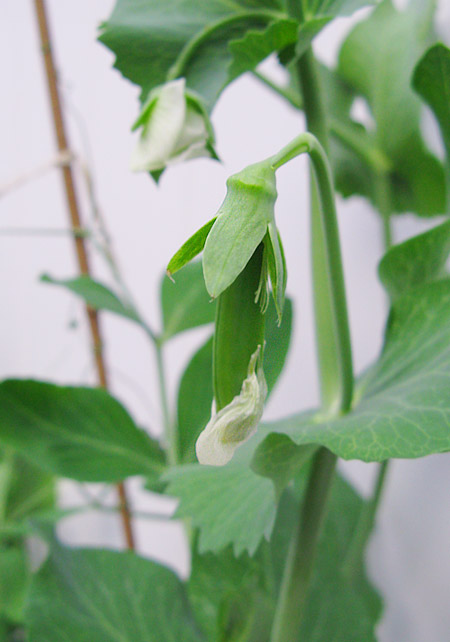
The fence that Brian and I grew the peas against was slippery, and plastic, meaning it would have to be nail-free.  So we constructed a trellis out of some tall bamboo stakes plunged into the soil, and some natural twine.  At first they were slow going.  I would run out to the garden each day, and all that I saw was a pile of plants.  But then, ever so slowly, the snap peas shot out frail tendrils.  The tendrils are what did it!  Like pieces of ABC (already-been-chewed) gum, each tendril was sticky, reaching for a stretch of twine.  And then one morning, on my usual jaunt into the backyard, I saw several tendrils grasping the twine.  That delicate bit of greenery was holding an entire plant, pulling it upwards.

And then they were off!

Soon the vines grew, and quickly.  Each day it seemed like they grew another six inches.  The greenery was robust, working itself around the makeshift trellis and then back again.  The vines began to house  pure white flowers, reminiscent of popcorn.  And then, the most exciting thing of all– from the depths of each flower grew a perfect pea!  The flowers withered, but a pea emerged, shedding its floral skin.

I waited– let photosynthesis do its work, let the sun do its magic.  The pods got fatter; I was patient.  And then, this weekend, I had a mini harvest.  Brian and I got a bowl from the kitchen and selected only the plumpest sugar snap peas.  I had every intention of incorporating them into our dinner– a salad, or lightly seared in sesame oil.  But the peas never even made it back inside.  Brian and I sat in the garden and ate most of those snap peas.  We couldn’t believe how sweet and juicy (who knew that?) they were.  We couldn’t believe our garden luck!  Maybe my thumb is not black after all.

Pin It
© 2024 wordpress test site
all rights reserved